
Gradle is a more feature-rich and more modern java build tool, so if you are planning to port from maven to gradle build system, this tutorial may help you.

1. Converting pom.xml to build.gradle
Very first thing – you must have gradle installed on your machine.
Now, go to your maven project’s root directory and execute the command:
$ gradle initThis will generate a bunch of files for you, most importantly a build.gradle which you can now use to run all your builds using gradle commands.
Please note that gradle init automatically detects the pom.xml and creates a gradle build with the java and maven plugins loaded. It means that existing Maven dependencies are automatically converted and added to the gradle build file.
2. Demo
Let’s take an example. I have below-written pom.xml file one of the example projects.
<project xmlns="http://maven.apache.org/POM/4.0.0" xmlns:xsi="http://www.w3.org/2001/XMLSchema-instance"
xsi:schemaLocation="http://maven.apache.org/POM/4.0.0 https://maven.apache.org/xsd/maven-4.0.0.xsd">
<modelVersion>4.0.0</modelVersion>
<groupId>com.howtodoinjava</groupId>
<artifactId>AngularSpringMVCExample</artifactId>
<packaging>war</packaging>
<version>0.0.1-SNAPSHOT</version>
<name>AngularSpringMVCExample Maven Webapp</name>
<url>http://maven.apache.org</url>
<dependencies>
<dependency>
<groupId>org.springframework</groupId>
<artifactId>spring-context</artifactId>
<version>4.3.2.RELEASE</version>
</dependency>
<dependency>
<groupId>org.springframework</groupId>
<artifactId>spring-webmvc</artifactId>
<version>4.3.2.RELEASE</version>
</dependency>
<dependency>
<groupId>org.webjars</groupId>
<artifactId>angularjs</artifactId>
<version>1.5.7</version>
<scope>runtime</scope>
</dependency>
<dependency>
<groupId>org.webjars</groupId>
<artifactId>bootstrap</artifactId>
<version>3.3.7</version>
<scope>runtime</scope>
</dependency>
<dependency>
<groupId>javax.servlet</groupId>
<artifactId>javax.servlet-api</artifactId>
<version>3.1.0</version>
<scope>provided</scope>
</dependency>
</dependencies>
<build>
<finalName>AngularSpringMVCExample</finalName>
<plugins>
<plugin>
<groupId>org.apache.maven.plugins</groupId>
<artifactId>maven-compiler-plugin</artifactId>
<version>3.3</version>
<configuration>
<source>1.7</source>
<target>1.7</target>
</configuration>
</plugin>
</plugins>
</build>
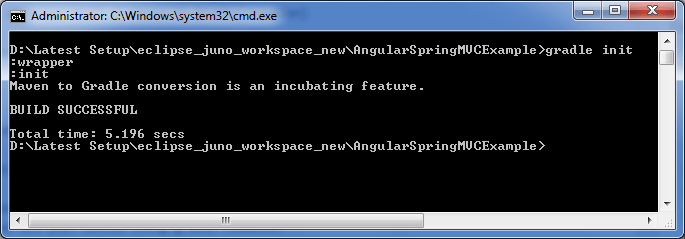
</project>I run the gradle init command into the project’s root directory. I get the following output:
After executing the above command, the following files are generated in the root folder.
build.gradle
apply plugin: 'java'
apply plugin: 'maven'

group = 'com.howtodoinjava'
version = '0.0.1-SNAPSHOT'

description = "AngularSpringMVCExample Maven Webapp"

sourceCompatibility = 1.7
targetCompatibility = 1.7

repositories {

     maven { url "http://repo.maven.apache.org/maven2" }
}
dependencies {
    compile group: 'org.springframework', name: 'spring-context', version:'4.3.2.RELEASE'
    compile group: 'org.springframework', name: 'spring-webmvc', version:'4.3.2.RELEASE'
    runtime group: 'org.webjars', name: 'angularjs', version:'1.5.7'
    runtime group: 'org.webjars', name: 'bootstrap', version:'3.3.7'
    providedCompile group: 'javax.servlet', name: 'javax.servlet-api', version:'3.1.0'
}
settings.gradle
rootProject.name = 'AngularSpringMVCExample'gradlew.bat
A similar file “gradlew” is generated for UNIX environment also.
This file runs the project into a machine where no prior Gradle setup has been done. For example, you download a project from GitHub and want to run that project on your machine.
All you need to do is execute OS specific gradlew file and it will do all things for you.
3. Challenges and Problems
Though the conversion process looks very easy – it is not that much simple. Due to how Gradle and Maven look at how to build a project, there are certain Maven features that may make the process more difficult. For example:
- Bills of Material (BOMs)
- “import” and “provided” scopes
- Optional dependencies
- Integration tests
- Custom configurations
- Less common Maven plugins
- Custom plugins
Gradle’s official site has instructions on what to do in case you have the above elements in your pom.xml file.
Due to possible conflicts in build process and directory structure, It is advisable to test your new gradle project, thoroughly. Do not forget to check environment properties, unit test case results and integration test results.
Happy Learning !!
Arghh. I see this type of tutorial all over the internet. A team mate finds it, thinks it would be cool to change the project from Maven to Gradle (because Gradle is ‘newer’) and then the mess starts. I don’t doubt that there are the 1% odd use-cases where Gradle shines over Maven but every project should evaluate if they can really extract additional value from Gradle vs sticking with Maven. In my organization we didn’t consider the “spreading resources thin” factor. In the past everyone understood Maven. Now, some people on the team understand Gradle, some understand both and all understand Maven at some level. But only the Gradle ninjas in the organization can truly understand our Gradle build scripts. One of the issues is that 90% of the world’s open source projects are using Maven and if you are somehow participating in that even the slightest – or perhaps simply cloning – then you need to retain your Maven knowledge too. So just like we had to set aside time to learn Maven and set aside time to maintain the knowledge we now set aside time for Gradle too. But you can’t just skip your Maven knowledge. You’ll still require it to be a part of today’s Java world. So you end up with needing time and brain capacity for both.
For this reason you need to be 100% convinced that you absolutely cannot live without Gradle.
Thanks for staying and posting this super useful comment. I agree with you. I have always used maven in all of my projects and never missed gradle for any reason.
This post exist in case somebody need it, which will be rarest of rare situation.
just run this command in cmd:
convert maven to gradle
what if the Pom.xml was not in the root of the project ? what if you have several modules & each one has it’s own pom.xml but they work together
Never tried. I will try to find a solution.
I think you are talking about multimodule project in which each project have its own pom but with dependency .i think we need to run the command in each directory where ever pom exists.