In Spring boot applications, the default packaging is jar which the application is deployed in embedded servers. If you want to generate a war file for deployment in separate application server instances such as Jboss, Weblogic or Tomcat, follow the instructions below.
1. Declare packaging type ‘war’
The first logical step is to declare the packaging type ‘war’ in pom.xml file.
<packaging>war</packaging>It indicates the project’s artifact type. Please note that when no packaging is declared, Maven assumes the artifact is the default: jar.
2. Set Embedded Server Dependency Scope to ‘provided‘
We may want to have an embedded server (e.g. Tomcat) in the development environment because of its usefulness in the fast development lifecycle, but we certainly do not want those server jars to be included in the finally generated maven artifact or war file. To do so, set the scope of embedded server dependency to ‘provided‘.
<dependency>
   <groupId>org.springframework.boot</groupId>
   <artifactId>spring-boot-starter-tomcat</artifactId>
   <scope>provided</scope>
</dependency>
Scope ‘provided’ indicates you expect the JDK or a container to provide the dependency at runtime. This scope is only available on the compilation and test classpath, and is not transitive.
3. Configure SpringBootServletInitializer
To deploy our application on a web container, we must initialize the Servlet context, which is required. In this regard, our App class must extend SpringBootServletInitializer.
Note that a WebApplicationInitializer is only needed if we build a war file and deploy it. If you prefer to run an embedded web server, you won’t need this.
@SpringBootApplication
public class WarInitializerApplication extends SpringBootServletInitializer {

    @Override
    protected SpringApplicationBuilder configure(SpringApplicationBuilder builder) {
        return builder.sources(WarInitializerApplication.class);
    }

}
Now, if we package our application as a WAR, we’ll be able to deploy it on any web container in a traditional way, which will also execute the logic we added in the configure() method.
4. War Packaging Demo
In this demo, we are using below pom.xml.
<project xmlns="http://maven.apache.org/POM/4.0.0" xmlns:xsi="http://www.w3.org/2001/XMLSchema-instance"
  xsi:schemaLocation="http://maven.apache.org/POM/4.0.0 https://maven.apache.org/xsd/maven-4.0.0.xsd;
  <modelVersion>4.0.0</modelVersion>

  <groupId>com.howtodoinjava</groupId>
  <artifactId>springbootdemo</artifactId>
  <version>0.0.1-SNAPSHOT</version>

  <packaging>war</packaging>

  <name>springbootdemo</name>
  <url>http://maven.apache.org</url>

  <parent>
    <groupId>org.springframework.boot</groupId>
    <artifactId>spring-boot-starter-parent</artifactId>
    <version>2.0.0.RELEASE</version>
  </parent>

  <properties>
    <java.version>1.8</java.version>
    <project.build.sourceEncoding>UTF-8</project.build.sourceEncoding>
  </properties>

  <dependencies>
    <dependency>
      <groupId>org.springframework.boot</groupId>
      <artifactId>spring-boot-starter-web</artifactId>
    </dependency>
    <dependency>
      <groupId>org.springframework.boot</groupId>
      <artifactId>spring-boot-starter-tomcat</artifactId>
      <scope>provided</scope>
    </dependency>
    <dependency>
      <groupId>org.springframework.boot</groupId>
      <artifactId>spring-boot-starter-hateoas</artifactId>
    </dependency>
    <dependency>
      <groupId>org.springframework.boot</groupId>
      <artifactId>spring-boot-starter-test</artifactId>
    </dependency>
  </dependencies>

  <build>
    <plugins>
      <plugin>
        <groupId>org.springframework.boot</groupId>
        <artifactId>spring-boot-maven-plugin</artifactId>
      </plugin>
    </plugins>
  </build>

  <repositories>
    <repository>
      <id>repository.spring.release</id>
      <name>Spring GA Repository</name>
      <url>http://repo.spring.io/release</url>
    </repository>
  </repositories>
</project>
Now run the maven build with goal package and it will generate the project’s war file in the target folder as below.
mvn package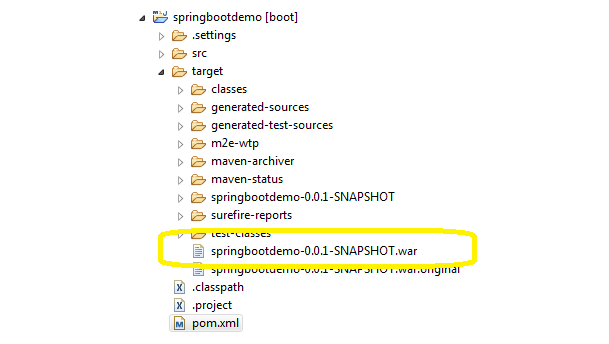
Drop me your questions in the comments section.
Happy Learning !!
Hi
how to packaging angular + spring boot (multi modules) app in the same war file in order to deploy the application in JBoss
Here is an example of multi-module packaging.
do you know if it is possible to “update” a regular spring mvc application in spring boot application? because in spring boot we eliminate web.xml and xml configuration in favor of conventions of spring boot
Yes, it is always possible. Try these tips.
Hi,
I created a boot project to create a war and trying to build that on jenkin and getting following error
org.apache.maven.plugin.PluginResolutionException: Plugin org.springframework.boot:spring-boot-maven-plugin:2.0.0.RELEASE or one of its dependencies could not be resolved: Failed to read artifact descriptor for org.springframework.boot:spring-boot-maven-plugin:jar:2.0.0.RELEASE.
Please help me in resolving this issue
Jars may have been corrupt. Try this script.