
Spring Boot applications come with Tomcat as the default embedded server we can use for development purposes. This article will explore how we can deploy a Spring Boot application as a traditional .war file into an external tomcat application server.
1. A Simple Spring Boot Web Application
Let’s create a simple Spring Boot Web Application using Maven as the build automation tool. It will have a single REST endpoint exposed. We can also generate Spring Boot projects using Spring Initializr.
By default, Spring boot applications are packaged as jar. We need to package the application as a ‘war’ file to deploy it as a web application in external application servers.
To test our application, we will create a simple REST endpoint and expose it at /greet.
@RestController
public class GreetingController {

    @GetMapping("/greet")
    public String greet() {
        return "Hey there!";
    }
}
2. Application Changes
To be able to deploy the application war in an external tomcat server, we will need to make certain changes to our Spring Boot application.
2.1. POM Changes
To create a WAR package instead of the default JAR archive, we need to change the 'packaging' attribute in the deployment descriptor file.
<packaging>war</packaging>If you use Gradle, you need to modify build.gradle to apply the war plugin to the project, as follows:
apply plugin: 'war'Build artifacts are generated by appending the version to the artifactId. To generate a custom-built artifact name, change the finalName attribute.
<build>
	<finalName>${artifactId}</finalName>
        ...
</build>
Also, the tomcat server-related classes should be found at runtime so include the spring-boot-starter-tomcat dependency at ‘provided’ scope.
<dependency>
   <groupId>org.springframework.boot</groupId>
   <artifactId>spring-boot-starter-tomcat</artifactId>
   <scope>provided</scope>
</dependency>
If you use Gradle, the following example marks the servlet container as being provided:
dependencies {
    // ...
    providedRuntime 'org.springframework.boot:spring-boot-starter-tomcat'
    // ...
}
2.2. Bootstrap with WebApplicationInitializer
The WebApplicationInitializer is needed to bootstrap the ServletContext programmatically as opposed to the traditional web.xml-based approach. Spring Boot provides SpringBootServletInitializer an extension of WebApplicationInitializer that runs a Spring Application from a war deployment. It binds Servlet, Filter and ServletContextInitializer beans from the application context to the server.
It uses the Spring Framework’s servlet 3.0 support and configures the application when it is launched by the servlet container.
import org.springframework.boot.SpringApplication;
import org.springframework.boot.autoconfigure.SpringBootApplication;
import org.springframework.boot.builder.SpringApplicationBuilder;
import org.springframework.boot.web.servlet.support.SpringBootServletInitializer;

@SpringBootApplication
public class MyApplication extends SpringBootServletInitializer {

    @Override
    protected SpringApplicationBuilder configure(SpringApplicationBuilder application) {
        return application.sources(MyApplication.class);
    }

    public static void main(String[] args) {
        SpringApplication.run(MyApplication.class, args);
    }

}
To create the WAR archive we need to build the application. Go to the root folder of the application and run the following command:
$ mvn clean packageThis will create the WAR file at the location /target.
3. Deploying into Tomcat Server
If you do not have Tomcat already, you can down it from the Apache website. Download and extract the tomcat archive at a suitable location like C:\Users\ABCD\tomcat.
To deploy our generated WAR file, we will have to follow the below steps
- Copy the application WAR file from the /target location to tomcat/webapps/
- Navigate to tomcat/bin folder where we have the server startup script
- Run startup.bat for Windows and startup.sh for Linux. This should start the tomcat server deploying the WAR available in the webapps folder.
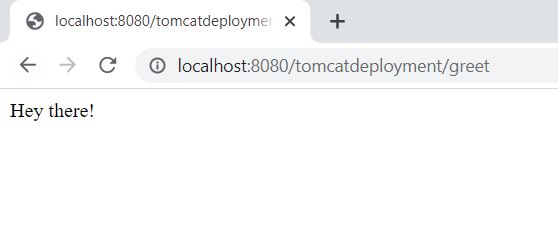
To test the successful deployment, navigate to http://localhost:8080/tomcatdeployment/greet on a browser. We should see a response from the controller.
4. Supporting Embedded as well as Traditional Deployments
If we intend to start our application as an embedded jar and also an executable war application, we need to share the customizations of the SpringApplicationBuilder in a method that is both available to the SpringBootServletInitializer callback and the main() method, in a class similar to the following:
@SpringBootApplication
public class Application extends SpringBootServletInitializer {

  @Override
  protected SpringApplicationBuilder configure(SpringApplicationBuilder builder) {
    return configureApplication(builder);
  }

  public static void main(String[] args) {
    configureApplication(new SpringApplicationBuilder()).run(args);
  }

  private static SpringApplicationBuilder configureApplication(SpringApplicationBuilder builder) {
    return builder.sources(Application.class).bannerMode(Banner.Mode.OFF);
  }

}
5. Conclusion
In this article, we explored how a Spring Boot application can be deployed to an external Tomcat Server. We also learned about embedded and traditional deployments to the Tomcat server.
Happy Learning!!!