Learn to perform load and performance testing for a web application in this step by step JMeter tutorial. This Jmeter example is intended for beginners who are trying to use the Jmeter for the first time.
1. Download and start JMeter
1.1. Download JMeter
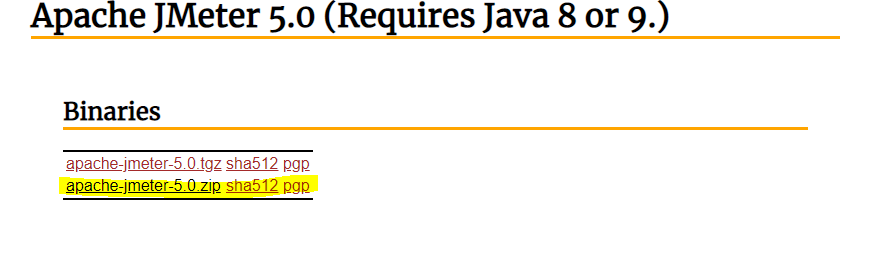
Go to Apache jmeter download page and download the distribution based on your machine. I am using a windows 10 machine, so I download the zip file.
Extract the downloaded package to a desired location.
1.2 Start JMeter
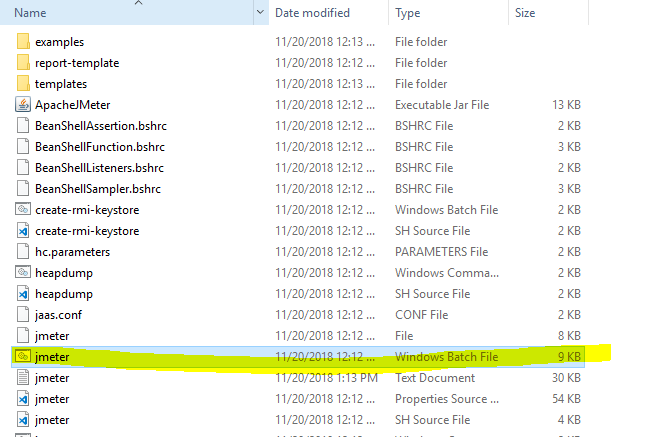
To run the jmeter, go to the folder the /jmeter/bin and run jmeter.bat file.
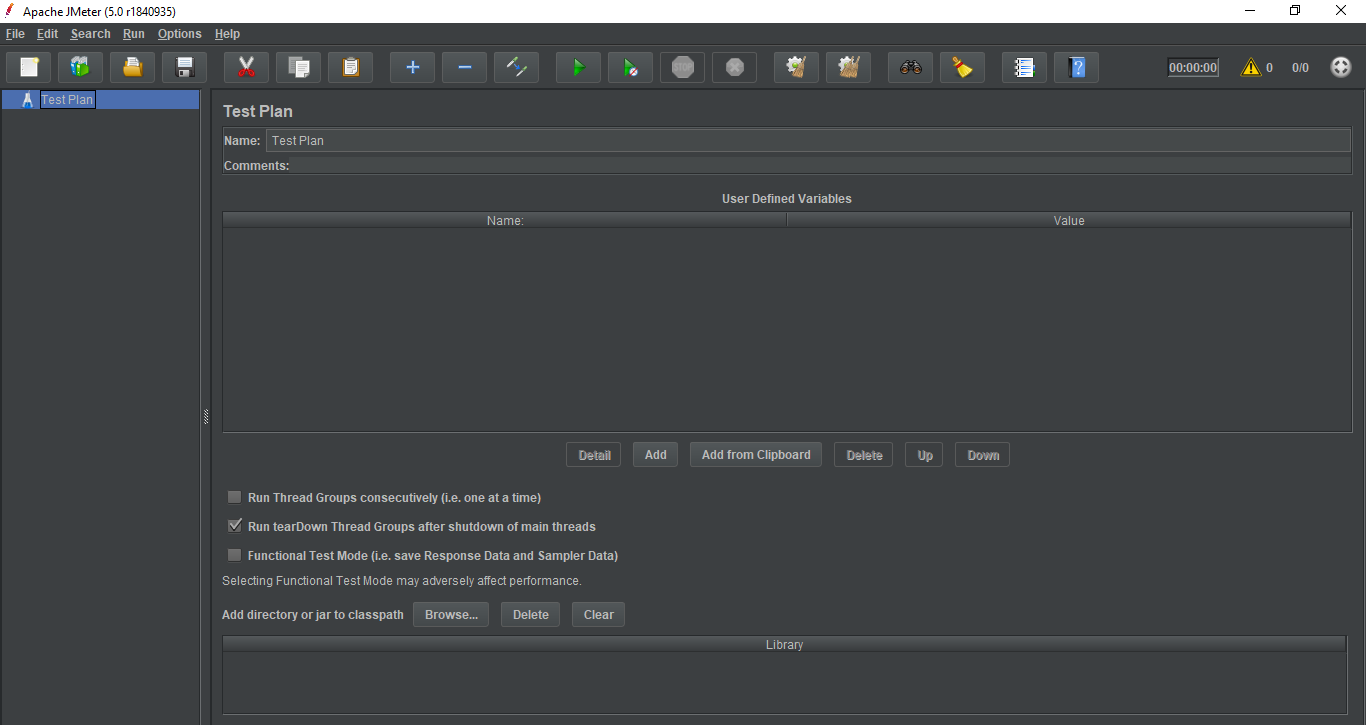
It will start the JMeter UI with no test plan initially. Now, it’s time to create a test plan for our web application’s load testing.
2. Create test plan
A useful test plan is created with minimum 3 components –
- Thread Group – contains the simulation of multiple concurrent users. A single thread represent a single user. We can create any number of threads to put the desired load on the application. It also help us in scheduling the delay between two threads, and any repetition of request batches.
- HTTP Request – consist the HTTP request configuration which thread group will be invoking. It is the application URL which you want to load test.
- Listener – helps in viewing the result of the whole testing process. There are multiple listener available in jmeter to verify the testing results.
2.1. Create Thread Group
To create a thread group, navigate to ‘Right click Test Plan -> Add -> Threads -> Thread Group’.

Fill in the values as per your requirements (or based on your assumptions, we can change them anytime in future). Name the thread group and save it to any location in your workstation.

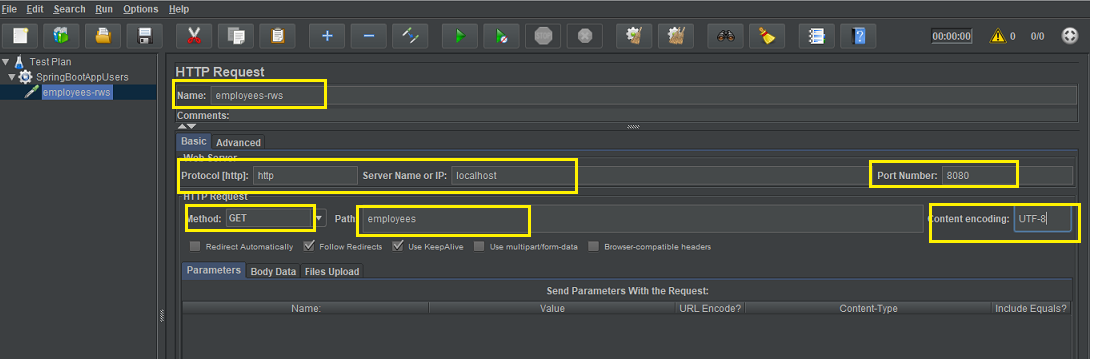
2.2. Create HTTP Request
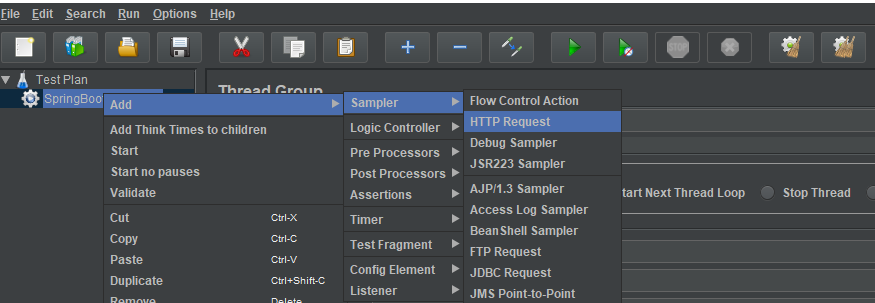
To add HTTP request details, navigate to ‘Right click thread group -> Add -> Sampler -> HTTP Request’.
< Create HTTP Request[/caption]>
Fill in the application URL details which we are going to test. I am using the rest api created for Spring boot hello world example. the API URL is 'http://localhost:8080/employees'.
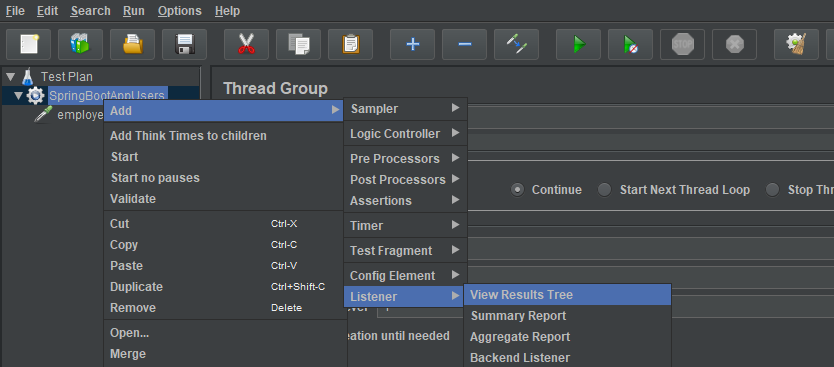
2.3. Add Listener
To see the results of test plan, add listener named “” by navigating to ‘Right click thread group -> Add -> Listener -> View Results Tree’.
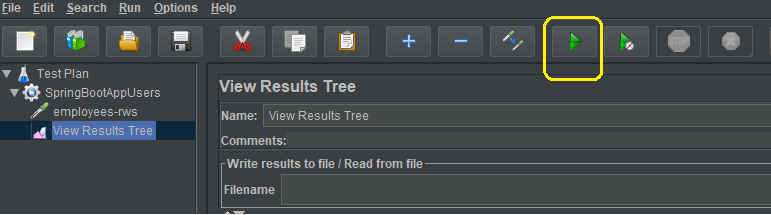
3. Perform load testing
To perform the load testing, start the thread group using the green play icon at the top ribbon in tool.
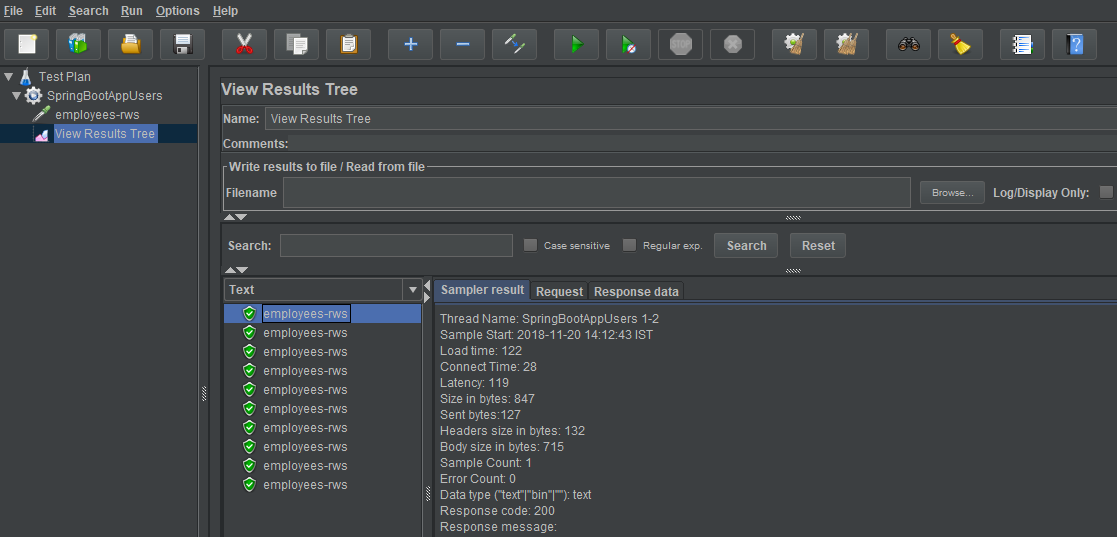
Let all threads run and invoke the configured application URL. After the test is finished, we can review the load test results in consolidated manner in listener tab.
4. JMeter tutorial summary
In this JMeter example, we learned to use jmeter to perform performance testing of a web application or rest api in simple steps. We learned to create test plan, thread group, configure HTTP request and review results in JMeter.
Drop me your questions in comments.
Happy Learning !!
Thanks a lot for the quick tutorial, Lokesh!!!
Very useful, quick and to the point.
Do these threads run in parallel?
Yes.
yes, contains the simulation of multiple concurrent users.