
This article explores the fundamentals of Spring Data Redis. We will discover how straightforward it is to connect with Redis using Spring auto-configuration and learn how to write custom configurations and modify Spring Data Redis’ default settings.
1. Introduction to Redis
Redis is an open-source, in-memory data structure store used as a database, cache, and message broker. It is a key-value store, with keys and values as strings, lists, sets, hashes, or sorted sets.
Developers often use Redis as a cache in front of a persistent database, (such as MySQL) for frequently accessed data to reduce the load. Because Redis stores data in memory, it can respond to requests quickly. Redis also provides other advanced features such as Lua scripting, transactions, pub/sub messaging, and geospatial indexing.
2. Redis Setup
We recommend installing and running Redis on your machine to follow along with this article. One Redis instance suffices for basic testing; however, for advanced features like clustering or sentinel mode, two or three instances may be required.
Find more information about Linux and MacOS downloads here. Please note that Redis does not officially support Windows, but we can find a port of the server here.
- In development environment, we can also run Redis using Docker as an alternative option.
- In test environment, we can consider using Testcontainers.
3. Maven
There are two supported connectors available to connect Redis from a Spring Boot application:
To configure and connect using Lettuce, we need to include spring-boot-starter-data-redis dependency in the project’s pom.xml file. Lettuce Java Redis client, which is included by default in Spring Boot, thereby eliminating the need to add any additional dependencies.
<dependency>
      <groupId>org.springframework.boot</groupId>
      <artifactId>spring-boot-starter-data-redis</artifactId>
</dependency>
For Jedis, we need to include one additional client’s library in dependencies.
<dependency>
  <groupId>redis.clients</groupId>
  <artifactId>jedis</artifactId>
  <version>4.3.2</version>
</dependency>
For unit testing, include the latest version of testcontainers-redis-junit-jupiter which adds support for running Testcontainer for Redis server.
<dependency>
    <groupId>com.redis.testcontainers</groupId>
    <artifactId>testcontainers-redis-junit-jupiter</artifactId>
    <version>1.4.6</version>
    <scope>test</scope>
</dependency>
4. Spring Boot Configuration
Spring boot autoconfiguration configures the StringRedisTemplate and RedisTemplate instances that we can directly inject and use to perform operations on Redis database.
Once configured, RedisTemplate and StringRedisTemplate are thread-safe and can be reused across multiple instances.
4.1. Connection Properties
By default, autoconfiguration tried to connect to a Redis server at localhost:6379. We can provide the custom connection details in the properties file.
spring.data.redis.database=0
spring.data.redis.host=localhost
spring.data.redis.port=6379
spring.data.redis.username=user
spring.data.redis.password=secret
There are a lot of other properties we can configure. The complete list of configuration properties is available in the Spring Boot documentation.
Using the above connection properties, Spring boot automatically creates an instance of RedisConnectionFactory. The RedisConnectionFactory provides the core building block for Redis communication, as it handles the communication with the Redis backend. It also automatically translates the underlying library exceptions to Spring DAO exceptions.
4.2. RedisTemplate
RedisTemplate provides a higher-level abstraction for interacting with Redis. While RedisConnection provides lower-level methods that handle binary values (byte arrays), the RedisTemplate handles serialization and connection management, relieving users from dealing with such details.
@Service
public class RedisCacheService {

    @Autowired
    RedisTemplate<Object, Object> redisTemplate;

    // ...
}
Then we customize a RedisTemplate using RedisConnectionFactory as follows:
@Configuration
public class RedisConfig {

    @Bean
    public RedisTemplate<Object, Object> redisTemplate(RedisConnectionFactory connectionFactory) {

        RedisTemplate<Object, Object> template = new RedisTemplate<>();
        template.setConnectionFactory(connectionFactory);
        // Add some specific configuration such as key serializers, etc.
        return template;
    }
}
The RedisTemplate supports various operations such as ValueOperations, HashOperations, ListOperations, SetOperations, GeoOperations, etc.
RedisTemplate utilizes a Java-based serializer for the majority of its operations, resulting in the serialization and deserialization of objects. It allows for the customization of the serialization mechanism, with various implementations offered by the Redis module, which are available in the org.springframework.data.redis.serializer package.
4.3. StringRedisTemplate
Redis modules offer two extensions to RedisConnection and RedisTemplate that are StringRedisConnection (with its DefaultStringRedisConnection implementation) and StringRedisTemplate. These extensions are specifically designed for handling String data commonly stored in Redis. Both the template and connection are bound to String keys and utilize the StringRedisSerializer, ensuring that the stored keys and values are human-readable. This makes them a convenient choice for efficient String operations.
@Service
public class RedisCacheService {

    @Autowired
    StringRedisTemplate stringRedisTemplate;

    // ...
}
4.4. Cache Operations
Data can be stored by using various data structures within Redis such as List, Map, binary or strings etc. These operations are represented with different interfaces:
- HashOperations
- ListOperations
- SetOperations
- ValueOperations
- GeoOperations, etc.
We can get the reference of these operations for direct access using the @Resource annotation:
public class RedisService {

  @Autowired
  private RedisTemplate<String, String> redisTemplate;

  @Resource(name="redisTemplate")
  private ListOperations<String, String> listOps;

  public void add(String key, String value) {
    listOps.leftPush(...);
  }
}
In not using the interface references, we can use the opsFor[X]() methods provided by RedisTemplate / StringRedisTemplate to persist and retrieve data from the Redis database. For example, in the following snippet, we are invoking the methods provided byValueOperations.
redisTemplate.opsForValue().get(key);  //Returns the associated value

redisTemplate.opsForValue().set(key, value); //Stores the key-value pair

redisTemplate.expire(key, ttl, TimeUnit.SECONDS);  //Key is expired after specified time
5. Custom Configuration
In the above configuration, we used Spring Boot connection default settings like connection pool, serializer, deserializer, etc. In the upcoming sections, we will see how we can modify these properties.
5.1. Connection Pool
Spring Data Redis uses commons-pool2 library to configure connection pooling. So, we need first to add the below dependency in our pom.xml file.
<dependency>
    <groupId>org.apache.commons</groupId>
    <artifactId>commons-pool2</artifactId>
</dependency>
To configure the connection pool, the next step is to add connection pool-related properties as shown below:
common.redis.pool-config.maxIdle=64
common.redis.pool-config.maxTotal=64
common.redis.pool-config.minIdle=8
Next, let’s configure the connection pool using org.apache.commons.pool2.impl.GenericObjectPoolConfig.
@Configuration
@ConfigurationProperties(prefix = "common.redis.pool-config", ignoreInvalidFields = true)
public class ConnectionPoolProperties {

  @Value("${maxIdle:64}")
  private Integer maxIdle;

  @Value("${maxTotal:64}")
  private Integer maxTotal;

  @Value("${minIdle:8}")
  private Integer minIdle;

  @Bean
  public GenericObjectPoolConfig genericObjectPoolConfig() {

    GenericObjectPoolConfig poolConfig = new GenericObjectPoolConfig();
    poolConfig.setMaxIdle(maxIdle);
    poolConfig.setMaxTotal(maxTotal);
    poolConfig.setMinIdle(minIdle);
    return poolConfig;
  }
}
Next, configure the LettucePoolingClientConfiguration and LettuceConnectionFactory instances. The similar configuration can be done for the Jedis connector.
@Configuration
public class RedisConfig {

	@Value("${default.redis.connection:standalone}")
  private String connectionType;

  @Autowired
  GenericObjectPoolConfig genericObjectPoolConfig;

  @Bean
  public LettucePoolingClientConfiguration poolingClientConfiguration() {

    return LettucePoolingClientConfiguration.builder()
        .poolConfig(genericObjectPoolConfig)
        .build();
  }

  @Bean
  public LettuceConnectionFactory connectionFactory(LettucePoolingClientConfiguration poolingClientConfiguration) {

    if (connectionType.equalsIgnoreCase("standalone")) {
      return new LettuceConnectionFactory(redisStandaloneConfiguration(), poolingClientConfiguration);
    } else {
      return new LettuceConnectionFactory(redisSentinelConfiguration(), poolingClientConfiguration);
    }
  }
}
5.2. Redis Connections
To add custom connection details, we first add them in the properties file as shown below:
## Standalone Config ##
spring.data.redis.host=localhost
spring.data.redis.port=6379
spring.data.redis.password=
spring.data.redis.timeout=3000


## Sentinel Config ##
## use attached docker compose to start redis is sentinel mode ###
spring.data.redis.sentinel.master=mymaster
spring.data.redis.sentinel.nodes=localhost:26379 #Comma-separated list of "host:port" pairs.
Then we inject the auto-configured RedisProperties bean and use it appropriately to initialize the connections.
@Configuration
public class ConnectionProperties {

    @Autowired
    private RedisProperties redisProperties;

    //...
}
5.2.1. Standalone Configuration
We can create a standalone connection using RedisStandaloneConfiguration class using the host and port defined in the properties file.
private RedisStandaloneConfiguration redisStandaloneConfiguration() {

  RedisStandaloneConfiguration redisStandaloneConfiguration
      = new RedisStandaloneConfiguration(redisProperties.getHost(), redisProperties.getPort());

  if (StringUtils.hasText(redisProperties.getPassword())) {
    redisStandaloneConfiguration.setPassword(redisProperties.getPassword());
  }

  return redisStandaloneConfiguration;
}
5.2.2. Sentinel Configuration
Redis Sentinel is a monitoring solution for Redis instances that handles automatic failover of Redis masters and service discovery. It not only allows data to be safely stored at more nodes. It also allows, by using Lettuce, to read data from replicas while pushing writes to the master. We can set the read/write strategy to be used by using LettuceClientConfiguration.
To start Redis in Sentinel mode, we use the docker-compose mentioned here.
If our Redis server is running in Sentinel mode, then the below configuration needs to be used:
private RedisSentinelConfiguration redisSentinelConfiguration() {

  RedisSentinelConfiguration sentinelConfig = new RedisSentinelConfiguration()
      .master(redisProperties.getSentinel().getMaster());

  redisProperties.getSentinel()
  	.getNodes()
  	.forEach(s -> sentinelConfig.sentinel(s.split(":")[0], Integer.valueOf(s.split(":")[1])
  ));

  if (StringUtils.hasText(redisProperties.getPassword())) {
    sentinelConfig.setPassword(RedisPassword.of(redisProperties.getPassword()));
  }

  LettuceClientConfiguration clientConfig = LettuceClientConfiguration.builder()
      .commandTimeout(redisProperties.getTimeout())
      .readFrom(ReadFrom.REPLICA_PREFERRED)
      .build();

  return sentinelConfig;
}
With the help of RedisSentinelConfiguration class, we set up RedisConnection via LettuceConnectionFactory. Then we create a LettuceClientConfiguration where we set a custom command timeout (default is 60 seconds) and preference for reading from slaves instead of master.
5.3. Custom Serializer/Deserializer
To create a custom serializer and deserializer for RedisTemplate, create a class that implements RedisSerializer<T> interface and overrides the byte[] serialize(Object o) and Object deserialize(byte[] bytes) method with custom logic. We have used Jackson’s ObjectMapper but you can use any library of your choice.
import com.fasterxml.jackson.annotation.JsonTypeInfo;
import com.fasterxml.jackson.core.JsonProcessingException;
import com.fasterxml.jackson.databind.ObjectMapper;
import lombok.extern.slf4j.Slf4j;
import org.springframework.data.redis.serializer.RedisSerializer;
import org.springframework.data.redis.serializer.SerializationException;

@Slf4j
public class CustomRedisSerializer implements RedisSerializer<Object> {

    private final ObjectMapper mapper;

    public CustomRedisSerializer() {

        this.mapper = new ObjectMapper();
        this.mapper.activateDefaultTyping(
                mapper.getPolymorphicTypeValidator(),
                ObjectMapper.DefaultTyping.NON_FINAL,
                JsonTypeInfo.As.PROPERTY);
    }

    @Override
    public byte[] serialize(Object object) throws SerializationException {
        if (object == null) {
            return new byte[0];
        }
        try {
            return mapper.writeValueAsBytes(object);
        } catch (JsonProcessingException e) {
            log.error("JsonProcessingException while compressing value to redis {}",
                    e.getMessage(), e);
        }
        return new byte[0];
    }

    @Override
    public Object deserialize(byte[] bytes) throws SerializationException {
        if(bytes == null || bytes.length == 0) {
            return null;
        }

        try {
            return mapper.readValue(bytes, Object.class);
        } catch (Exception ex) {
            throw new SerializationException("Could not read JSON: " + ex.getMessage(), ex);
        }
    }
}
We can now use the above serializer in the RedisTemplate configuration to use our custom serializer instead of the Spring Data Redis default serialization as shown below.
@Bean(name = "customRedisTemplate")
public RedisTemplate<Object, Object> redisUtilRedisTemplate(RedisConnectionFactory connectionFactory) {

        RedisTemplate<Object, Object> redisTemplate = new RedisTemplate<>();
        redisTemplate.setConnectionFactory(connectionFactory);
        redisTemplate.setDefaultSerializer(new CustomRedisSerializer ());
        redisTemplate.setKeySerializer(new StringRedisSerializer());
        redisTemplate.setHashKeySerializer(new StringRedisSerializer());
        redisTemplate.setValueSerializer(new CustomRedisSerializer ());
        redisTemplate.setHashValueSerializer(new CustomRedisSerializer ());
        return redisTemplate;
}
5.4. Error Handling
By default, SimpleCacheErrorHandler is used by Spring Data Redis, and it simply throws the exception back to the client. However, in practice, failing to retrieve an object from the cache should not affect the primary functioning. Spring provides a CacheErrorHandler interface, a cache error handler strategy for you to handle those circumstances.
RedisCacheErrorHandler logs the error for further investigation instead of throwing back to the client. It provides 4 methods for handling different types of errors:
- handleCacheGetError()
- handleCachePutError()
- handleCacheEvictError()
- handleCacheClearError()
Below is a CacheErrorHandler implementation example that you can customize for further requirements.
@Slf4j
public class RedisCacheErrorHandler implements CacheErrorHandler {

    @Override
    public void handleCacheGetError(RuntimeException exception, Cache cache, Object key) {
        log.info("Failure getting from cache: " + cache.getName() + ", exception: " + exception.toString());
    }

    @Override
    public void handleCachePutError(RuntimeException exception, Cache cache, Object key, Object value) {
        log.info("Failure putting into cache: " + cache.getName() + ", exception: " + exception.toString());
    }

    @Override
    public void handleCacheEvictError(RuntimeException exception, Cache cache, Object key) {
        log.info("Failure evicting from cache: " + cache.getName() + ", exception: " + exception.toString());
     }

    @Override
    public void handleCacheClearError(RuntimeException exception, Cache cache) {
        log.info("Failure clearing cache: " + cache.getName() + ", exception: " + exception.toString());
    }
}
Next, we implement the CachingConfigurer interface or extend from CachingConfigurerSupport class to register the custom CacheErrorHandler that we have created as shown below:
import org.springframework.cache.annotation.CachingConfigurerSupport;
import org.springframework.cache.interceptor.CacheErrorHandler;
import org.springframework.context.annotation.Configuration;

@Configuration
public class RedisConfiguration implements CachingConfigurer {

     @Override
    public CacheErrorHandler errorHandler() {
        return new RedisCacheErrorHandler();
    }
}
5.5. CacheManager
Next, we can configure the following beans to ease the development:
cacheManager – We initialize the cache Manager to the Redis connection created above and supply the configuration for the cache with the cache configuration bean. This helps with the @Cacheable annotation.
cacheConfiguration – The behavior of RedisCache created with RedisCacheManager is defined with RedisCacheConfiguration. The configuration lets you set key expiration times, prefixes, and RedisSerializer implementations for converting to and from the binary storage format.
@Autowired
private ConnectionPoolProperties connectionPool;

@Override
@Bean
public RedisCacheManager cacheManager() {
     return RedisCacheManager
             .builder(this.connectionFactory(connectionPool.poolingClientConfiguration()))
             .cacheDefaults(this.cacheConfiguration())
             .build();
}

@Bean
public RedisCacheConfiguration cacheConfiguration() {
    return RedisCacheConfiguration.defaultCacheConfig()
             .entryTtl(Duration.ofMinutes(connectionProperties.getTimeToLive()))
             .disableCachingNullValues()
             .serializeValuesWith(RedisSerializationContext
                     .SerializationPair
                     .fromSerializer(new CustomRedisSerializer()));
}
6. Test
Finally, Let’s use the customRedisTemplate that we configured with our implementation of serializer and deserializer and perform different operations on the Redis Database.
@SpringBootTest
@Testcontainers(disabledWithoutDocker = true)
class SpringDataRedisLettuceApplicationTests {
@Autowired
private RedisCacheService redisCacheService;
@Container
private static final RedisContainer REDIS_CONTAINER =
new RedisContainer(DockerImageName.parse("redis:5.0.3-alpine")).withExposedPorts(6379);
@DynamicPropertySource
private static void registerRedisProperties(DynamicPropertyRegistry registry) {
registry.add("spring.data.redis.host", REDIS_CONTAINER::getHost);
registry.add("spring.data.redis.port", () -> REDIS_CONTAINER.getMappedPort(6379).toString());
registry.add("default.redis.connection", () -> "standalone");
}
String key;
String value;
String hashKey;
@BeforeEach
public void setUp() {
key = "Name";
value = "Java";
hashKey = "Subject";
}
@Test
void testSetup() {
assertTrue(REDIS_CONTAINER.isRunning());
}
@Test
public void testValueOps() {
redisCacheService.putSimple(key, value);
String retrievedValue = redisCacheService.getSimple(key);
assertEquals(value, retrievedValue);
}
@Test
public void testHashOps() {
redisCacheService.put(hashKey, key, value, 60L);
String fetchedValue = redisCacheService.get(hashKey, key);
assertEquals(value, fetchedValue);
}
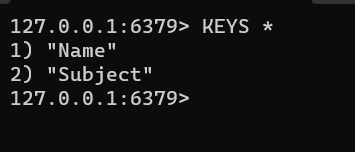
}Once we run the above tests, we can query the Redis DB and check that the keys are present.
7. Conclusion
In this article, we went through the basics of Spring Data Redis. We learned how to configure RedisTemplate with custom Serializer/Deserializer, CacheErrorHandler and CacheManager. We also went through some of the CRUD operations supported by Redis.
Happy Learning !!