
In this step-by-step Dropwizard tutorial, we’ll learn how to build a basic CRUD (Create, Read, Update, Delete) application having REST APIs to perform operations.
1. Introduction to DropWizard
Dropwizard is an opensource Java framework for the rapid development of REST APIs. Dropwizard is an ecosystem that contains all the dependencies (such as Jersey, Jackson or Jetty) bundled into a single package or can be added as a separate module.
If we are not using dropwizard, we will end up collecting all dependencies ourselves, and it often results in class loading issues due to version mismatches between various Java libraries. Dropwizard solves this problem for us and combines stable, mature libraries into a simple, lightweight package that lets us focus on getting things done.
Once we include dropwizard into our project, we get the following libraries added to classpath.
- Jersey – For building RESTful web applications.
- Jetty – Dropwizard uses the Jetty HTTP library to embed an HTTP server directly into your project.
- Jackson – For object to/from JSON conversion. It allows exporting your domain models directly with JAXB annotations.
- Guava – highly optimized immutable data structures to speed up development.
- Logback and SLF4j – for performant and flexible logging.
- Hibernate Validator – an easy declarative framework for validating user input and generating helpful and i18n-friendly error messages.
- Apache HTTPClient – For low- and high-level interaction with other web services.
- JDBI – the most straightforward way to use a relational database with Java.
- Liquidbase – to keep your database schema in check throughout your development and release cycle.
- FreeMarker – templating systems.
- Mustache – simple templating systems for more user-facing applications.
- Joda Time – very complete and sane library for handling dates and times.
2. Including DropWizard using Maven
To include DropWizard in an application, including the latest version of dropwizard-core.
<dependency>
    <groupId>io.dropwizard</groupId>
    <artifactId>dropwizard-core</artifactId>
    <version>4.0.0</version>
</dependency>
This will transitively download all related dependencies. To add build and package support to our project, we will use the maven-shade plugin, which will allow us to package our project completely, along with its dependencies, into a single standalone JAR file (Fat/Uber JAR) that can be distributed and executed as is.
<plugin>
  <groupId>org.apache.maven.plugins</groupId>
  <artifactId>maven-shade-plugin</artifactId>
  <version>3.2.0</version>
  <executions>
    <execution>
      <phase>package</phase>
      <goals>
        <goal>shade</goal>
      </goals>
      <configuration>
        <transformers>
          <transformer implementation="org.apache.maven.plugins.shade.resource.ManifestResourceTransformer">
            <mainClass>com.howtodoinjava.app.App</mainClass>
          </transformer>
          <transformer implementation="org.apache.maven.plugins.shade.resource.ServicesResourceTransformer">
          </transformer>
        </transformers>
      </configuration>
    </execution>
  </executions>
</plugin>
3. Creating a REST API with DropWizard
In this example, we have created an employee management application – so it has APIs for managing employee records. This class will be responsible for handling HTTP requests and generating JSON responses.
As we have Jersey in our classpath, we will use it to build REST APIs using Jakarta RESTful Web Services.
import com.howtodoinjava.app.model.Employee;
import com.howtodoinjava.app.repository.EmployeeRepository;
import jakarta.validation.ConstraintViolation;
import jakarta.validation.Validator;
import jakarta.ws.rs.DELETE;
import jakarta.ws.rs.GET;
import jakarta.ws.rs.POST;
import jakarta.ws.rs.PUT;
import jakarta.ws.rs.Path;
import jakarta.ws.rs.PathParam;
import jakarta.ws.rs.Produces;
import jakarta.ws.rs.core.MediaType;
import jakarta.ws.rs.core.Response;
import jakarta.ws.rs.core.Response.Status;
import java.net.URI;
import java.net.URISyntaxException;
import java.util.ArrayList;
import java.util.Set;

@Path("/employees")
@Produces(MediaType.APPLICATION_JSON)
public class EmployeeController {

  private Validator validator;
  private EmployeeRepository repository;

  public EmployeeController(Validator validator, EmployeeRepository repository) {
    this.validator = validator;
    this.repository = repository;
  }

  @GET
  public Response getEmployees() {
    return Response.ok(repository.getEmployees()).build();
  }

  @GET
  @Path("/{id}")
  public Response getEmployeeById(@PathParam("id") Integer id) {

    Employee employee = repository.getEmployee(id);
    if (employee != null) {
      return Response.ok(employee).build();
    } else {
      return Response.status(Status.NOT_FOUND).build();
    }
  }

  @POST
  public Response createEmployee(Employee employee) throws URISyntaxException {


    Employee e = repository.getEmployee(employee.getId());

    if (e != null) {
      repository.updateEmployee(employee.getId(), employee);
      return Response.created(new URI("/employees/" + employee.getId()))
          .build();
    } else {
      return Response.status(Status.NOT_FOUND).build();
    }
  }

  @PUT
  @Path("/{id}")
  public Response updateEmployeeById(@PathParam("id") Integer id, Employee employee) {


    Employee e = repository.getEmployee(employee.getId());

    if (e != null) {
      employee.setId(id);
      repository.updateEmployee(id, employee);
      return Response.ok(employee).build();
    } else {
      return Response.status(Status.NOT_FOUND).build();
    }
  }

  @DELETE
  @Path("/{id}")
  public Response removeEmployeeById(@PathParam("id") Integer id) {
    Employee employee = repository.getEmployee(id);
    if (employee != null) {
      repository.removeEmployee(id);
      return Response.ok().build();
    } else {
      return Response.status(Status.NOT_FOUND).build();
    }
  }
}
4. Models are Simple POJOs
Representation is what holds the data and is serialized into JSON. It’s a model for RESTful applications. When using Jersey with Jackson, all you need to build a resource representation is – a simple POJO following Java bean standards. Jackson constructs the JSON string recursively according to the getter methods of each class and their return type.
Any instance of the java.util.List type will be converted to a JSON array.
import lombok.AllArgsConstructor;
import lombok.Data;
import lombok.NoArgsConstructor;
import org.hibernate.validator.constraints.Length;
import org.hibernate.validator.constraints.NotBlank;

@AllArgsConstructor
@NoArgsConstructor
@Data
public class Employee {

  private Integer id;
  private String firstName;
  private String lastName;
  private String email;
}
If required in some cases, we can prevent a property from being a part of the JSON representation by adding the @JsonIgnore annotation to its getter.
5. Adding Bean Validation
When accepting PUT and POST requests, we may need to validate user-submitted entity content in the request body. Dropwizard uses hibernate validator for this purpose.
Adding validation requires the following steps:
1. Start with adding the validation annotations on the model class.
@NotNull
private Integer id;

@NotBlank @Length(min=2, max=255)
private String firstName;

@NotBlank @Length(min=2, max=255)
private String lastName;

@Pattern(regexp=".+@.+\\.[a-z]+")
private String email;
2. Inject Environment.getValidator() in REST resource from main Application class.
@Override
public void run(Configuration c, Environment e) throws Exception
{
  LOGGER.info("Registering REST resources");
  e.jersey().register(new EmployeeRESTController(e.getValidator()));
}
3. Use validator in REST APIs
public class EmployeeRESTController {

  private final Validator validator;

  public EmployeeRESTController(Validator validator) {
    this.validator = validator;
  }

  @POST
  public Response createEmployee(Employee employee) throws URISyntaxException
  {
    Set<ConstraintViolation<Employee>> violations = validator.validate(employee);

    Employee e = EmployeeDB.getEmployee(employee.getId());

    if (violations.size() > 0) {

      ArrayList<String> validationMessages = new ArrayList<String>();
      for (ConstraintViolation<Employee> violation : violations) {

        validationMessages.add(violation.getPropertyPath().toString() + ": " + violation.getMessage());
      }
      return Response.status(Status.BAD_REQUEST).entity(validationMessages).build();
    }

    //...
  }
}
6. Packaging and Deploying the Application
The following App class is the entry point for any dropwizard application. It needs to extend the io.dropwizard.Application class and implement the initialize(Bootstrap<Configuration>) and run(Configuration, Environment) methods. They prepare the runtime environment of the application.
To invoke the run method, we will need to have main() method, which will be invoked by java -jar command when you run the application as jar file.
import com.howtodoinjava.app.config.ApplicationHealthCheck;
import com.howtodoinjava.app.repository.EmployeeRepository;
import com.howtodoinjava.app.web.EmployeeController;
import io.dropwizard.core.Application;
import io.dropwizard.core.Configuration;
import io.dropwizard.core.setup.Bootstrap;
import io.dropwizard.core.setup.Environment;
import org.slf4j.Logger;
import org.slf4j.LoggerFactory;

public class App extends Application<Configuration> {

  private static final Logger LOGGER = LoggerFactory.getLogger(App.class);

  @Override
  public void initialize(Bootstrap<Configuration> b) {
  }

  @Override
  public void run(Configuration c, Environment e) throws Exception {
    LOGGER.info("Registering REST resources");
    e.jersey().register(new EmployeeController(e.getValidator(), new EmployeeRepository()));

    LOGGER.info("Registering Application Health Check");
    e.healthChecks().register("application", new ApplicationHealthCheck());
  }

  public static void main(String[] args) throws Exception {
    new App().run(args);
  }
}
First, we must package the application with mvn package command which will produce the DropWizardExample.jar in the /target folder.
$ mvn clean packageFor executing the JAR file, we add the server argument to the command which starts the embedded HTTP Server (Jetty) to run our service.
$ java -jar target\DropWizardExample.jar serverDropwizard’s embedded Jetty server will try to bind to ports 8080 and 8081 by default.
- Port 8080 is used by the server to serve incoming HTTP requests to the application.
- Port 8081 is used by Dropwizard’s administration interface.
We have also imported the necessary Logger and LoggerFactory classes in order to construct a Logger instance we could use for our logging needs.
7. Demo
Now that we have created and added validations for REST APIs, let’s test this out.
Build application Uber jar file.
$ mvn clean packageStart application in jetty server.
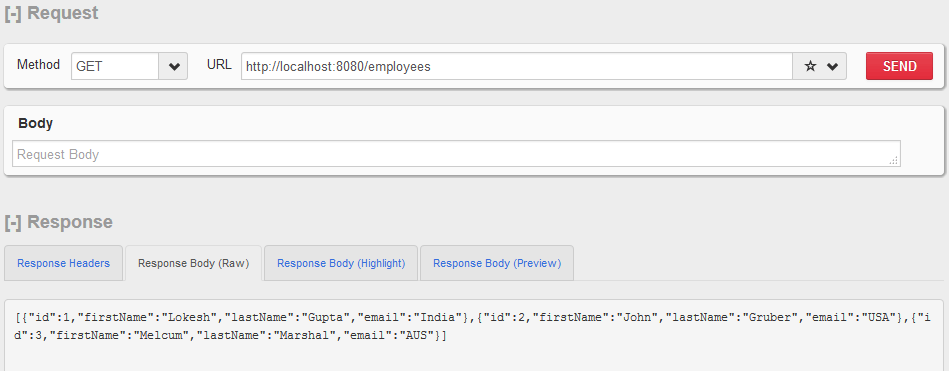
$ java -jar target\DropWizardExample-0.0.1-SNAPSHOT.jar serverAccess HTTP GET http://localhost:8080/employees
This will return employees collection and related response headers.
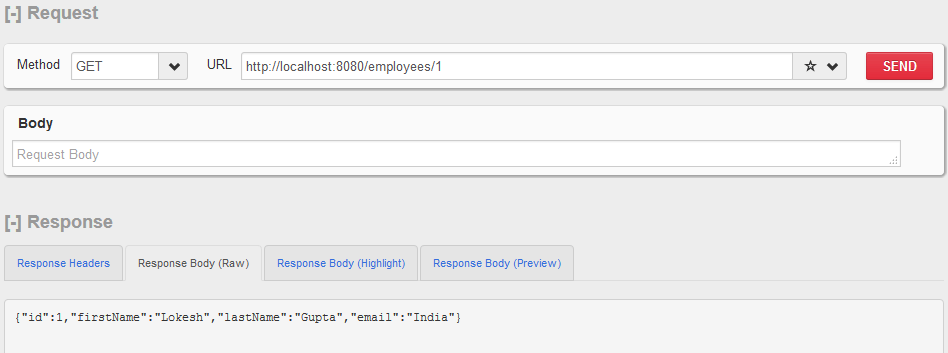
Access HTTP GET http://localhost:8080/employees/1
This will return employee’s record with id 1.
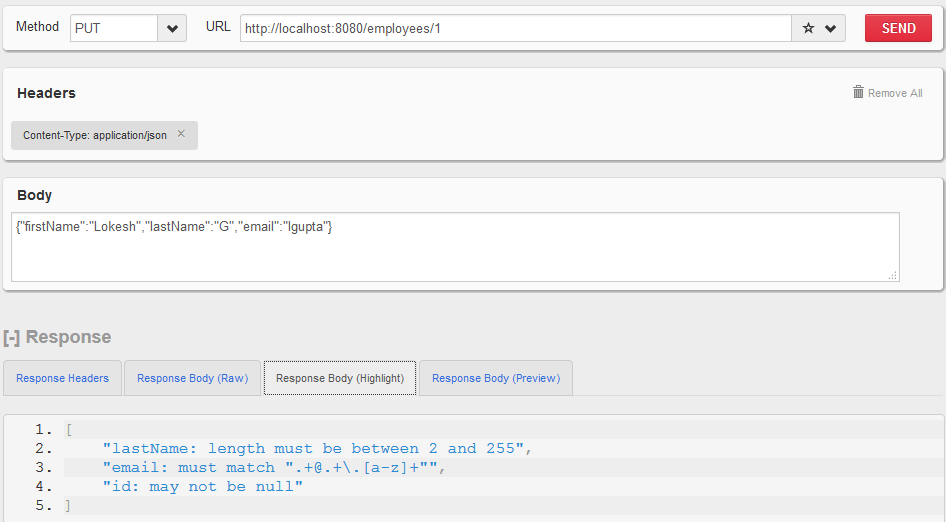
Send invalid data to HTTP PUT http://localhost:8080/employees/1
You will get validation messages.
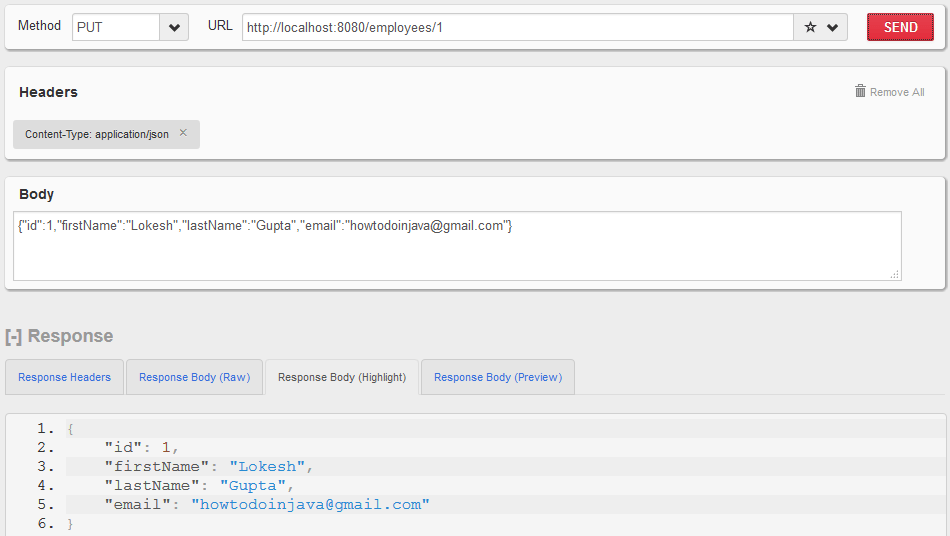
Sent valid data to HTTP PUT http://localhost:8080/employees/1
Employee record will be updated successfully.
Let me know your questions in the comments section.
Happy Learning !!
localhost:8080 requires a username and password
how to solve?
username : admin and password is password
how to use @Inject with dropwizrad
Hi ,
I have a query related to the DW . can we register multiple services on a single DW using one yml file where app port should be running on single port or can we register multiple services on one yml .
localhost:8080 requires a username and password
how to solve?
did you get an answer to this? – I’ve got the same problem – thanks
While I am trying to run this file the ConstraintViolation class is not found. I searched many websites but there i got nothing. Can you please help me to solve this issue.
Hi Lokesh,
Good work. On a similar fashion, we can also use CDI interceptor to call validator which makes the rest – validator – service loosely coupled.
Regards,
Himansu