In previous post, we learned about uploading a file in JAX-RS RESTEasy application where the client to upload the file was built using HttpClient library. This client was pure java client and does not have any UI associated. In this post, I am building the same uploading feature but this time, we will have an UI to interact with.
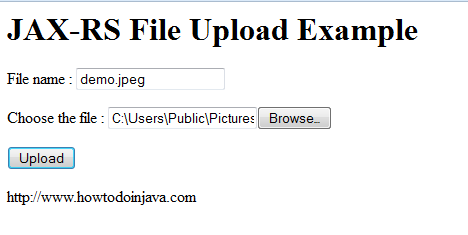
Our UI to upload the file to the server looks like this.
Lets make the application step by step:
1) Create a eclipse web project using maven for dependency management
2) Update project dependencies in pom.xml
<project xmlns="http://maven.apache.org/POM/4.0.0" xmlns:xsi="http://www.w3.org/2001/XMLSchema-instance"
  xsi:schemaLocation="http://maven.apache.org/POM/4.0.0 ;
  <modelVersion>4.0.0</modelVersion>
  <groupId>com.howtodoinjava</groupId>
  <artifactId>RESTfulDemoApplication</artifactId>
  <packaging>war</packaging>
  <version>1.0-SNAPSHOT</version>
  <name>RESTfulDemoApplication Maven Webapp</name>
  <url>http://maven.apache.org</url>
  <repositories>
   	<repository>
      <id>jboss</id>
      <url>http://repository.jboss.org/maven2</url>
   	</repository>
  </repositories>
  <dependencies>
  	<!-- Junit support -->
    <dependency>
      <groupId>junit</groupId>
      <artifactId>junit</artifactId>
      <version>3.8.1</version>
      <scope>test</scope>
    </dependency>
    <!-- core library -->
	<dependency>
		<groupId>org.jboss.resteasy</groupId>
		 <artifactId>resteasy-jaxrs</artifactId>
		<version>2.3.1.GA</version>
	</dependency>
	<dependency>
		<groupId>net.sf.scannotation</groupId>
		<artifactId>scannotation</artifactId>
		<version>1.0.2</version>
	</dependency>
	<!-- JAXB provider -->
   <dependency>
		<groupId>org.jboss.resteasy</groupId>
		<artifactId>resteasy-jaxb-provider</artifactId>
		<version>2.3.1.GA</version>
	</dependency>
	<!-- Multipart support -->
	<dependency>
		<groupId>org.jboss.resteasy</groupId>
		<artifactId>resteasy-multipart-provider</artifactId>
		<version>2.3.1.GA</version>
	</dependency>
	<!-- For better I/O control -->
	<dependency>
		<groupId>commons-io</groupId>
		<artifactId>commons-io</artifactId>
		<version>2.0.1</version>
	</dependency>
  </dependencies>
  <build>
    <finalName>RESTfulDemoApplication</finalName>
  </build>
</project>
3) Update web.xml file for mapping valid REST APIs
<!DOCTYPE web-app PUBLIC
 "-//Sun Microsystems, Inc.//DTD Web Application 2.3//EN"
 "http://java.sun.com/dtd/web-app_2_3.dtd" >

<web-app>
  	<display-name>Archetype Created Web Application</display-name>

  	<!-- Auto scan REST service -->
	<context-param>
		<param-name>resteasy.scan</param-name>
		<param-value>true</param-value>
	</context-param>

	<listener>
      <listener-class>
         org.jboss.resteasy.plugins.server.servlet.ResteasyBootstrap
      </listener-class>
   </listener>

	<servlet>
		<servlet-name>resteasy-servlet</servlet-name>
		<servlet-class>
			org.jboss.resteasy.plugins.server.servlet.HttpServletDispatcher
		</servlet-class>
	</servlet>

	<servlet-mapping>
		<servlet-name>resteasy-servlet</servlet-name>
		<url-pattern>/rest-ws/*</url-pattern>
	</servlet-mapping>

</web-app>
4) Update index.jsp file with desired UI
<html> <body> <h1>JAX-RS File Upload Example</h1> <form action="rest-ws/upload-file" method="post" enctype="multipart/form-data"> <p> File name : <input type="text" name="fileName" /> </p> <p> Choose the file : <input type="file" name="selectedFile" /> </p> <input type="submit" value="Upload" /> </form>Java Tutorials</body> </html>
5) Create FileUploadForm with fields mapped to HTML form
package com.howtodoinjava.client.upload;

import javax.ws.rs.FormParam;
import org.jboss.resteasy.annotations.providers.multipart.PartType;

public class FileUploadForm {

	public FileUploadForm() {
	}

	private byte[] fileData;
	private String fileName;

	public String getFileName() {
		return fileName;
	}

	@FormParam("fileName")
	public void setFileName(String fileName) {
		this.fileName = fileName;
	}

	public byte[] getFileData() {
		return fileData;
	}

	@FormParam("selectedFile")
	@PartType("application/octet-stream")
	public void setFileData(byte[] fileData) {
		this.fileData = fileData;
	}
}
6) Create RESTful API having logic for handling uploaded file
package com.howtodoinjava.client.upload;

import java.io.File;
import java.io.FileOutputStream;
import java.io.IOException;

import javax.ws.rs.Consumes;
import javax.ws.rs.POST;
import javax.ws.rs.Path;
import javax.ws.rs.core.Response;

import org.jboss.resteasy.annotations.providers.multipart.MultipartForm;

@Path("/rest-ws")
public class DemoFileSaver_MultipartForm
{
	@POST
	@Path("/upload-file")
	@Consumes("multipart/form-data")
	public Response uploadFile(@MultipartForm FileUploadForm form) {

		String fileName = form.getFileName() == null ? "Unknown" : form.getFileName() ;

		String completeFilePath = "c:/temp/" + fileName;
		try
		{
			//Save the file
			File file = new File(completeFilePath);

			if (!file.exists())
			{
				file.createNewFile();
			}

			FileOutputStream fos = new FileOutputStream(file);

			fos.write(form.getFileData());
			fos.flush();
			fos.close();
		}
		catch (IOException e)
		{
			e.printStackTrace();
		}
		//Build a response to return
		return Response.status(200)
		    .entity("uploadFile is called, Uploaded file name : " + fileName).build();
	}
}
7) Test the application
Sourcecode download
Happy Learning !!
Hello Lokesh!
As you can see, when uploading the file – you get the filename on the right side of the ‘Choose the file’.
I would like to fetch that original-name , not letting the user type in that – is it feasible to solve.
seeing that mkyong ( https://www.mkyong.com/webservices/jax-rs/file-upload-example-in-resteasy/ ) has a way to solve it, is there no better way ?
regards, Inki
I tried to find another way. I couldn’t find today. If got another better way anytime, I will update here.
Hi ,
Nice post really helpful, but then how to to handle if I have multiple file uploads ?.
Thanks
Saravana kumar
I will post something on multiple upload soon.
Thanks for your prompt reply.
Thx for your article! Any progress on uploading multiple files?
Good work :) …. did you post for multiple files ??
Good Example