Deploying a Spring Boot application to Kubernetes can seem daunting at first, but with the right tools and knowledge, it can be a straightforward process. In this post, we will walk through the steps needed to deploy a dockerized Spring Boot application to Kubernetes (Minikube).
1. Prerequisites
Before we begin, make sure we have the following:
- A
Kubernetescluster up and running. Dockerinstalled.kubectlinstalled.
2. Introduction to Kubernetes
Kubernetes is an open-source, portable, and extensible platform for managing workloads and services deployed in containers. Kubernetes facilitates both declarative configuration and automation. The Kubernetes platform has a rich and rapidly growing ecosystem, and its support, services, and tools are widely available.
Kubernetes is based on a decade and a half of experience that Google has in running production workloads at scale, along with the best ideas and practices suggested by the community.
Key components of kubernetes are:
- Nodes: Nodes are responsible for running containers, communicating with the master, and reporting the status of their assigned tasks.
- Pods: Pods are the smallest objects in a kubernetes cluster located on a node.
- ReplicaSets: Allows us to scale the number of replicas up or down based on the demand.
- Services: A Service is an object used to direct requests or traffic to multiple Pods using an IP address.
- Cluster :Basicly, a Kubernetes cluster is a sort of host for your running containers. and each Node clusters will have at least one master node and warker nodes; this master node is responsible for keeping the overall cluster in a desirable state based on the configuration and the workerNode is the one that runs applications inside a container.
3. Initialize a Spring Boot Application
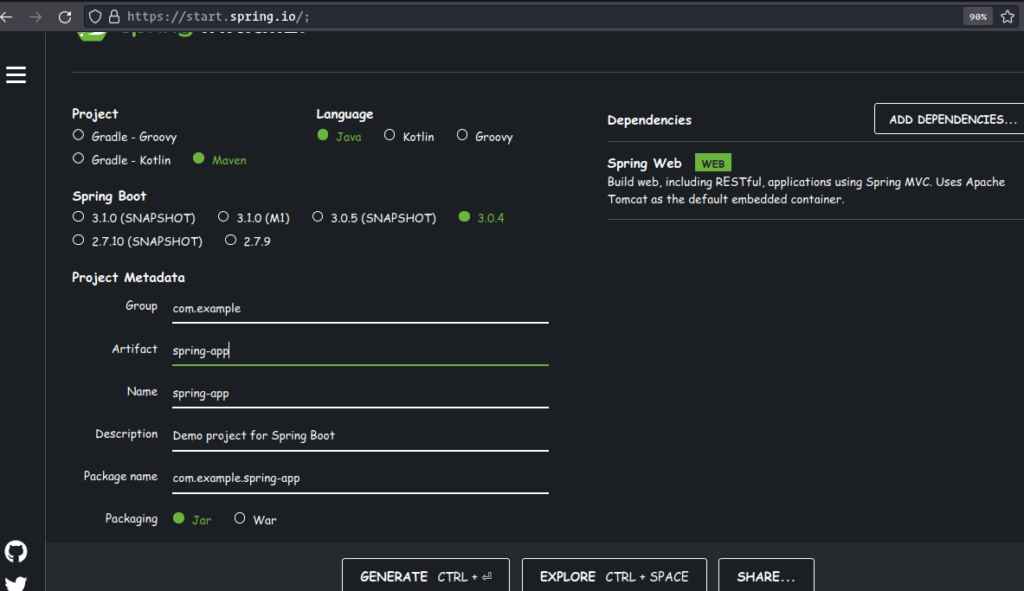
To quickly generate a simple project, use Spring Initializer.
Then, create an endpoint called controller to verify everything is working properly when deploying the project.
@RestController
public class FooController {

   @RequestMapping(value="/controller", method=RequestMethod.GET)
   public String foo() {
      return "Response!";
   }

}
In this example, we create an endpoint called controller, so if we send a request to the endpoint, we should get the message response!

Next, create an executable JAR file to the folder /target, use maven install. If you don’t know how, check out Creating Spring Boot Fat/Uber Jar or War Files.
$ mvn clean install4. Dockerize Spring Boot Application
To containerize the application, create a Dockerfile with the following instructions:
FROM openjdk:17
VOLUME /tmp
EXPOSE 8080
ARG JAR_FILE=target/spring-demo-0.0.1-SNAPSHOT.jar
ADD ${JAR_FILE} app.jar
ENTRYPOINT ["java","-jar","/app.jar"]
Next, build the image with the command docker build.

Go Deep on Docker: Check How To Dockerize a Spring Boot Application
5. Deploy to Minikube
5.1. Installation
Minikube provides an easy way to set up a local Kubernetes environment for testing and development purposes. We can find the installation instructions for our system at Minikube Installation.
Install Minikube and check its status with the command minikube status.
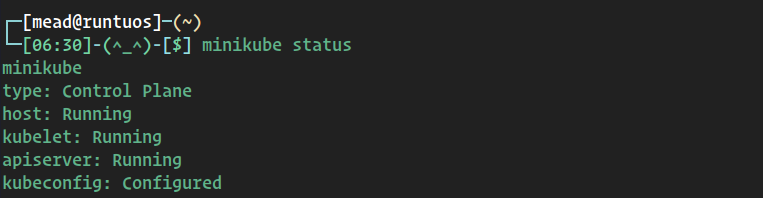
If it’s not running, use the command minikube start to start it.

After starting Minikube, we need to tell Minikube to read our local image. Use the command.
$ eval $(minikube docker-env)5.2. Deployment
Now, we have two options to start deploying our application: using kubectl commands or a YAML file with the whole configuration. We will use a YAML file.
In the root folder of your application, create a file with any name, but the extension should be .yaml. with the following instructions:
apiVersion: apps/v1
kind: Deployment
metadata:
  name: spring-app
spec:
  replicas: 2
  selector:
    matchLabels:
      app: spring-app
  template:
    metadata:
      labels:
        app: spring-app
    spec:
      containers:
        - name: spring-app
          image: springboot-app:latest
          imagePullPolicy: IfNotPresent
          ports:
            - containerPort: 8080
This is a YAML file that describes a Kubernetes deployment for a containerized application. Let’s go through the different parts of the file:
apiVersion: The Kubernetes API version used by the deployment.kind: The type of Kubernetes resource being created.metadata: This contains metadata about the deployment, such as the name of the deployment.spec: The desired state of the deployment.replicas: The number of replicas (instances) of the application to run.selector: The labels used to identify the pods that belong to the deployment. In this case, it is looking for pods with the labelapp: spring-app.template: The pod template used to create new pods for the deployment.metadata: The labels used to identify the pod.spec: The pod specification, including the container(s) to run.containers: The container(s) to run within the pod.name: The container name.image: Name of the docker image that we gonna use for the container.ports: The ports to expose for the container.
Make sure you add
imagePullPolicy: IfNotPresent. This tells Minikube to search for the image locally first and then, if it’s not present, to search on the Docker Hub.
Here we will create a yaml file called deployment.yaml with the above content, and then all we need to do is tell kubectl to take the file and create the deployment object for us with the following command:
$ kubectl apply -f deployment.yaml
5.3. Verification
When we execute this, that means we create the deployment object, and we can verify that with:
$ kubectl get deployments
And we can check pods since we define two pods on the yaml file with the command:
$ kubectl get pods
To check if the pod is working successfully, execute the command:
$ kubectl logs {name of the pod}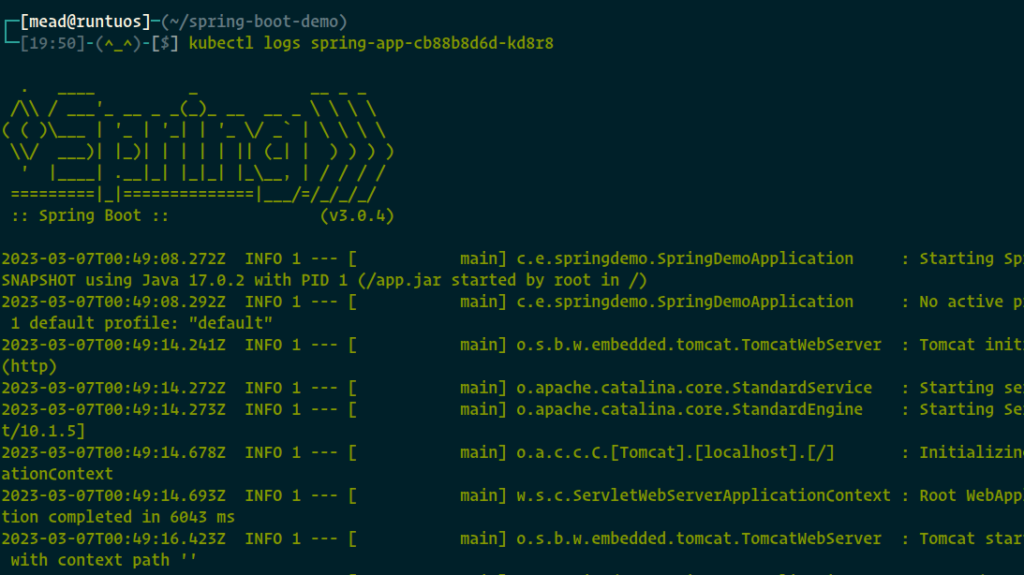
As the image tells us, everything is running fine.
6. Kubernetes Services
Our application runs on two different pods, which means two different IP addresses. If a user wants to execute our application, which of the two pods will execute?
The answer to this question is Kubernetes services. Services allow us to load balance the traffic between our pods by giving us a single IP address for a group of pods. In our case, we have just two pods. By adding a service, we have a solution to the question of which pod will execute when a user sends a request to our application.
In Kubernetes, there are four types of services:
- ClusterIP: Provides a stable IP address that is only accessible within the cluster.
- NodePort: Used to exposes a port on every node in the cluster.
- LoadBalancer: Creates a load balancer in the cloud provider to distribute traffic to the pods..
- ExternalName: This type of service maps a DNS name to an external service.
- Headless: To allows direct access to each pod by DNS name.
Here, we will use NodePort. Create another YAML file with the following:
apiVersion: v1
kind: Service
metadata:
  name: spring-service
spec:
  type: NodePort
  selector:
    app: spring-app
  ports:
  - name: http
    port: 80
    targetPort: 8080
    nodePort: 30005
The only difference from the deployment file is that instead of kind: deployment, it should be service. For the name, you can use any name, but in this case, we will use spring-service.
Make sure that the name of the selector app is the same as what we defined in the deployment file.
spec.ports.nodePort: specifies the port on which the service will be exposed externally. In our case, we’re using port 30005 (The range of valid ports is 30000-32767).
Apply the service with the command:
$ kubectl apply -f service.yaml
To check if our service is working, execute the command:
$ kubectl get svc
7. Demo
Now that our service is working, we need to get the node IP with kubectl get nodes -o wide so that we can access our app.

Now, with the IP and port, we can access our app. In our case, the IP is 192.168.49.2 and the port is 30005. The final URL is 192.168.49.2:30005/controller, where controller is the endpoint that we created earlier.

Congratulations, we have received our response from Kubernetes.
8. Minikube DashBoard
After successfully hosting our app in the Kubernetes cluster, we can access the Minikube dashboard to check the different components.
$ minikube dashboard 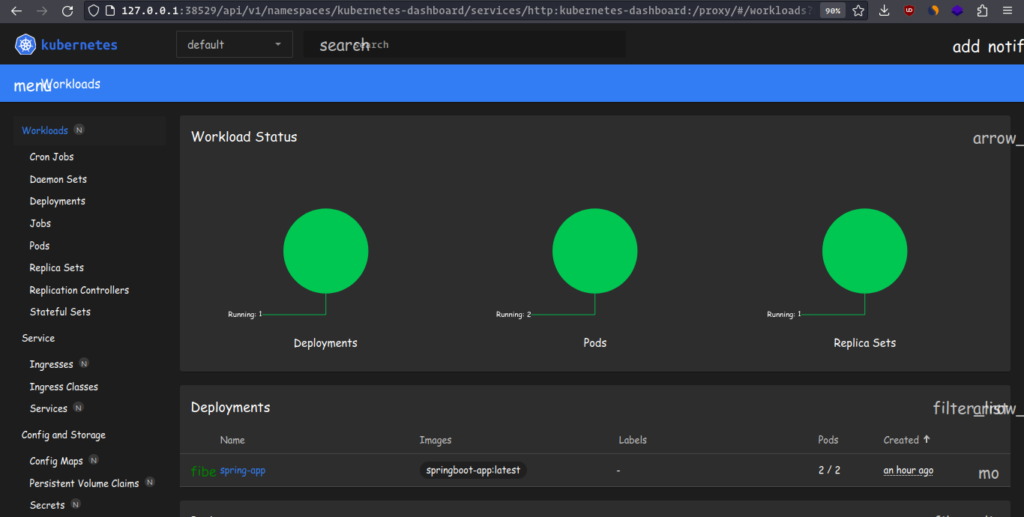
The dashboard shows us all the components that we have; in our example, we have 1 deployment and 2 pods, and we can add or delete whatever we want. Basically, the dashboard is just an interface that allows us to interact with and manage our Kubernetes cluster.
9. Conclusion
In this guide, we learned how to deploy a Spring Boot app step by step to a Kubernetes cluster using a YAML file based deployment. We also learned to configure the k8s services and tested the application by hitting the API request successfully.
Happy Learning !!