
In this maven tutorial, we will learn to create a fat jar or uber jar for spring boot applications using the maven plugin. It is very easy and requires very few config changes in pom.xml file.
A fat jar is a build artifact containing all of the application’s compiled code along with the application’s dependencies. As this build jar includes all necessary dependencies to run the application, we can deploy it on any machine supporting Java applications.
Step 1. Add Spring Boot Maven Plugin
The first step and probably the only step required is to have spring-boot-maven-plugin plugin entry in the pom.xml file.
<build>
  <plugins>
    <plugin>
      <groupId>org.springframework.boot</groupId>
      <artifactId>spring-boot-maven-plugin</artifactId>
    </plugin>
  </plugins>
</build>
See Also: Create fat jar using maven shade plugin
Step 2. Run the Maven Build
Now when we run the maven build using a simple command 'mvn clean install', it will generate the fat jar for the project consisting of all compiled application code as well as all its dependencies – packaged inside one big jar file. An embedded Tomcat server is also built-in, by default, unless we configure any other embedded server such as Jetty.
$ mvn clean installAfter the build succeeds, inside the fat JAR, we can find the META-INF folder that has MANIFEST.MF file. This file stores the basic meta-information about the project.
Additionally, BOOT-INF folder stores information about the class that has the @SpringBootApplication annotation. This class is used for bootstrapping the application.
Note that if the 'war' packaging is configured then the above command will build a fat war file. We can deploy this war file to any web container, or we can run standalone as well.
<packaging>war</packaging>2.3. External Dependencies
It is worth knowing that, by default, 2.3. external or system dependencies are intentionally excluded from fat JARs since they may be platform-specific and are usually provided by the JDK.
To include such dependencies, we can set ‘includeSystemScope‘ to true.
<plugin>
  <groupId>org.springframework.boot</groupId>
  <artifactId>spring-boot-maven-plugin</artifactId>
  <configuration>
    <includeSystemScope>true</includeSystemScope>
  </configuration>
</plugin>
Now we can define an external dependency as follows:
<dependency>
  <groupId>dep</groupId>
  <artifactId>dep</artifactId>
  <version>1.0</version>
  <scope>system</scope>
  <systemPath>${basedir}/lib/dep.jar</systemPath>
</dependency>
3. Demo
You can download the sourcecode of Spring Boot REST API Example into your machine to run the demo. We can optionally import this project as a Maven project into eclipse if we wish to look inside the project code.
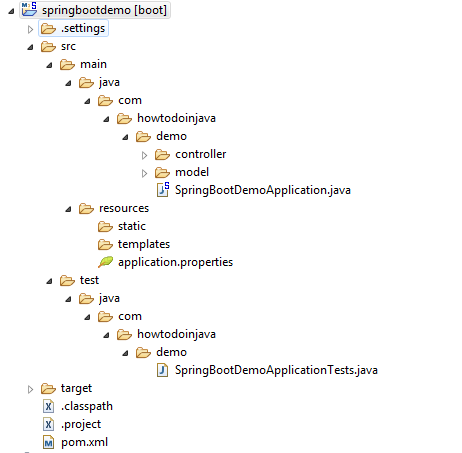
3.1. Imported Project Structure
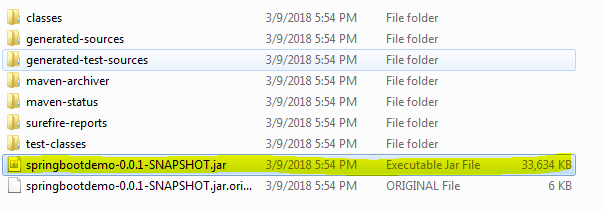
3.2. Generated Fat jar File
We can start the application using this simple command. We can also include any optional application arguments in the command.
$ java -jar <artifact-name>3.3. Complete pom.xml File
<?xml version="1.0" encoding="UTF-8"?>
<project xmlns="http://maven.apache.org/POM/4.0.0" xmlns:xsi="http://www.w3.org/2001/XMLSchema-instance"
  xsi:schemaLocation="http://maven.apache.org/POM/4.0.0 https://maven.apache.org/xsd/maven-4.0.0.xsd;
  <modelVersion>4.0.0</modelVersion>

  <groupId>com.howtodoinjava.demo</groupId>
  <artifactId>springbootdemo</artifactId>
  <version>0.0.1-SNAPSHOT</version>
  <packaging>jar</packaging>

  <name>SpringBootDemo</name>
  <description>Spring Boot Demo for https://howtodoinjava.com</description>

  <parent>
    <groupId>org.springframework.boot</groupId>
    <artifactId>spring-boot-starter-parent</artifactId>
    <version>1.4.0.RELEASE</version>
    <relativePath/> <!-- lookup parent from repository -->
  </parent>

  <properties>
    <project.build.sourceEncoding>UTF-8</project.build.sourceEncoding>
    <project.reporting.outputEncoding>UTF-8</project.reporting.outputEncoding>
    <java.version>1.8</java.version>
  </properties>

  <dependencies>
    <dependency>
      <groupId>org.springframework.boot</groupId>
      <artifactId>spring-boot-starter-data-jpa</artifactId>
    </dependency>
    <dependency>
      <groupId>org.springframework.boot</groupId>
      <artifactId>spring-boot-starter-hateoas</artifactId>
    </dependency>
    <dependency>
      <groupId>org.springframework.boot</groupId>
      <artifactId>spring-boot-starter-jersey</artifactId>
    </dependency>
    <dependency>
      <groupId>org.springframework.boot</groupId>
      <artifactId>spring-boot-starter-security</artifactId>
    </dependency>
    <dependency>
      <groupId>org.springframework.boot</groupId>
      <artifactId>spring-boot-starter-web</artifactId>
    </dependency>
    <dependency>
      <groupId>org.hsqldb</groupId>
      <artifactId>hsqldb</artifactId>
      <scope>runtime</scope>
    </dependency>
    <dependency>
      <groupId>org.springframework.boot</groupId>
      <artifactId>spring-boot-starter-test</artifactId>
      <scope>test</scope>
    </dependency>
  </dependencies>

  <build>
    <plugins>
      <plugin>
        <groupId>org.springframework.boot</groupId>
        <artifactId>spring-boot-maven-plugin</artifactId>
      </plugin>
    </plugins>
  </build>

</project>
That’s all for this quick tip. Drop me your questions in the comments section.
Happy Learning !!
How to generate jar file for gradle build with version 2.14