In this maven tutorial, learn to add and configure tomcat plugin to pom.xml and use it to deploy the web application without any tomcat installation in the machine.
It is very useful when we want to test the application in our local machine where the actual tomcat installation is not available due to any reason.
Check for the latest supported version of tomcat and the plugin version on this page.
1. Adding Tomcat Maven Plugin
At the time of writing this post, the latest plugin is tomcat7-maven-plugin.
There are other plugins tomcat8-maven-plugin and tomcat9-maven-plugin available in the maven repository but those are not from the official apache group.
Edit project’s pom.xml file and plugin entry inside build tag.
<build>
<sourceDirectory>src/main/java</sourceDirectory>
<resources>
<resource>
<directory>src/main/resources</directory>
</resource>
</resources>
<plugins>
<plugin>
<artifactId>maven-compiler-plugin</artifactId>
<version>3.5.1</version>
<configuration>
<source>1.8</source>
<target>1.8</target>
</configuration>
</plugin>
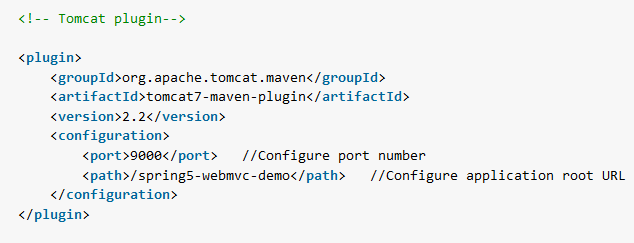
<!-- Tomcat plugin-->
<plugin>
<groupId>org.apache.tomcat.maven</groupId>
<artifactId>tomcat7-maven-plugin</artifactId>
<version>2.2</version>
<configuration>
<port>9000</port> //Configure port number
<path>/spring5-webmvc-demo</path> //Configure application root URL
</configuration>
</plugin>
</plugins>
</build>
2. Plugin Configuration Options
We can add the tomcat plugin in various ways within configuration tag. Some useful configuration options are:
address– This IP address will be used on all portscontextFile– The path of the Tomcat context XML file.hostName– configure host namehttpsPort– The https port to run the Tomcat server on.keystoreFile– Override the default keystoreFile for the HTTPS connector (if enabled)keystorePass– Override the default keystorePass for the HTTPS connector (if enabled)mainClass– Main class to use for starting the standalone jar.systemProperties– List of System properties to pass to the Tomcat Server.port– Custom port numberpath– The webapp context path to use for the web applicationwarFile– The path of the WAR file to deploy.
3. Running the Application with Tomcat Plugin
To run the application with tomcat maven plugin, use maven goal as –
mvn tomcat7:run
When we run above maven goal, we can see tomcat starting in console log with default port 8080.
[INFO] >>> tomcat7-maven-plugin:2.2:run (default-cli) > process-classes @ spring5-webmvc-demo >>>
[INFO]
[INFO] --- maven-resources-plugin:2.6:resources (default-resources) @ spring5-webmvc-demo ---
[WARNING] Using platform encoding (Cp1252 actually) to copy filtered resources, i.e. build is platform dependent!
[INFO] Copying 0 resource
[INFO]
[INFO] --- maven-compiler-plugin:3.5.1:compile (default-compile) @ spring5-webmvc-demo ---
[INFO] Nothing to compile - all classes are up to date
[INFO]
[INFO] <<< tomcat7-maven-plugin:2.2:run (default-cli) < process-classes @ spring5-webmvc-demo <<<
[INFO]
[INFO] --- tomcat7-maven-plugin:2.2:run (default-cli) @ spring5-webmvc-demo ---
[INFO] Running war on http://localhost:8080/spring5-webmvc-demo
[INFO] Using existing Tomcat server configuration at D:\java9\workspace\spring5-webmvc-demo\target\tomcat
[INFO] create webapp with contextPath: /spring5-webmvc-demo
---
---
INFO: Starting ProtocolHandler ["http-bio-8080"]
Happy Learning !!
hi , how can add WAR file in pom xml?
The plugin seems to be dead. Better to move on.
Here i am facing some issue as i am getting till file.jsp but i am not able to access the servlet.java class i dont know where is the problem?? Pls Anyone can help.
I am getting the following Error:
Could not start Tomcat: Failed to start component [StandardServer[-1]]: Failed to start component [StandardService[Tomcat]]: Failed to start component [StandardEngine[Tomcat]]: A child container failed during start
How can i use this tomcat maven plugin in multi module project.
Main pom.xml file 3 modules. main pom has packaging pom and in children modules: one has packaging war and other two has packaging jar. These jar modules are dependencies for war module.
How can i use tomcat maven plugin to run this project locally?
What have you tried so far? Please share if you faced any issue?