
This tutorial gives easy instructions for importing maven remote archetype catalogs in eclipse to give you a head start in configuring the project. Using archetype automatically import all basic runtime dependencies and configure the project with the most basic configuration you can use to build hello world applications within minutes.
Step 1: Open Maven Preferences in Eclipse
Go to Windows -> Preferences -> Maven -> Archetypes.
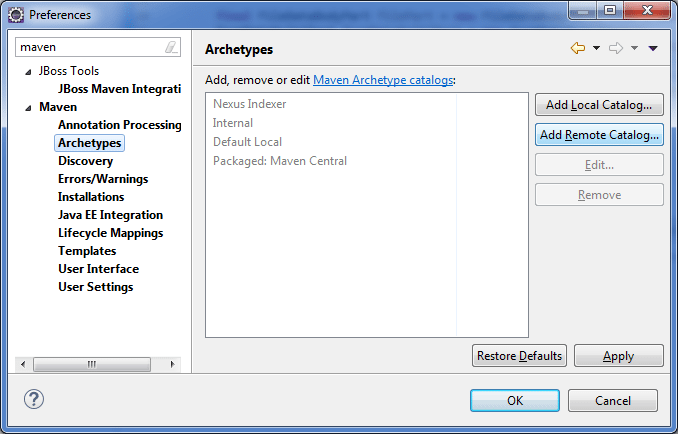
Step 2: Add Remote Catalog File
Click on Add Remote Catalog button. Fill in the catalog file as “http://repo1.maven.org/maven2/archetype-catalog.xml” and some custom descriptions.
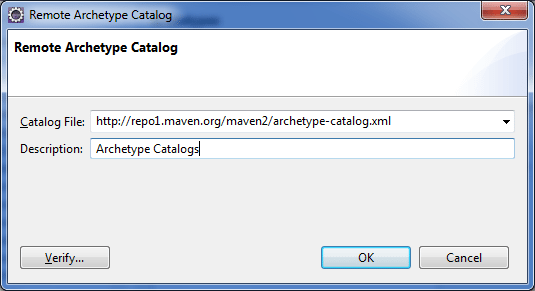
Click the OK button. You are done.
Step 3: Verify Remote Archetypes
To verify that you can now access to all archetypes, create a new maven project.
Select the new custom catalog you created.
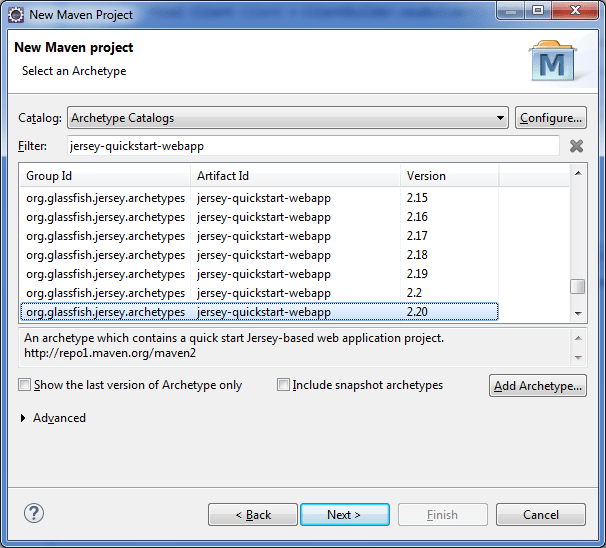
In first time, it will take a few moments to gather all the archetypes. You can see the progress at the very bottom right of the IDE. When it’s done, you should be able to see the archetypes.
Fill group id and artifact id for your project.
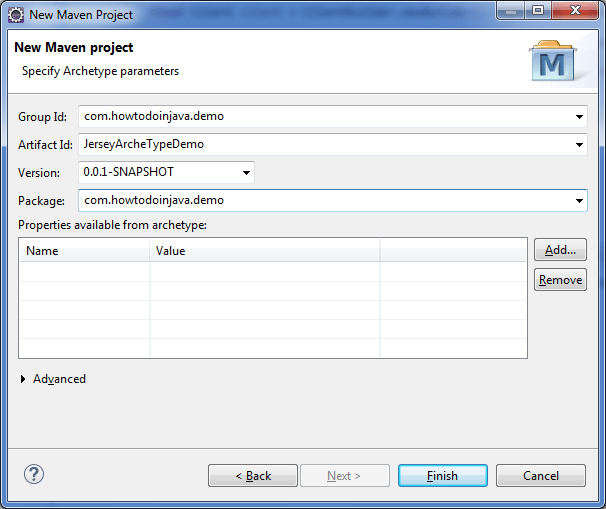
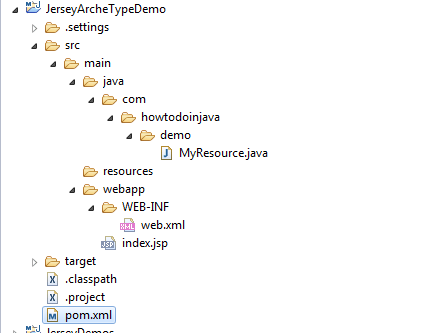
Click on OK to create the project. You will see the new project create on your workspace with all dependencies and basic configurations already done.
Drop me your questions if you face any issues in any step.
Happy Learning !!
“Remote server is empty” is displayed after filling the catalog file and descriptor field
Add https:// instead of http://
The required property “package” is not set.
This is the message, what should I do?
thank you sir, it worked for me
Hello,
I followed the steps but still, jersey is not coming in the list :-(
what could be the reason?
I am trying in Eclipse
This makes me crazy, too
use https:// instead pf http:// worked for me when I updated it.
now it is working
Thanks
It worked.
Thanks a lot, it worked well
does not getting a window to choose the archetype of maven project in eclipse neon
Thank you for sharing this in a very simple way.
Yes This method works for me thanks a lot.
Unable to create project from archetype.
This is the error I have been getting when creating a new maven project.
I tried it in many ways to solve the error.
1.Changing the proxy in settings.xml file
2.Using remote catalog in Eclipse
3.I tried of creating a maven project through command line even there the project is BUILD FAILURE.
Please anyone help me in solving this problem?????
Hi, I am trying to create a project using this archetype. But I keep getting this error.
Any help is appreciated.
Unable to create project from archetype [com.intuit.karate:karate-archetype:0.2.9 -> https://repo.maven.apache.org/maven2/ ]
The defined artifact is not an archetype
can remote catalog hosted over https:// can be accessed.?
Thanks worked fine :)
Archetype Catalogs list is coming empty. Could not able to create maven project :- error
Could not resolve archetype org.apache.maven.archetypes:maven-archetype-webapp:1.0 from any of the configured repositories.
Could not resolve artifact org.apache.maven.archetypes:maven-archetype-webapp:pom:1.0
Failure to transfer org.apache.maven.archetypes:maven-archetype-webapp:pom:1.0 from https://repo.maven.apache.org/maven2/ was cached in the local repository, resolution will not be reattempted until the update interval of central has elapsed or updates are forced. Original error: Could not transfer artifact org.apache.maven.archetypes:maven-archetype-webapp:pom:1.0 from/to central https://repo.maven.apache.org/maven2/): sun.security.validator.ValidatorException: PKIX path building failed: sun.security.provider.certpath.SunCertPathBuilderException: unable to find valid certification path to requested target
Failure to transfer org.apache.maven.archetypes:maven-archetype-webapp:pom:1.0 from https://repo.maven.apache.org/maven2/ was cached in the local repository, resolution will not be reattempted until the update interval of central has elapsed or updates are forced. Original error: Could not transfer artifact org.apache.maven.archetypes:maven-archetype-webapp:pom:1.0 from/to central https://repo.maven.apache.org/maven2/): sun.security.validator.ValidatorException: PKIX path building failed: sun.security.provider.certpath.SunCertPathBuilderException: unable to find valid certification path to requested target
Its HTTPS issue and purely your environment specific.
Hi,
I am also getting this error. How to resolve this proxy issue ?
https is working for me :D :D thanks thanks
java.lang.nullPointerException while downloading????
plz help i’m also getting the same issue in mars2 ..
I am trying to do it but when i am adding the remote catalog and click ok and follow the same steps it is showing nothing. Also if i verify it is showing that remote catalog is empty.
It might be some proxy issue. Please try in home network where firewall is off.
The firewall is off. But it stil show that remote catalog is empty.