
Learn to create a Java application project with maven, using interactive and non-interactive modes from the command prompt.
1. Using Maven Non-interactive Mode
In non-interactive mode, Maven creates a blank Java project with all default options applicable for the selected Maven template. To create this, type the below command.
//Remove the new line characters. This command should be in a single line.
$ mvn archetype:generate
-DgroupId=com.howtodoinjava
-DartifactId=DemoJavaProject
-DarchetypeArtifactId=maven-archetype-quickstart
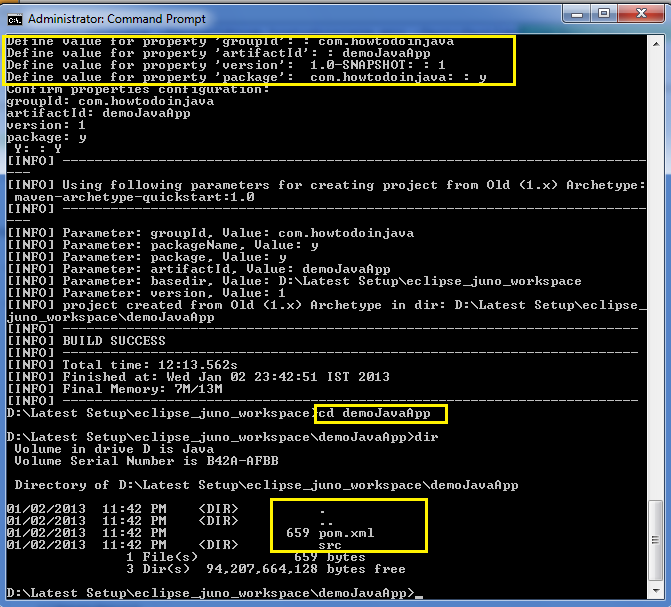
-DinteractiveMode=falseThis command will create a blank java project named DemoJavaProject in the workspace. You can choose and use your own application name. We can see what happens when you run the above command in the below image.
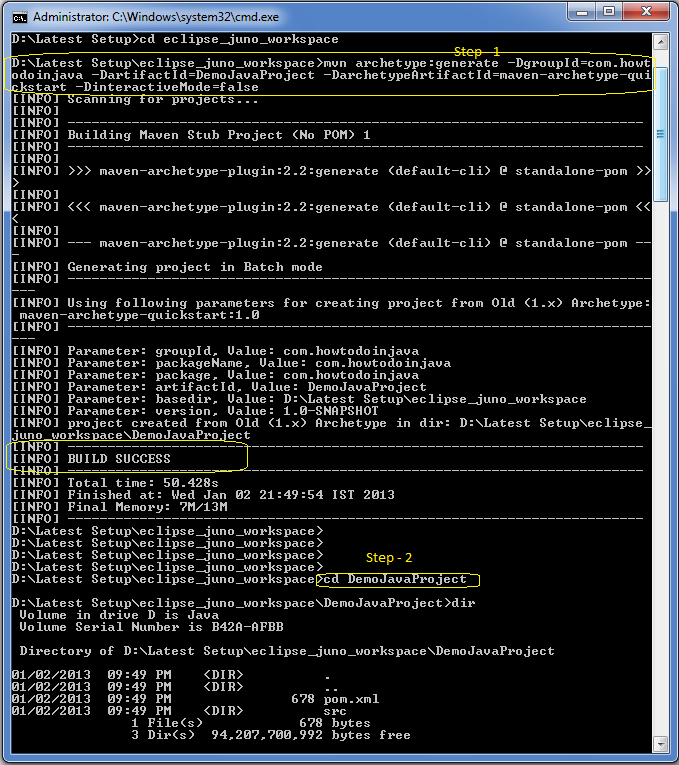
We can see in step 2, that the Java project has standard folders created and a default pom.xml has also been created in the project root.
2. Using Maven Interactive Mode
In interactive mode, We just need to start with “mvn archetype:generate” and the rest of the options will be specified using a wizard which will come one by one.
$ mvn archetype:generate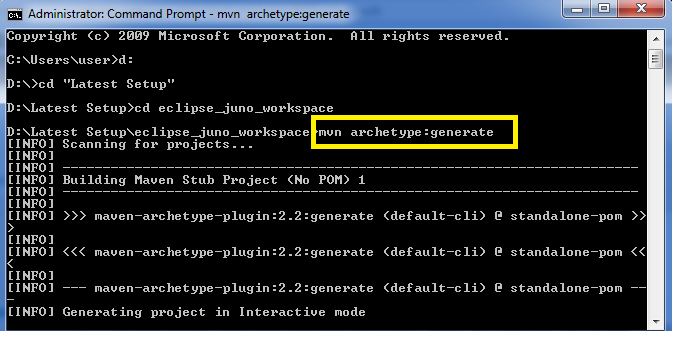
The wizard stops at where it will ask for archetypeArtifactId. Wizard will present us a list of numbers to choose from or filter among them (because the options list is very long).
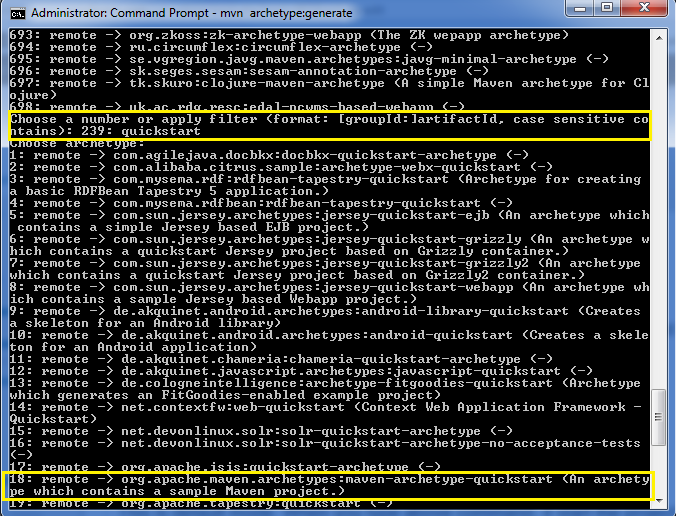
We need to choose option 18 for our simple java project.
Finally, choose the archetype version as 5 (or any other of your choice), and groupId as “com.howtodoinjava“.
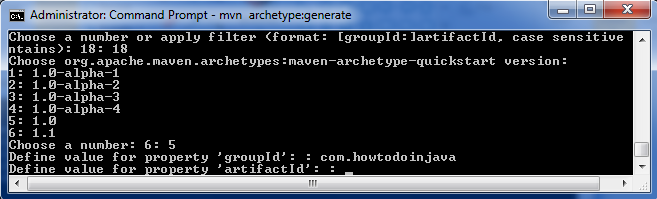
Finally, choose the artifactId that is the desired project name. Now, there will be some other options and confirmations. Answer them, and our project is ready.
We can see that our project is created with the default source folder and pom.xml file.
Happy Learning !!
Hi ,
I am getting below exception and i am not able to resolve :(
[ERROR] No plugin found for prefix ‘archetype’ in the current project and in the
plugin groups [org.apache.maven.plugins, org.codehaus.mojo] available from the
repositories [local (C:Userspraveena.m2repository), central (http://ipagbld0
5.snt.bst.bls.com:5125/nexus/content/groups/public)] -> [Help 1]
[ERROR]
[ERROR] To see the full stack trace of the errors, re-run Maven with the -e swit
ch.
[ERROR] Re-run Maven using the -X switch to enable full debug logging.
[ERROR]
[ERROR] For more information about the errors and possible solutions, please rea
d the following articles:
[ERROR] [Help 1]
orPrefixException
demojavaApp is created, but when I select file-import-General-Existing projects-select root dir- demojavaApp
No Projects are found to import , so what to do?
should I create jar file then import jar file , does that jar file gets extracted in to project by eclipse?
Rajendra, to add support for eclipse IDE You must run following command.
mvn eclipse:eclipse
Above command will create .project file which is needed by eclipse.