Learn to install Maven on a Windows operating system. In this maven installation guide, we are installing Maven on a Windows 11 machine. The steps are the same for a Windows 10 machine as well.
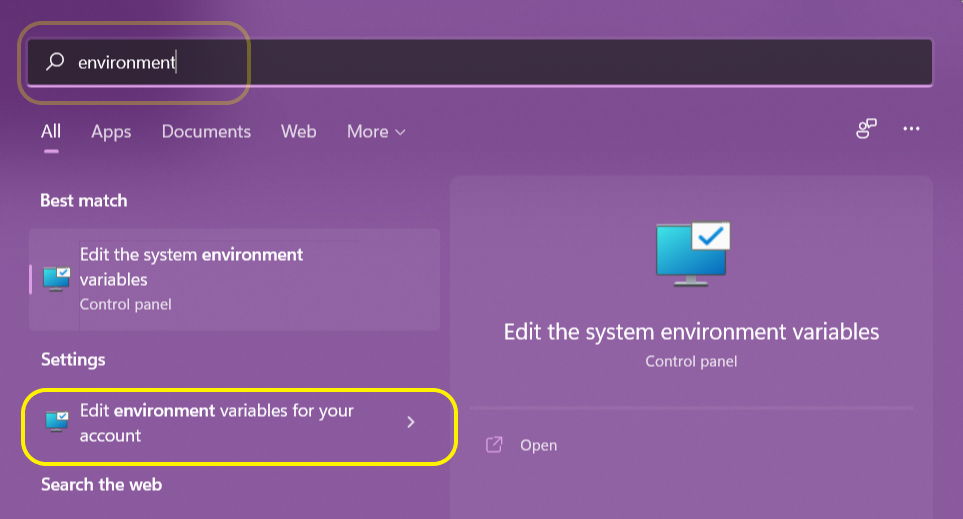
1. Windows Environmant Variables
Maven is a build and dependency management tool for Java applications development. Just like many other Java development tools, Maven is not installed as a Windows service, rather it is configured using the Windows environment variables.
2. Steps to Install and Configure Maven
Follow the steps needed to install maven on the windows operating system.
2.1. Verify Installed JDK and ‘JAVA_HOME’ Environment Variable
We must have Java installed on our computer and the JAVA_HOME must be set in the environment variables.
To install java, download JDK installer and install Java. Then add/update the JAVA_HOME variable to the JDK installation folder.
On my computer, JAVA_HOME is pointing to the JDK 17 installation folder.

2.2. Download and Extract Maven Zip File
We can download the latest version from Maven from the official website. Now we need to extract the downloaded zip file in any location.
I have extracted it on C:\devsetup\maven. You can choose your own folder location.
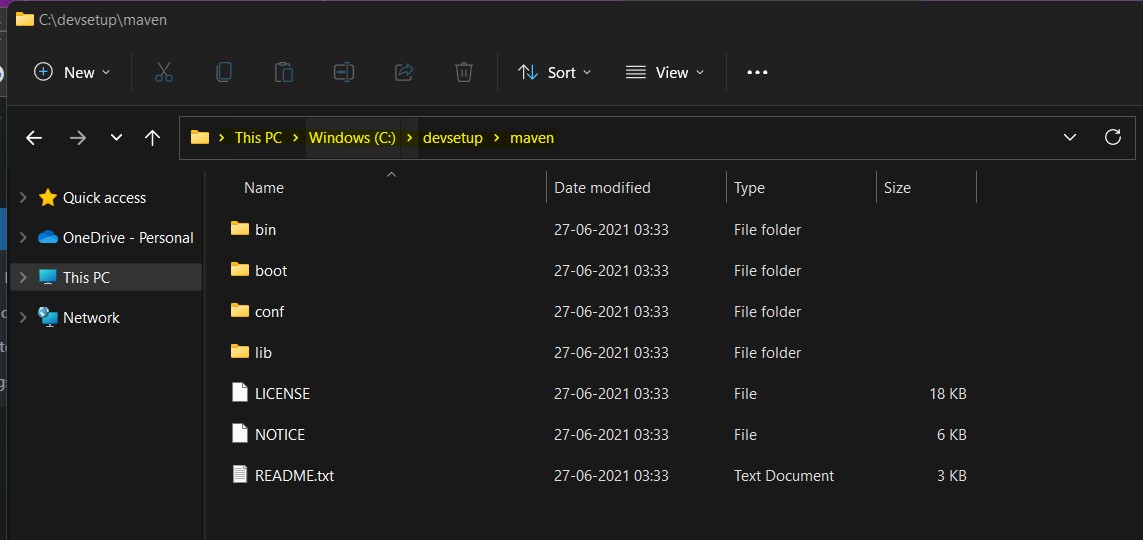
Let us briefly discuss what these directories contain:
- The
binfolder contains the batch files and shell scripts to run Maven on various platforms. - The
bootfolder contains the jars required for Maven to start. - The
conffolder contains the defaultsettings.xmlfile used by Maven. - The
libfolder contains the libraries used by Maven. It also contains anextfolder in which third-party extensions, which can extend or override the default Maven implementation, can be placed.
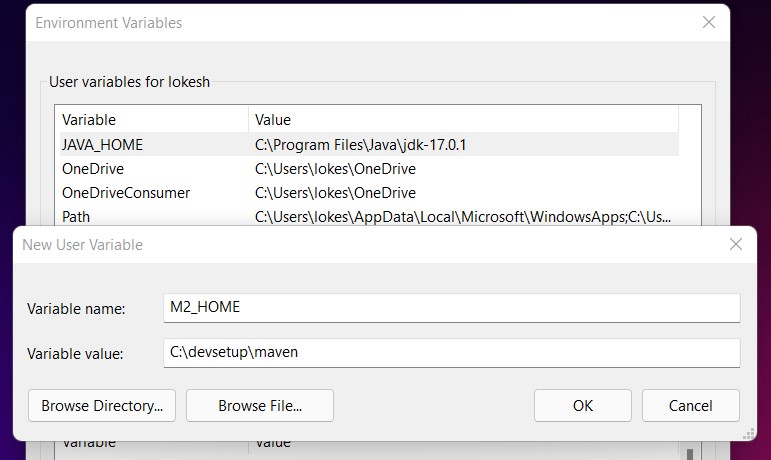
2.3. Add M2_HOME Environment Variable
Note
Since Maven 3.5.0, the environment variable M2_HOME is not used/supported anymore. We can skip the M2_HOME variable setup with the latest version of Maven.
Now add the M2_HOME to windows environment variables. The value will be the installation location on your computer.
Note that it is an optional step, yet it is highly recommended. Many external IDEs and tools rely on M2_HOME variable to work with Maven.
2.4. Include ‘bin’ directory in PATH Variable
To run Maven commands from the console, windows should be able to locate the Maven batch files. Update the PATH variable with '%M2_HOME%\bin' directory.

3. Verify Maven Installation
Maven installation is complete. Now, let’s test it from the windows command prompt.
- Go to start menu and type
cmdin application location search box. - Press
ENTER. A new command prompt will be opened. - Type
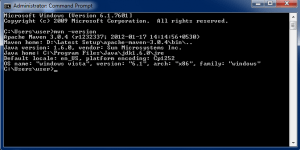
mvn -versionin command prompt and hitENTER.
$ mvn -versionThe mvn command runs this batch file mvn.bat from bin folder of the Maven installation location. That’s why we added the the location to PATH environment variable.
After checking JAVA_HOME and any optional arguments (Maven_OPTS), the batch file runs its main class org.codehaus.plexus.classworlds.launcher.Launcher.
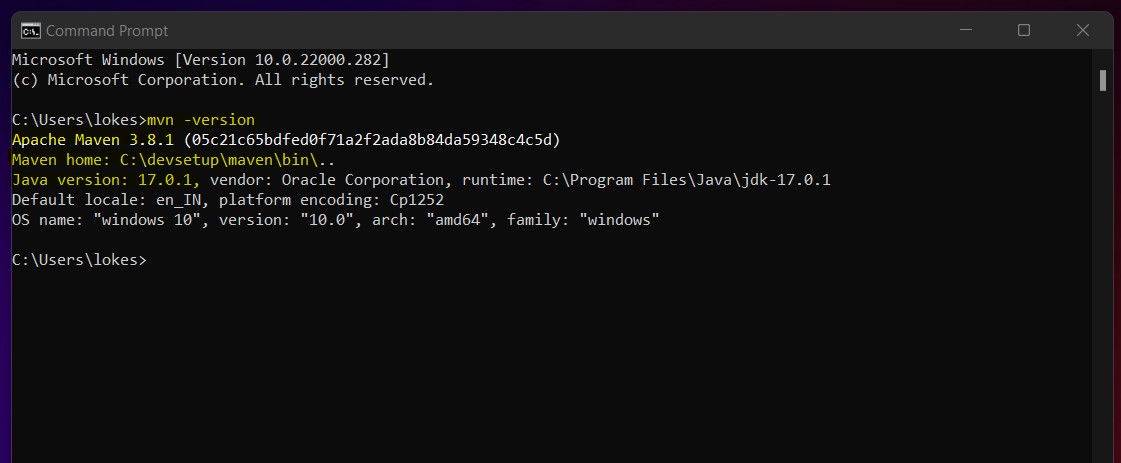
This should show the Maven version information, path to Maven bin folder and installed Java version.
If you face any error in the command prompt then please cross-check all the above steps.
Happy Learning !!
Hi, I already have nodejs path in path variable…so What I do for it? I need nodejs path too.
Please reply asap. Thanks
just put ; and paste the path
where did M2_HOME variable was set?
MAVEN_HOME is same as M2_HOME
Java and Maven installed properly but “‘mvn’ is not recognized as an internal or external command, operable command or batch file” error occur in cmd.
Maven
/binfolder should be inpathenvironment variable.I am not seeing Maven Dependency in Eclipse….any suggestion?
You will get some help from https://howtodoinjava.com/maven/maven-m2-repo-eclipse/
Also install maven plugin for eclipse.
could not find or load main class org.codehaus.plexus.classworlds. launcher error my system
I am using Windows 8
Jdk 8
maven 2 or maven 3? Try using variable M3_HOME instead of M2_HOME if you are using maven 3.
Hi i have downloaded apache-maven-3.6.2 on windows machine and followed same steps still its not working
Make sure, you verify the maven command in “new command prompt window” if there is already any opened prompt.
I entered
maven_home,java_homeandpathbut still not execute on cmd.After updating environment variables, open a new command prompt window to test it.
HI , Firstly thanks for your blog n tutorials. Nicely explained How to configure Maven in window environment.
Hi Lokesh,
Its very good article, if you post how to install maven on other OS then its sounds better.
Thanks