This beginner’s guide will discuss the installation of the Keycloak authorization server as a docker container and different configurations for setting up the realm and testing the authorization token flow.
1. Introduction to Keycloak?
1.1. What is Keycloak?
Keycloak is an open-source Identity and Access Management (IAM) system. It is designed to handle large-scale projects with millions of users, making it an ideal choice for enterprise-level applications. One of Keycloak’s key features is the ability to provide customizable login/register pages that can be seamlessly integrated with any application. There is also no need to deal with storing users or writing code for authenticating users.
Additionally, Keycloak simplifies processes such as password recovery, profile editing, and OTP (One Time Password), making it unnecessary for developers to write thousands of lines of code to implement these features. With Keycloak, these processes can be integrated with just a few clicks.
1.2. OAuth2 with Keycloak
Keycloak acts as an OAuth2 authorization server, issuing access tokens and verifying them on subsequent requests. By using Keycloak for OAuth2, developers can simplify the implementation of authentication and authorization in the applications, allowing them to focus on the core functionality of their applications.
Additionally, Keycloak provides other features, such as Single Sign-On (SSO), social login and customizable user interfaces, which can further simplify the development process.
1.3. Terminology
Here are some of the key terms we should know:
- Client: A client is an application that uses Keycloak for authentication and authorization. In other words, a client is a consumer of the Keycloak security services. Keycloak supports several types of clients, including web applications, mobile applications, and REST APIs.
- User: A user is a person who accesses a client application. Keycloak manages user authentication and authorization using different methods like passwords, social login, or two-factor authentication.
- Role: A role is a set of permissions that can be assigned to users and groups. Roles help manage and control access to resources within Keycloak.
- Group: A group is a collection of users that share a common set of permissions or roles. Groups can be used to manage and grant access to resources, such as applications or APIs.
- Realm: A realm is a container for your clients (Application ). It is a self-contained security domain where all the components of the security model (users, groups, roles, clients, etc.) reside. Each realm has its own set of security policies, configuration, and authentication mechanisms.
2. Installation
To install Keycloak on Docker, you can follow these steps:
- Install Docker on your system if you haven’t already.
- Pull the Keycloak image from Docker Hub using the following command:
docker pull quay.io/keycloak/keycloak:latestThis command will pull the latest image from the docker hub and install on your machine.
3. Start the Keycloak Server
We can start the Keycloak server in two modes:
- Development Mode
- Production Mode
3.1. In Development Mode
In development mode, Keycloak provides additional features to help with development and testing, such as live reloading of configuration changes, simplified logging, and automatic database schema generation. Dev mode is intended for use in a development environment only and should not be used in production.
The following command will start a new container named “keycloak_server” and expose port 8180 (default port is 8080) on the host system, which is used to access Keycloak. It also sets the Keycloak admin username as “admin” and password as “password“.
docker run --name keycloak_server -p 8180:8180 \
		-e KEYCLOAK_ADMIN=admin \
		-e KEYCLOAK_ADMIN_PASSWORD=password \
		quay.io/keycloak/keycloak:latest \
		start-dev \
		--http-port=8180
3.2. In Production Mode
In production mode, Keycloak provides better performance and security features. It is recommended to use Keycloak in conjunction with other technologies such as load balancers, databases, and caches to ensure high availability and performance.
The following command starts the Keycloak server in production mode using the specified
docker run --name keycloak_server -p 8180:8180 \
        -e KEYCLOAK_ADMIN=admin \
        -e KEYCLOAK_ADMIN_PASSWORD=password \
        quay.io/keycloak/keycloak:latest \
        start \
        --auto-build --hostname=my-keycloak-host.com \
        --db=postgres --features=token-exchange \
        --db-url=<JDBC-URL> \
        --db-username=<DB-USER> --db-password=<DB-PASSWORD> \
        --https-key-store-file=<file> --https-key-store-password=<password>
        --http-port=8180
To test the above server configuration options in a local machine, we can pass ‘–http-enabled=true‘ and ‘–db=dev-mem‘ parameters that will enable the HTTP protocol support, and configure an in-memory database.
docker run --name keycloak_server -p 8180:8180 \
        -e KEYCLOAK_ADMIN=admin \
        -e KEYCLOAK_ADMIN_PASSWORD=password \
        quay.io/keycloak/keycloak:latest \
        start \
        --auto-build \
        --db=dev-mem --hostname localhost:8080 --http-enabled true \
        --hostname-strict-https false
        --http-port=8180
3.3. Importing an Existing Realm using Docker Compose
If we have an existing realm configuration JSON file, we can use the docker-compose to import it into the started server. Suppose, we have the realm file /home/keycloak/howtodoinjava-realm.json.
Use the following compose file to specify the realm file:
services:
  auth:
    image: quay.io/keycloak/keycloak:latest
    ports:
      - "8180:8180"
    environment:
      KEYCLOAK_ADMIN: admin
      KEYCLOAK_ADMIN_PASSWORD: password
    command:
      - start-dev
      - --http-port=8180
      - --import-realm
    volumes:
      - /home/keycloak/howtodoinjava-realm.json:/opt/keycloak/data/import/howtodoinjava-realm.json
To start Keycloak, simply run the command in the directory where we placed the above file:
docker-compose up4. Server Configurations
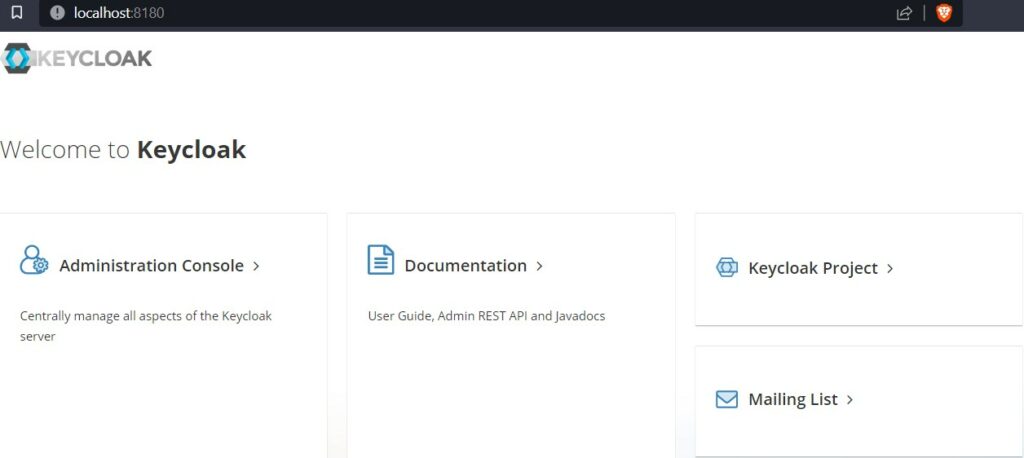
We have started the server in port 8180, so open the URL http://localhost:8180/ in the browser.
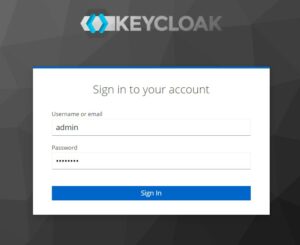
Click on Administration Console link that will present the login page.
Enter the username and password as ‘admin’ and ‘password‘. Click Sign In.
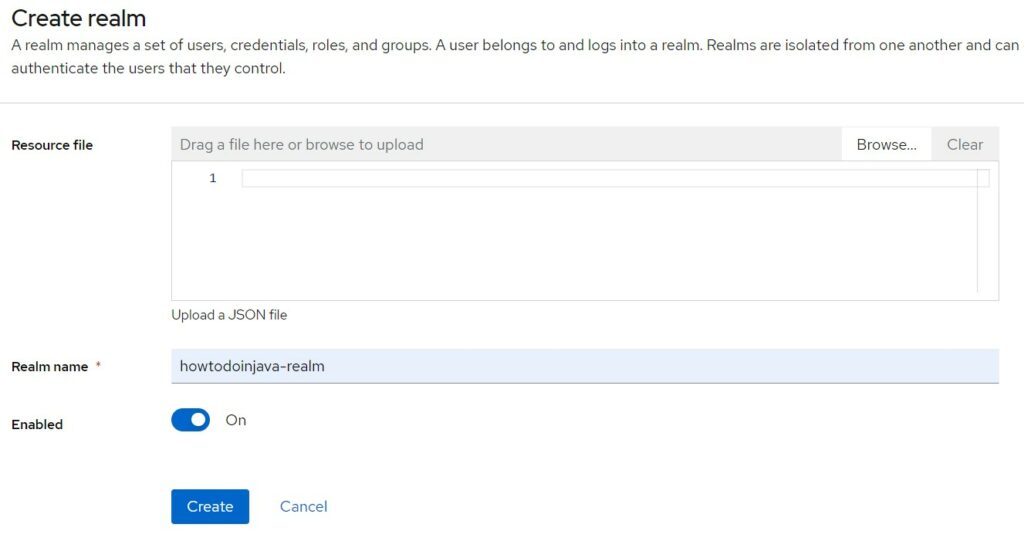
4.1. Create a New Realm
In Keycloak, a realm is a container for a set of users, credentials, and applications. It is a logical and independent partition within the Keycloak server where all the configuration settings and security policies can be defined for a specific set of users and applications.
Keycloak, by default, creates the master realm. We can add a realm by opening the drop-down in the top left corner and pressing “Create Realm“.
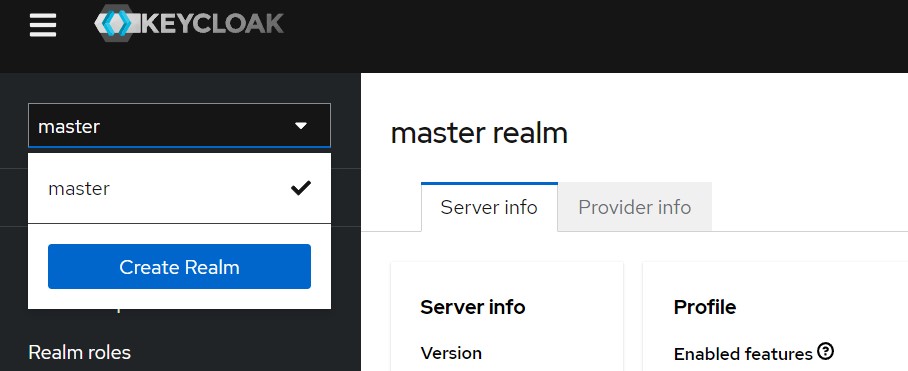
Fill in the desired name for the realm and press Create.
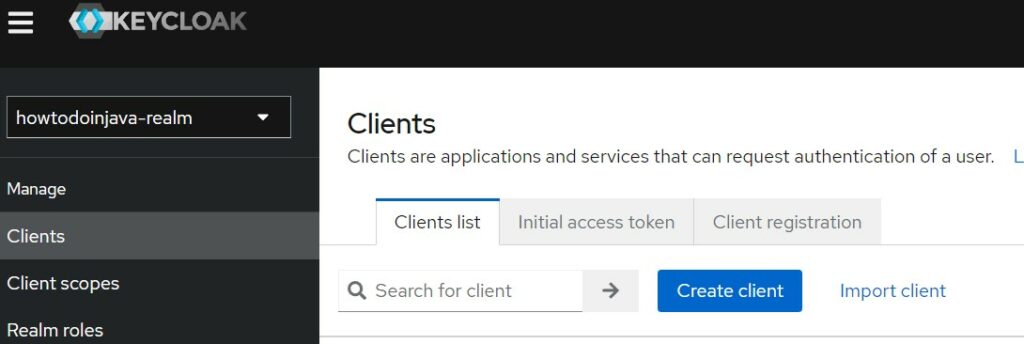
4.2. Add a Client
A client is a representation of a resource that is protected by Keycloak. This resource can be a web application, mobile application, or any other type of application that requires authentication and authorization.
When a user tries to access a protected resource within a client, the client sends a request to Keycloak for authentication and authorization. Keycloak then responds with a token that contains the user’s identity and any associated roles, which the client can use to grant or deny access to the requested resource.
Add a new client by accessing the menu option “Clients” in the left panel. Press the “Create Client” button.
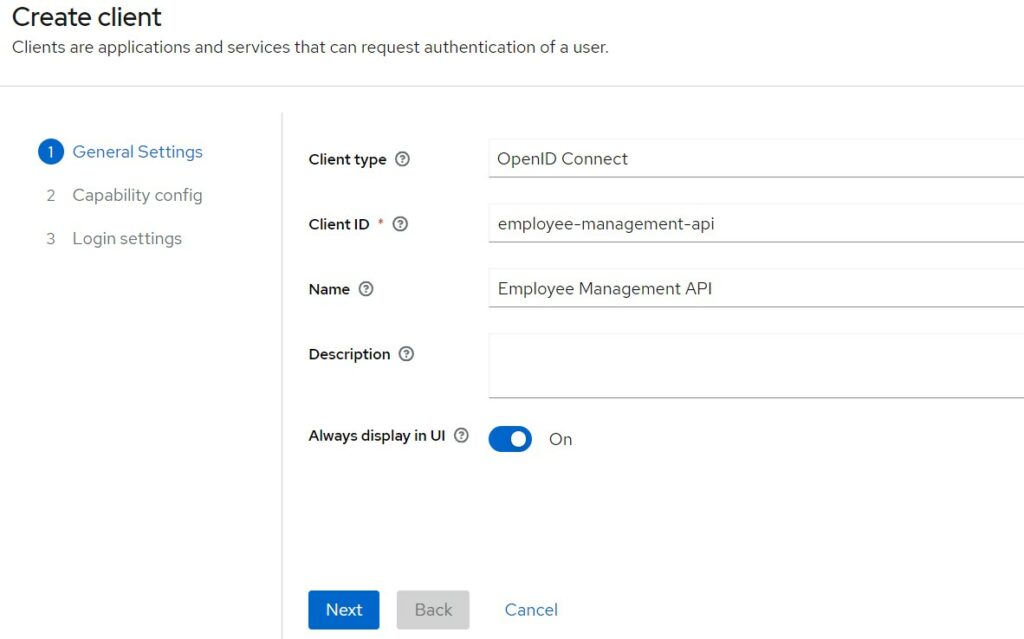
Fill in the client id and name. Click Next.
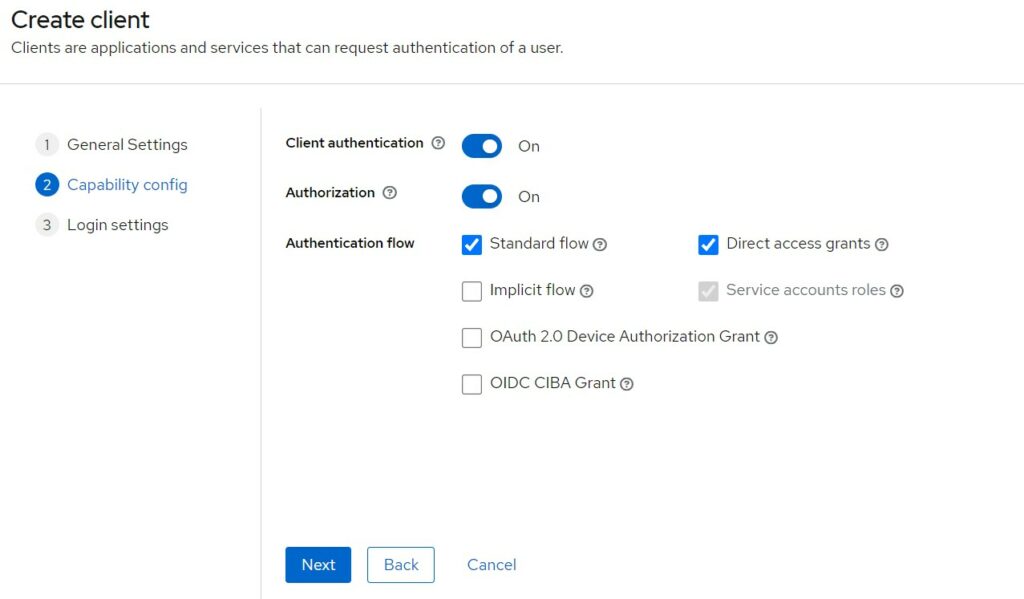
Choose the appropriate capabilities. Click on the tooltips to get additional help on different options.
Fill in the client applications root URL, redirect URLs etc.
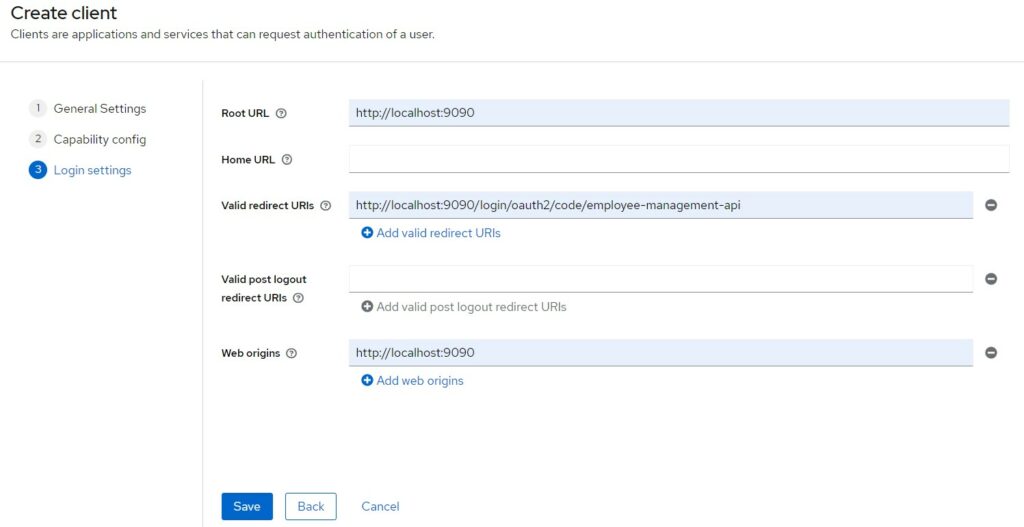
There are more settings, in other tabs, you can check out and configure as necessary.
Note down the Client secret from “Credentials” tab. It will be used to request the access token by the clients.
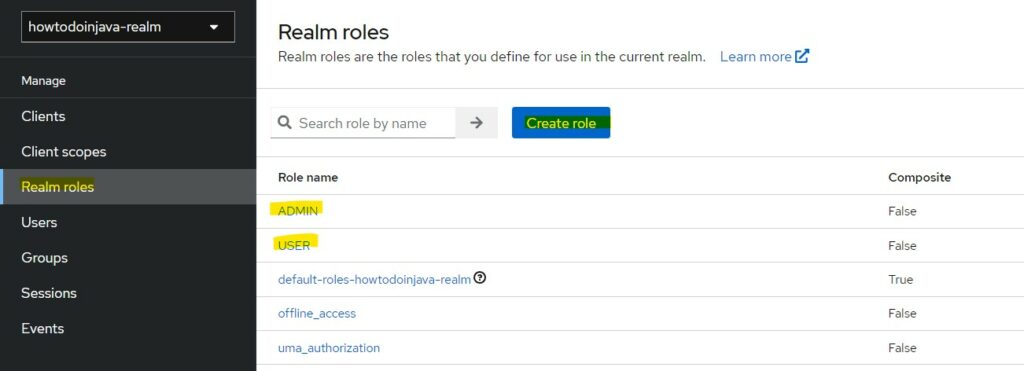
4.3. Create Roles
Next, we can add custom roles that will be used for authorization purposes for a user. We are creating two roles “USER” and “ADMIN”.
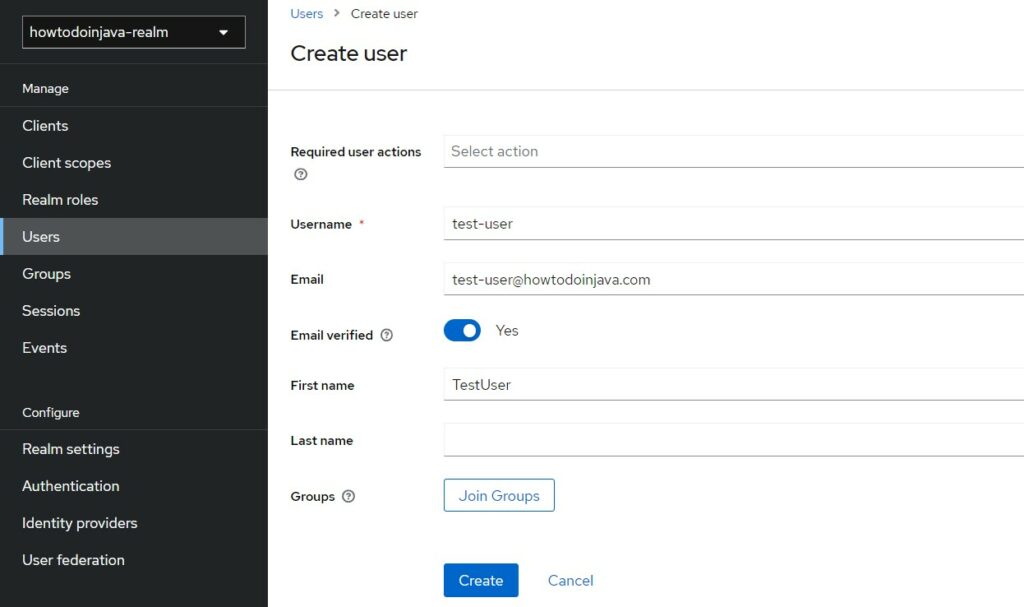
4.4. Create Users
Users are the actual users of the application and provide the username and password to authenticate. They are the resource owners trying to access the protected resources.
To create a new user, click on “Users” option in the left panel, and fill in the details.
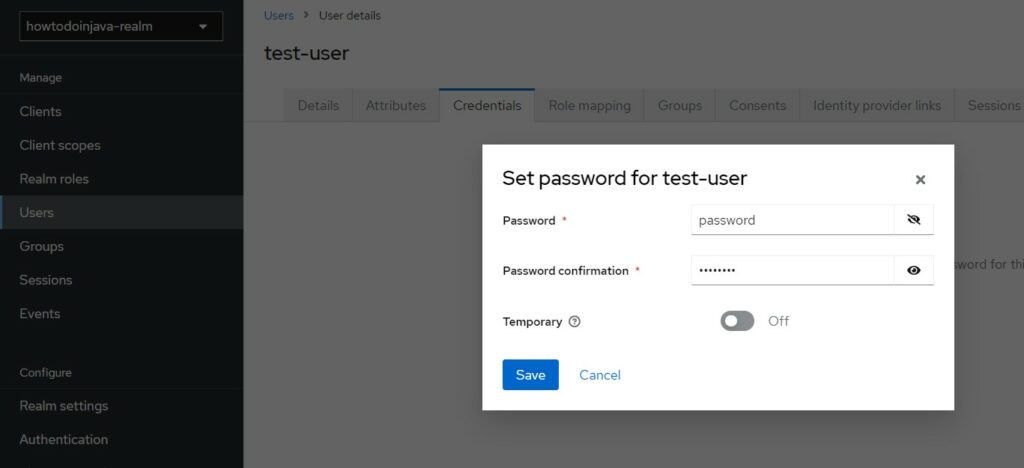
If we are using username/password based authentication, we need to set the password in the “Credential” tab. To keep things simple, I am using “password” value in all password fields.
At this step, we can map the user’s role as well in the “Role Mapping” tab.
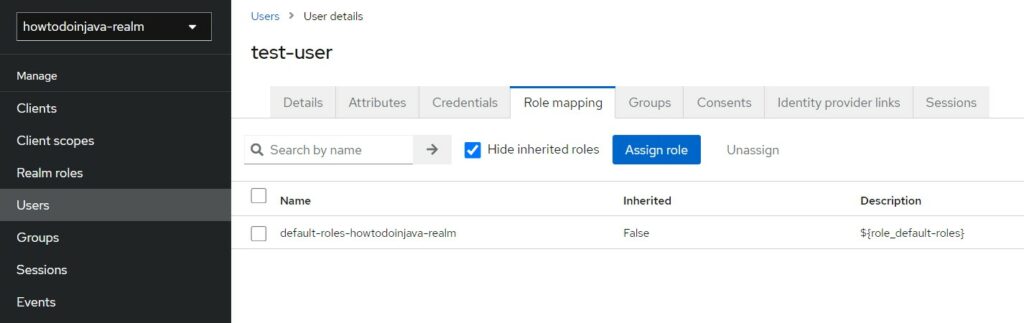
Select the appropriate role(s) and click “Assign”.
Similarly, create a new user “test-admin” with “Admin” role.
5. Test
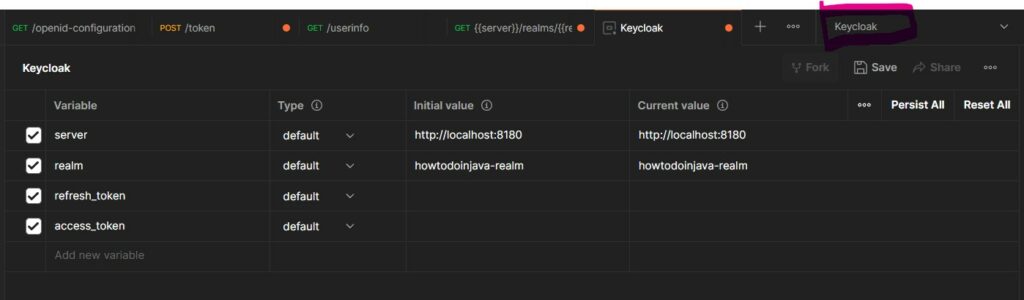
Let us test the different configurations, authentication and authorizations in Postman. To avoid writing the commonly used values, we can add an Environment in Postman.
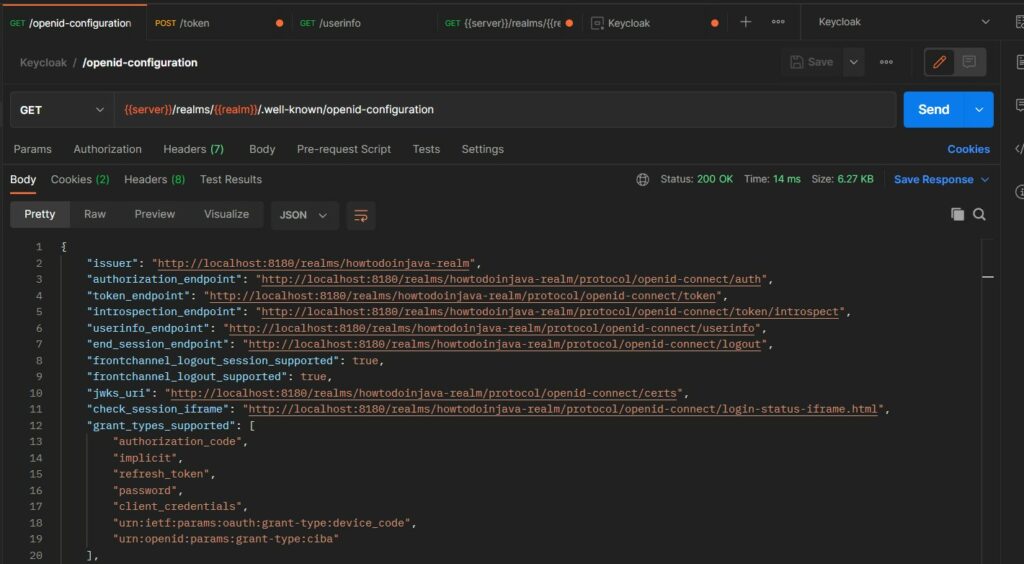
5.1. OpenID Configuration
Start with checking the OpenID Connect (OIDC) configuration at the url: {{server}}/realms/{{realm}}/.well-known/openid-configuration. This configuration for a Keycloak client contains information about how the client can authenticate and authorize users using OIDC.
The configuration typically includes the issuer URL, authorization endpoint, token endpoint, userinfo endpoint and supported response types, subject types, claims and scopes.
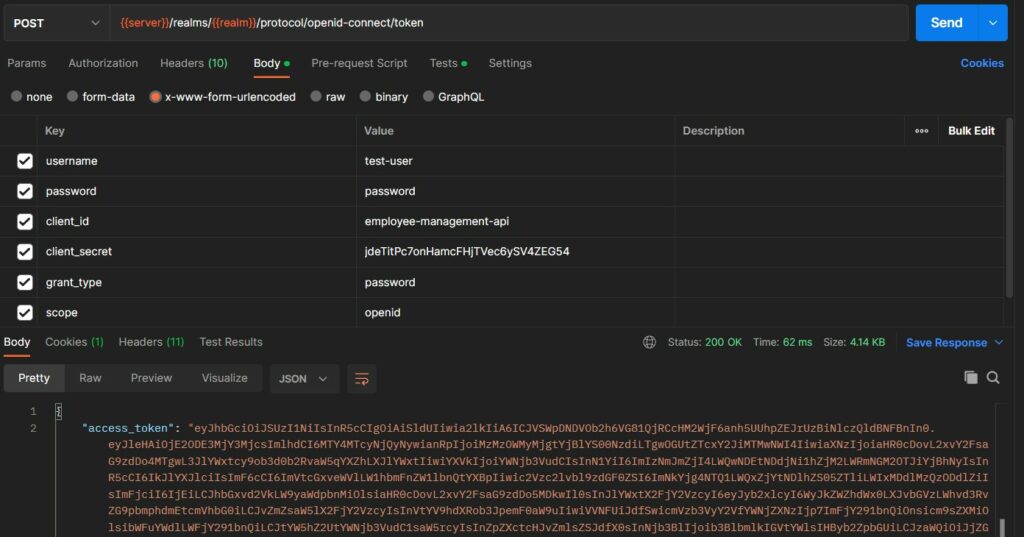
5.2. Requesting Authentication Token
To get the token, we need to send an HTTP POST request to the token URL as noted down in the OIDC configuration response i.e. http://localhost:8180/realms/howtodoinjava-realm/protocol/openid-connect/token.
The following HTTP headers should be included in the request.
HTTP POST: {{server}}/realms/{{realm}}/protocol/openid-connect/token

username: test-user
password: password
client_id: employee-management-api
client_secret: jdeTitPc7onHamcFHjTVec6ySV4ZEG54
grant_type: password
scope: openid
In response, we get the following response structure.
{
    "access_token": "eyJhbGciOiJS...",
    "expires_in": 300,
    "refresh_expires_in": 1800,
    "refresh_token": "eyJhbGciOiJI...",
    "token_type": "Bearer",
    "id_token": "eyJhbGci...",
    "not-before-policy": 0,
    "session_state": "cdb88545-d1f6-49ae-9e9b-b107e34387ef",
    "scope": "openid email profile"
}
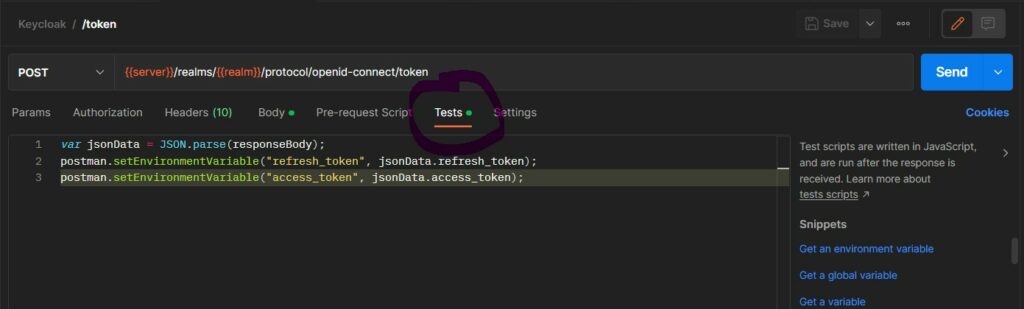
We can run a test script in Postman that will populate the access_token and refresh_token to the environment variables that we defined at the start of this section.
var jsonData = JSON.parse(responseBody);

postman.setEnvironmentVariable("refresh_token", jsonData.refresh_token);
postman.setEnvironmentVariable("access_token", jsonData.access_token);
This script will be executed everytime after we fetch the token and populate the variables. We can not use the variables in other tabs without manually copying the tokens everytime.
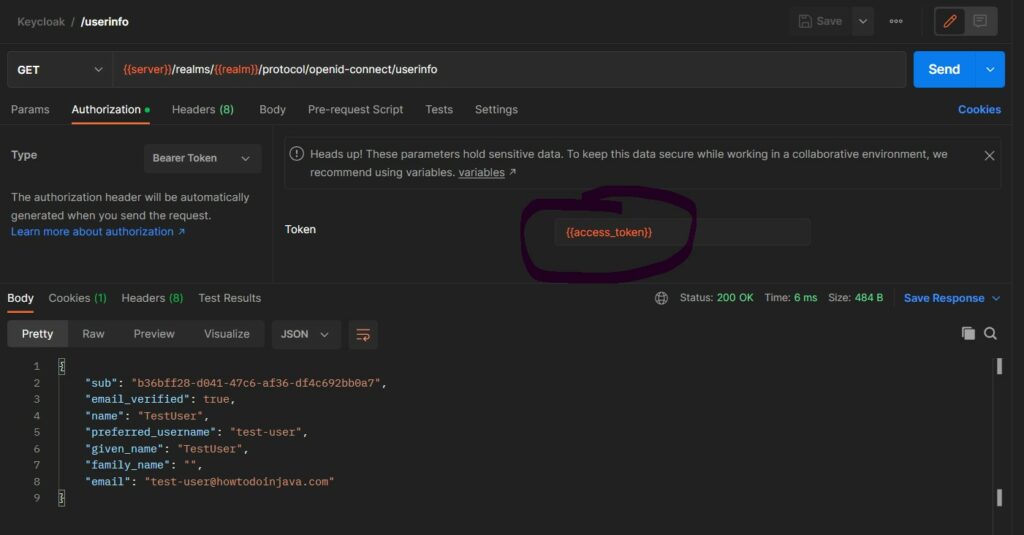
5.3. Access User Information
The user information is a protected resource. We must pass the access token in Authorization header to fetch the information. Let us test it by sending a GET request to /userinfo endpoint as noted in the OIDC configuration response.
6. Conclusion
In this Keycloak tutorial, we learned to install keycloak as a Docker container, run the container in development and production modes and create a new Realm with all its configuration options. Then we tested the created realm and fetched the access token through Postman for demo purposes.
Happy Learning !!
Thanks for this article, I’m kind of stuck at the openid configuration. Can I get more details into what needs to be done