Sublime Text is a popular code editor known for its simplicity and extensibility. One of its key features is the ability to install and manage packages, which enhances its functionality for different programming languages and tasks such as syntax highlighting definitions, menus, snippets and more. Sublime Text ships with several pre-installed packages, and we can install more on demand.
In this article, we’ll walk through the process of installing Python packages in Sublime Text using the Package Control Manager.
1. Installing Sublime Package Control, If Not Installed
Before we begin, Make sure we have Sublime Text installed on the system. You can download it from the official website.
First, download the package control for the sublime editor. Go to the URL: https://packagecontrol.io/installation#st3

Now note down the location of the folder where packages are installed in the sublime editor. We can find the location by clicking on Preferences > Browse Packages.

By default, packages are stored in ‘.sublime-package‘ files, which are zip files with a different extension.
Save the downloaded file from the package control website by clicking “Package Control.sublime-package” link, and place it inside the folder located in the second step.
Now restart the sublime editor by closing it and then opening it again.
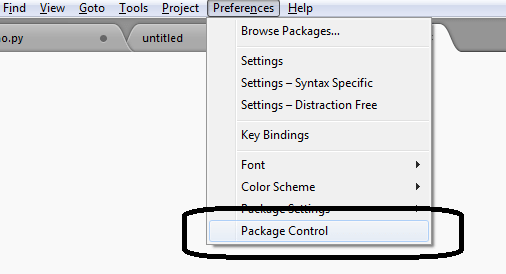
To verify the package control is installed correctly, click on ‘Preferences > Package Control‘ menu item. It should open up the package control window.
2. Installing Python 3 with Package Control
Now, after installing the package control, go to Preferences > Package Control. We can also use the keyboard shortcuts i.e. press Ctrl + Shift + P (Windows/Linux) or Cmd + Shift + P (macOS) to open the command palette.
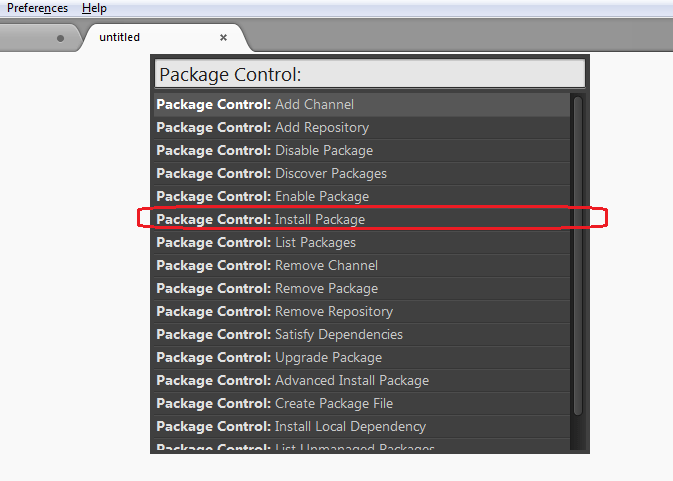
Choose “Package Control: Install Package” and select it from the list of options.
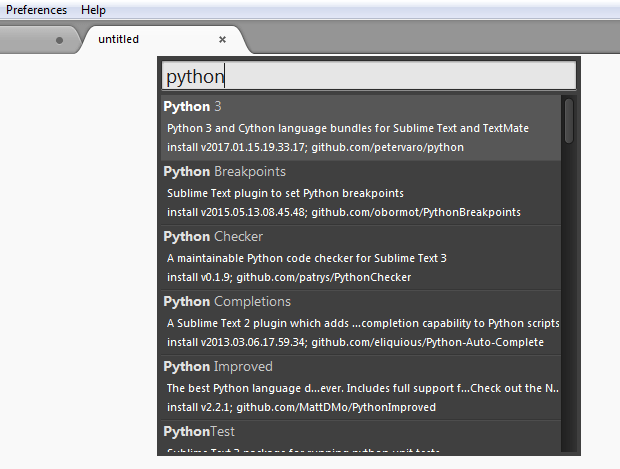
In the opened window, type ‘python‘ to filter the list of packages related to Python only. Choose the desired version of Python from here. Select it from the dropdown.
Package Control will download and install the selected package. We can see a status message in the Sublime Text console indicating the progress of the installation.

Wait for a few seconds, and the Python package will be installed into the sublime editor.
In some cases, we may need to restart Sublime Text to activate the newly installed package. If prompted, go ahead and restart the editor.
3. Verify Python Autocomplete and Build
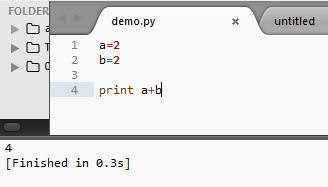
To verify Python support, again restart the IDE. Create a file with a name demo.py. Type a few simple commands like print. It should open the autocomplete window.
Now type a simple hello world code, and enter CTRL + B on the keyboard. It will open the output output window in the bottom pane and will show the build output of the commands in the demo.py file.
Now you are ready to create and build Python programs using sublime editor.
4. Popular Python Packages for Sublime Text
Here are a few common use cases for Python packages in Sublime Text:
Anaconda: It is a powerful package for Python developers in Sublime Text. It provides features like code autocompletion, linting, code formatting, and debugging.
SublimeREPL: It runs Python (and other languages) code directly within Sublime Text. It’s a great tool for interactive coding and testing.
GitSavvy: is a powerful Git integration package for Sublime Text. While not Python-specific, it’s incredibly useful for Python developers who work with version control.
Jedi: It is a Python autocompletion package for Sublime Text. It provides intelligent code autocompletion and assists with function signatures, docstrings, and more.
Happy Learning !!