
TestNG, where NG stands for “Next Generation” is a test automation framework inspired by JUnit (in Java) and NUnit (in C#). TestNG can be used for unit testing, functional testing, integration testing, and end-to-end testing.
TestNG has gained a lot of popularity quickly and is one of the most widely used testing frameworks among Java developers. It mainly uses Java annotations to configure and write test methods, much similar to JUnit.
1. Installing TestNG into Eclipse
Before we can download and start using TestNG, we should have a minimum of Java 8 or above installed on our system.
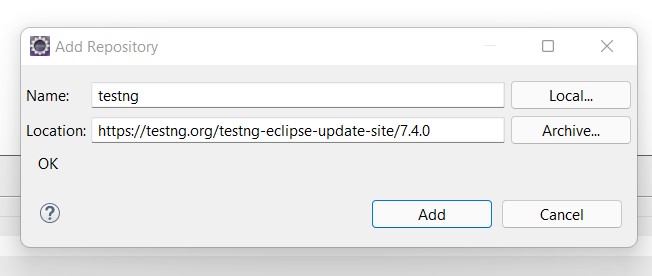
Copy the latest update URL from the update site.
Use the above URL to install TestNG support in Eclipse. Go to the option: Help > Install New Software.
Click Add button and choose the required components to be installed.
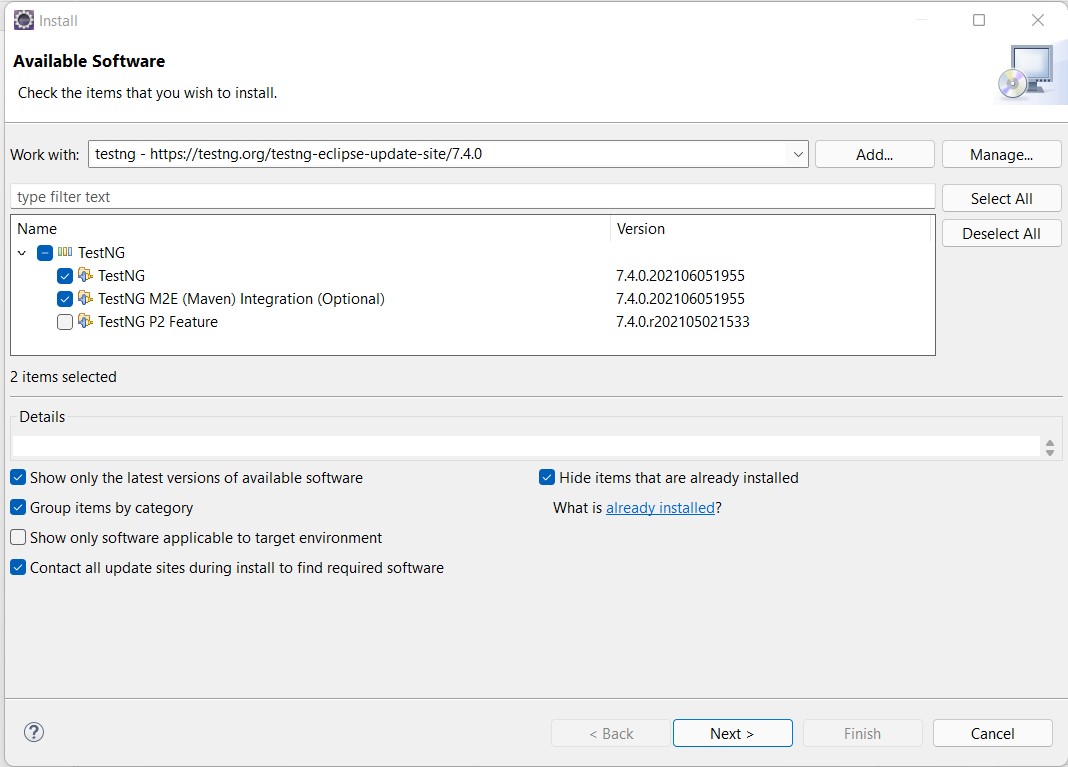
Agree with any license agreement if asked. TestNG Support will be installed in the next few minutes in the Eclipse IDE.
It may ask to restart the IDE after finishing the installation. Please restart.
2. TestNG Dependency
Before writing our first TestNG test, we have to create a Java project in Eclipse and include our TestNG dependencies.
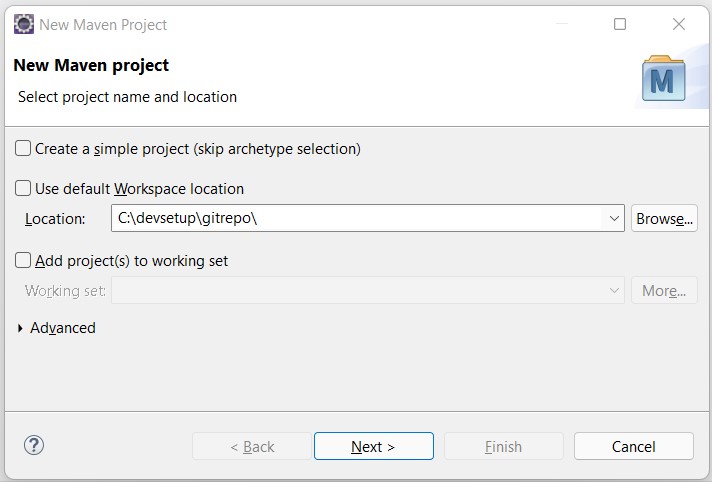
Go to File | New | Other. A window with multiple options will be shown.
Select New Maven Project as shown in the following screenshot and click on Next.
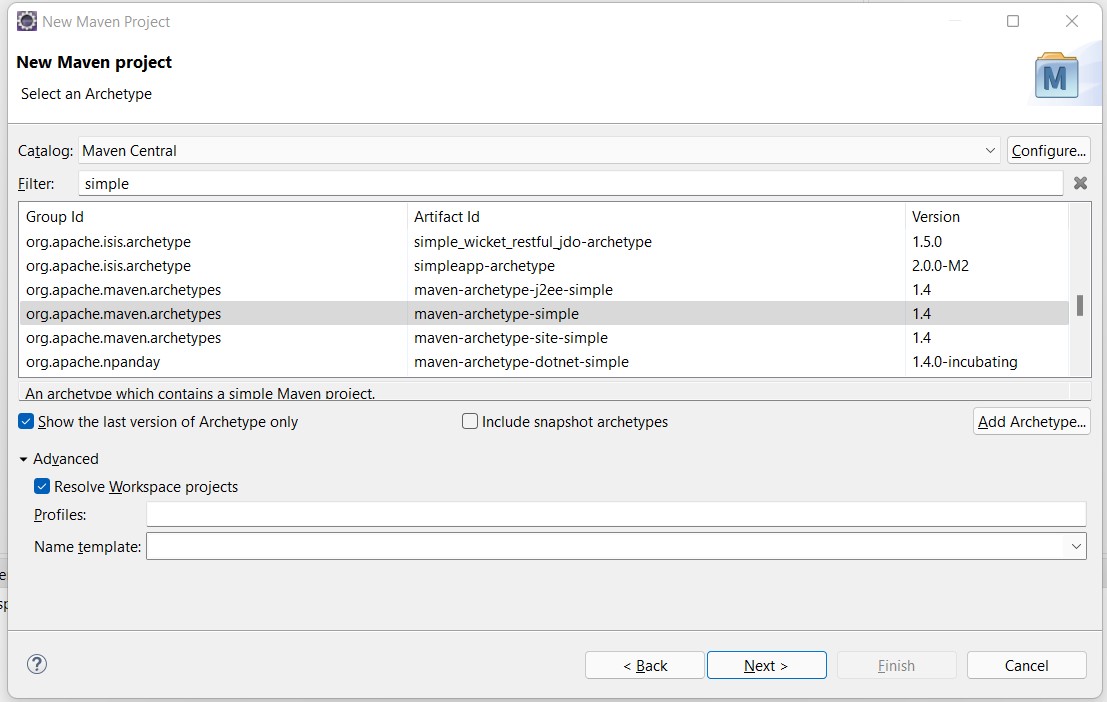
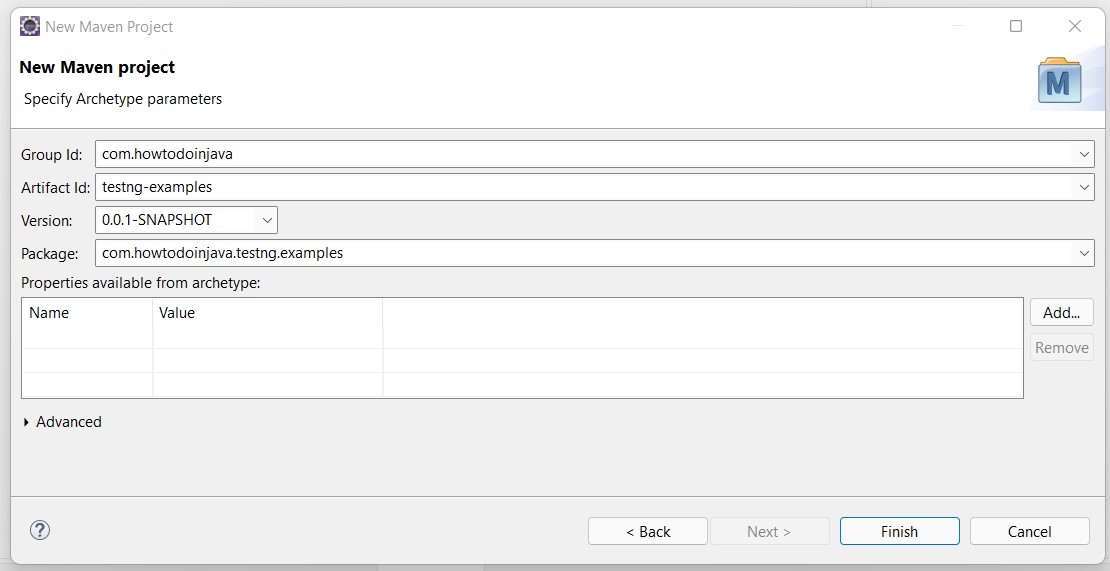
Select the appropriate maven archetype.
Fill in the project’s Maven coordinates.
By default, Maven includes the Junit dependency in pom.xml file. We need to remove the JUnit dependency and include the latest TestNG dependency.
<dependency>
	<groupId>org.testng</groupId>
	<artifactId>testng</artifactId>
	<version>7.4.0</version>
	<scope>test</scope>
</dependency>
Now we are good to write our tests using TestNG.
3. Creating Our First TestNG Test
Before this, you may delete any existing auto-creating JUnit test class, if any. Now, perform the following steps to create our first TestNG class:
1. Go to File | New | Other. This will open a new Add wizard window in Eclipse.
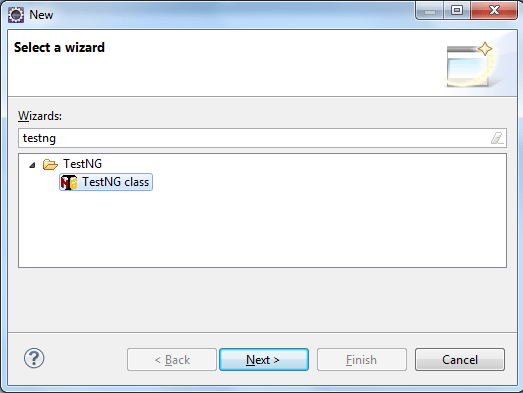
2. Select TestNG class from the Add wizard window and click on Next.
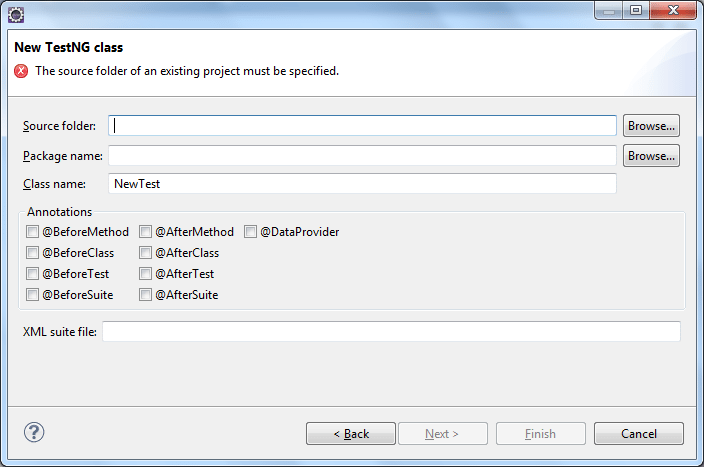
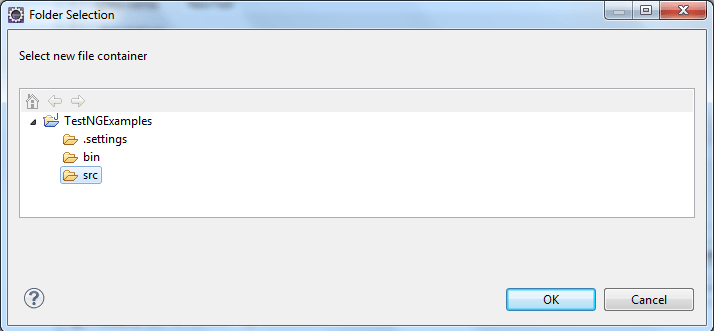
3. On the next window click on the Browse button and select the Java project where you need to add your class.
4. Enter the package name and the test class name and click on Finish.
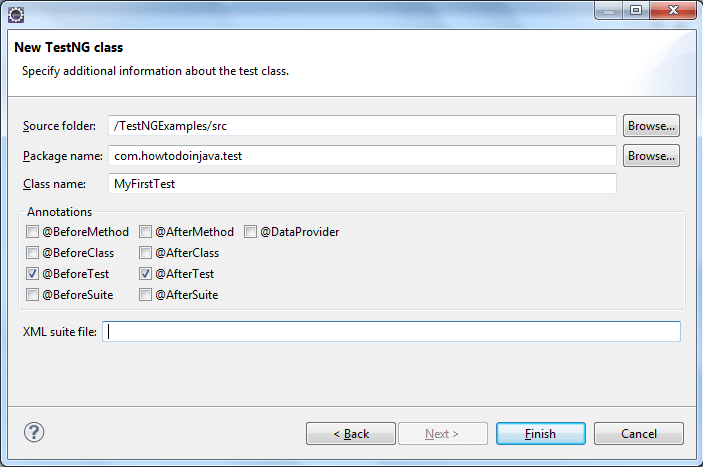
5. This window also gives you an option to select different annotations while creating a new TestNG class. If selected, the plugin will generate dummy methods for these annotations while generating the class. This will add a new TestNG class to our project.
package com.howtodoinjava.testng.examples;

import org.testng.annotations.Test;
import org.testng.annotations.BeforeTest;
import org.testng.annotations.AfterTest;

public class AppTest
{
  @Test
  public void f() {
  }

  @BeforeTest
  public void beforeTest() {
  }

  @AfterTest
  public void afterTest() {
  }
}
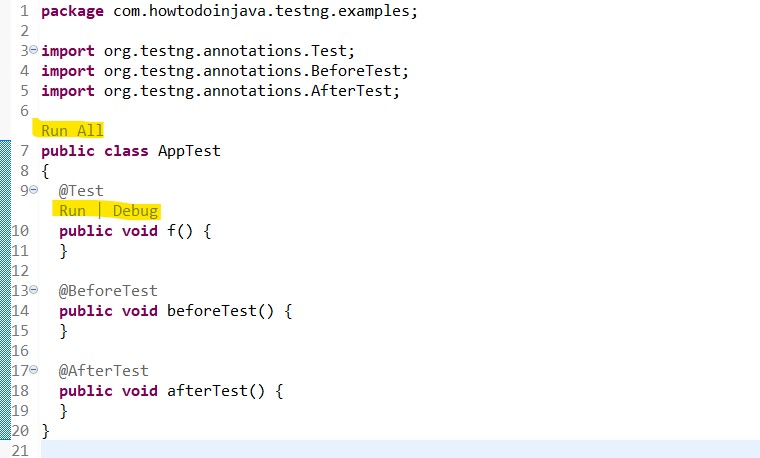
We have successfully added a new TestNG test class to the newly created Java project in Eclipse. Feel free to modify the code as needed. Now let’s run the newly created test class through Eclipse.
4. Executing TestNG Tests
4.1. Shortcut Options
Notice the test class in Eclipse IDE. You will see a few blurred texts as “Run All” or “Run | Debug“. These are the shortcuts we can use to run or debug a single test method or test class with a simple mouse click.
If you do not see the above shortcuts for any reason, then please follow the given steps to create the testNG run configuration and execute it.
4.2. Create Run Configuration
Perform the following steps to run tests through Eclipse:
1. Select the Java project in Eclipse and go to Run | Run Configuration.

2. Select TestNG in the given options and click on the New button to create a new configuration.
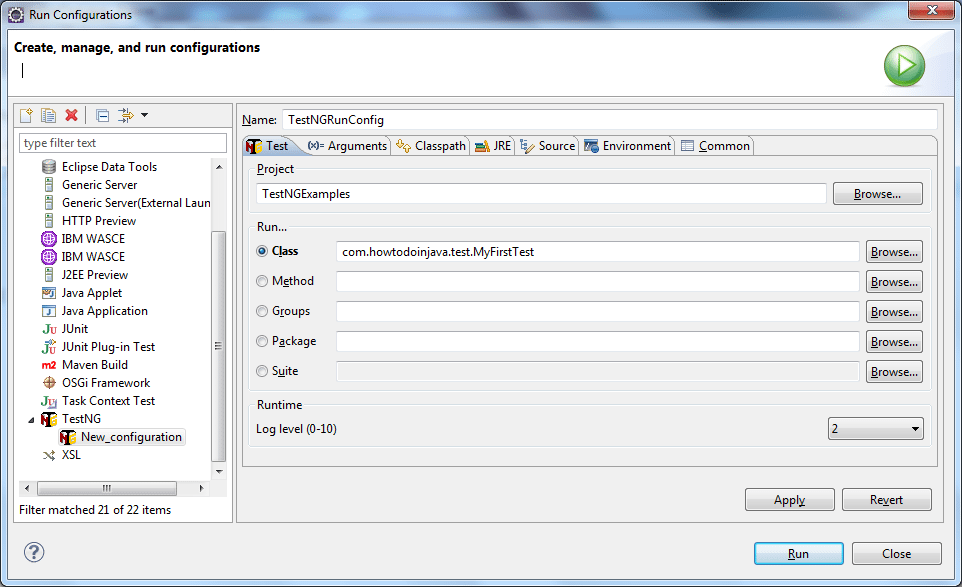
3. Please notice that TestNG plugin provides multiple options for running your test cases as follows:
- Class: Using this option you can provide the class name along with the package to run only the said specific test class.
- Method: Using this you can run only a specific method in a test class.
- Groups: In case you would like to run specific test methods belonging to a particular TestNG group, you can enter those here for executing them.
- Package: If you would like to execute all the tests inside a package, you can specify these in this box.
- Suite: In case you have suite files in the form of
testing.xmlfiles, you can select those here for execution.
Let’s enter the configuration name as TestNGRunConfig and select the newly created class under the Class section and click on Apply.
4. Now if you would like to run the newly created configuration, just click on Run after clicking on Apply.
This will compile and run the TestNG test class that we have written. The result of the test execution is displayed in the Console and Results in windows of Eclipse as shown in the following screenshot.
[TestNG] Running:
C:\Users\somelocalpath\testng-customsuite.xml
PASSED: f
===============================================
Default test
Tests run: 1, Failures: 0, Skips: 0
===============================================
===============================================
Default suite
Total tests run: 1, Failures: 0, Skips: 0
===============================================
[TestNG] Time taken by org.testng.reporters.XMLReporter@177b3cd: 23 ms
[TestNG] Time taken by [FailedReporter passed=0 failed=0 skipped=0]: 0 ms
[TestNG] Time taken by org.testng.reporters.jq.Main@b8deef: 46 ms
[TestNG] Time taken by org.testng.reporters.JUnitReportReporter@10ab323: 12 ms
[TestNG] Time taken by org.testng.reporters.EmailableReporter2@5e176f: 13 ms
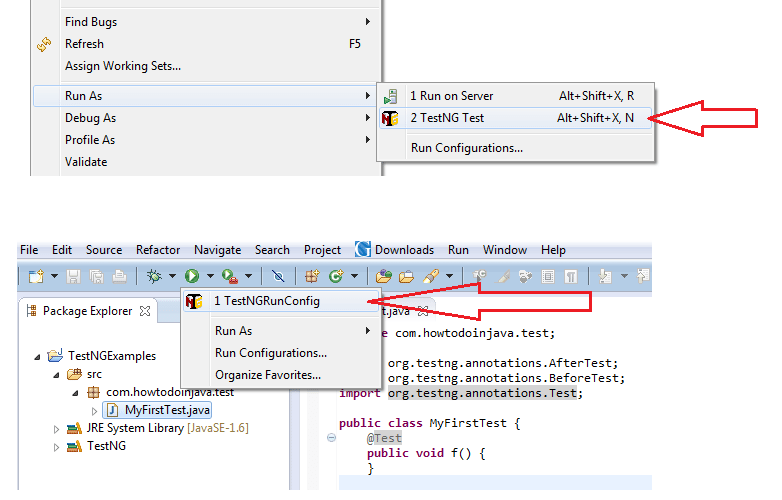
[TestNG] Time taken by org.testng.reporters.SuiteHTMLReporter@d1e89e: 142 msYou can also run the test class by selecting it and then right-clicking on it, selecting Run as from the menu, and then choosing TestNG Test.
In this TestNG Eclipse tutorial, we learned about TestNG, features offered by TestNG, installing the TestNG plugin into Eclipse and writing and executing TestNG tests through Eclipse.
Happy Learning !!