Learn to configure Maven https proxy settings in a variety of ways. By default, maven uses a default network connection while running on the local systems. But sometimes we are running our application in our workplace or company. These networks shield internet usage through proxy servers or firewalls, so all internet queries made from our system go through this proxy server.
Maven by default does not detect network proxy configuration, and to use Maven in these restricted areas, we must configure network proxy settings for Maven.
Read More: Maven Installation
1. Configuring Maven Proxy Settings, Globally
To setup the Maven proxy setting in the Maven configuration file, follow the below steps:
- Navigate to path – {M2_HOME}/conf/settings.xml
- Open file settings.xml in edit mode in any text editor.
- Open and update <proxy> tag.
This tag will look like this:
<settings xmlns="http://maven.apache.org/SETTINGS/1.0.0"
      xmlns:xsi="http://www.w3.org/2001/XMLSchema-instance"
      xsi:schemaLocation="http://maven.apache.org/SETTINGS/1.0.0 https://maven.apache.org/xsd/settings-1.0.0.xsd">

  <!-- proxies
  | This is a list of proxies which can be used on this machine to connect to the network.
  | Unless otherwise specified (by system property or command-line switch), the first proxy
  | specification in this list marked as active will be used.
  |-->
  <proxies>
    <!-- proxy
     | Specification for one proxy, to be used in connecting to the network.
     |
    <proxy>
      <id>optional</id>
      <active>true</active>
      <protocol>http</protocol>
      <username>proxyuser</</username>
      <password>proxypass</password>
      <host>proxy.host.net</host>
      <port>80</port>
      <nonProxyHosts>local.net|some.host.com</nonProxyHosts>
    </proxy>
    -->
  </proxies>

</settings>- id: An identifier for this proxy.
- active: Whether this proxy is active (
trueorfalse). - protocol: The protocol to use (
httporhttps). - host: The hostname of the proxy server.
- port: The port number of the proxy server.
- username: (Optional) The username for the proxy server.
- password: (Optional) The password for the proxy server.
- nonProxyHosts: (Optional) A list of hosts that should bypass the proxy.
Update the above proxy server fields with your network-specific credentials. You can find network proxy details in your browser’s connection settings. For example, proxy settings can be found at –
Internet Explorer >> tools >> internet options >> Connections >> LAN Settings

Firefox >> tools >> options >> ADVANCED TAB >> settings
Or you can find the settings in the “Network Settings” in your workstation.
2. Maven Proxy Setting in Eclipse
To use proxy settings in Eclipse while using Maven, follow these steps:
- Open your Eclipse and go to Window -> Preferences.
- Click on the ‘Browse‘ button of ‘User Settings‘, and select the settings.xml.
- Click on the
"Update Settings"button to update the settings. If any confirmation dialog appears, just click Yes.

3. Configuring Maven Proxy in IntelliJ
We can change the proxy settings in IntelliJ in the ‘System Settings > Proxy‘ configuration screen. The screen can be found in the ‘File > Settings‘ window.
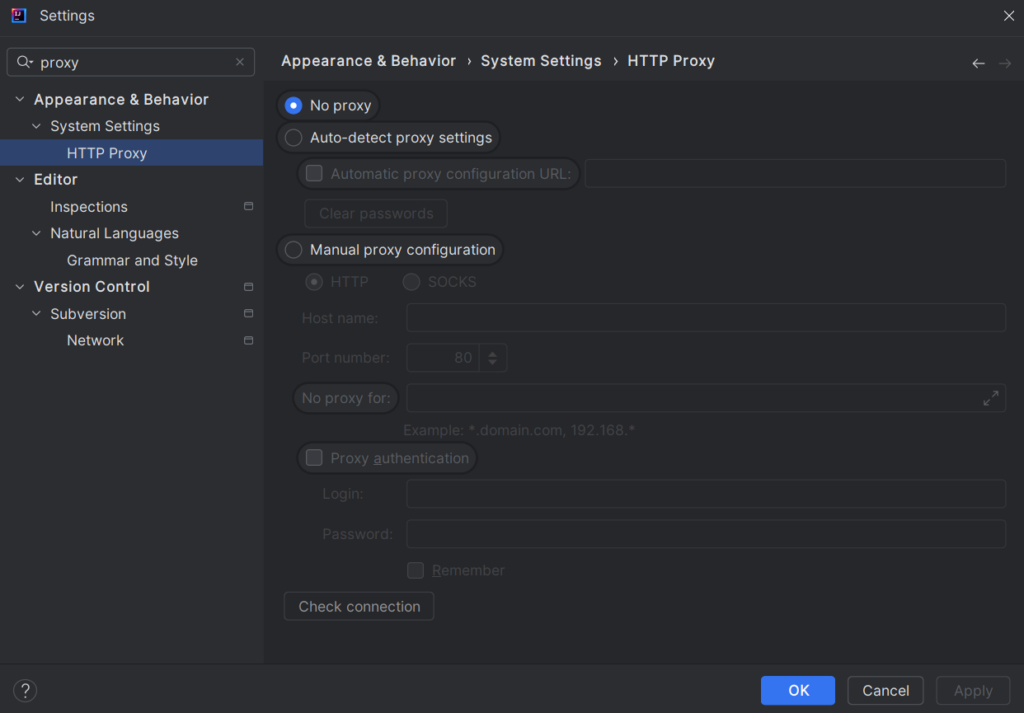
Click Apply and then OK to save the settings.
Or, if we already have the proxy configured in the Maven’s settings.xml file then we can configure the IntelliJ to refer to this for proxy configuration also.
- Go to ‘File > Settings > Build, Execution, Deployment > Build Tools > Maven‘ on Windows.
- Go to ‘Preferences > Build, Execution, Deployment > Build Tools > Maven‘ on macOS.
- Ensure that IntelliJ IDEA is pointing to the correct
settings.xmlfile that has the proxy details updated in it. We can specify the path to the customsettings.xmlin the “User settings file” field. - Click
Applyand thenOK. You may need to reload your Maven projects to apply the changes.
4. Update Maven Proxy from Command Line
If you only need to set the proxy for a single Maven command, we can use the Java system properties approach. In this method, we can append proxy details before the maven command.
$ mvn -DproxySet=true /
  -DproxyHost=ur.proxy.server /
  -DproxyPort=port /
  -DproxyUser=proxyuser /
  -DproxyPassword=somepassword  clean install
Though it’s possible to set maven proxy from the command line, still it is recommended to use global proxy settings in settings.xml file.
Happy Learning !!
Reference:
use below it will work like charm :P. It worked for me !
1. Download the wagon-http-lightweight-2.2.jar from http://repo.maven.apache.org/maven2/org/apache/maven/wagon/wagon-http-lightweight/2.2/wagon-http-lightweight-2.2.jar
2. Copy the wagon-http-lightweight-2.2.jar to %M2_HOME%/lib/ext folder.
This happen generally while we take new project code and start building it,so it come only first time build.
Hi Lokesh,
how configure Proxy Settings in Maven in the case when I use “Use system Settings” for Proxy Settings ( i.e. I do not have specified Proxy in Tools->Options-> Advanced TAB -> Network..)?
What I must to do to take System Settings for Proxy?
I ask this because I have problem with downloading some plugins.
I am getting this error after entering mvn archetype:generate -DgroupId=com.howtodoinjava -DartifactId=demoWebApplication
-DarchetypeArtifactId=maven-archetype-webapp -DinteractiveMode=false in cmd
If I try to see this plugin manually in web browser there is no Problem. Another Problem I had is in no recognization of some certifikates, and I can not download in process of creation maven Project some Things. I think this is slao connected wit Proxy Settings, because when I Bypass Proxy I do not have Problem with no recognition of cerfifikates. But at the end I must use Proxy. So my last question is how set properly maven Project to avoid above described Problems.
Thanks.
How did you resolve this?
optional
true
http
proxyuser
proxypass
proxy.host.net
80
local.net|some.host.com
This setting is mandatory in settings.xml.
I dont want to take this proxy details form settings.xml.
Maven or eclipse should take directly system proxy settings.
Is it possible?
Please confirm.
Proxy is not mandatory.