
Learn to implement OAuth2 based login functionality with Spring Boot and Spring Security. We will go through a general overview of how to apply OAuth2 authentication using 3rd party authorization servers, for example, Github, Twitter and Facebook.
1. OAuth2 Architecture
OAuth 2 is referred to as an authorization framework whose primary purpose is to allow a third-party website or app access to a resource. Sometimes people refer to OAuth2 as a delegation protocol for SSO authentication.
SSO is specially useful in an organization where users need to authenticate to multiple applications. It would be challenging for us to remember multiple passwords and for the organization to manage multiple sets of credentials. OAuth2 helps in isolating the responsibility for credential management to an independent authorization server.
In layman’s terms, a single sign-on (SSO) secured application is one in which we authenticate through an authorization server, and then the app keeps us logged in, using a refresh token.

In this tutorial, we will be using Github as an authorization server that validates the user’s identity using the credentials provided by the user.
Note that in our case, Github will also provide the user’s basic information so it is also acting as a resource server allowing us to retrieve the user’s details.
2. Dependencies
For integrating oauth2 based authorization in Spring boot application, we need to import spring-boot-starter-oauth2-client module.
<dependency>
    <groupId>org.springframework.boot</groupId>
    <artifactId>spring-boot-starter-oauth2-client</artifactId>
</dependency>

<dependency>
   <groupId>org.springframework.boot</groupId>
   <artifactId>spring-boot-starter-security</artifactId>
</dependency>
In a non-Boot project, we will need to add the spring-security-oauth2-client and spring-security-oauth2-jose dependencies.
<dependency>
    <groupId>org.springframework.security</groupId>
    <artifactId>spring-security-oauth2-client</artifactId>
    <version>5.7.1</version>
</dependency>
<dependency>
    <groupId>org.springframework.security</groupId>
    <artifactId>spring-security-oauth2-jose</artifactId>
    <version>5.7.1</version>
</dependency>
3. OAuth2 Client Configuration
Spring boot supports many popular oauth2 authentication providers with simple properties configuration. We only need to obtain the client id and client secret tokens from the providers after registering our application.
3.1. Registering Custom OAuth2 App with Providers
We need to create an oauth2 login application into the auth provider application, such as, Github, Google or Facebook. Please note that we can configure multiple oauth2 providers in an application.
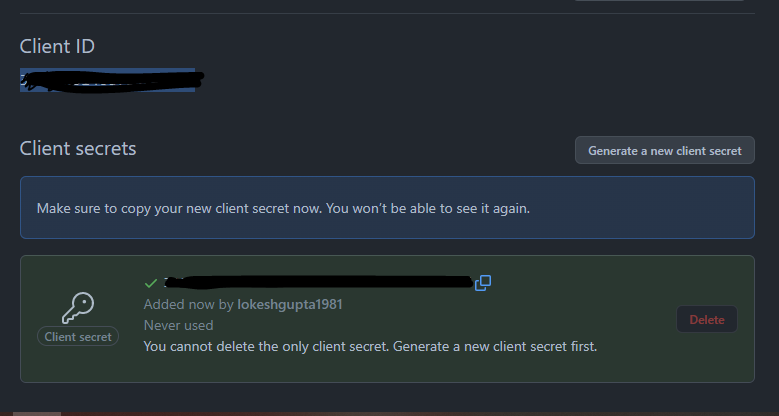
For example, in Github, we create an application as follows :

After the application has been created, note down the generated client id and client secret.
3.2. Configuring Client Id and Client Secret
On our client application side, Spring boot providers sensible defaults when it detects the corresponding properties for an oauth2 provider. The properties names help in differentiating between multiple provider’s client ids and secrets.
spring.security.oauth2.client.registration.github.client-id=git-id
spring.security.oauth2.client.registration.github.client-secret=git-secret

spring.security.oauth2.client.registration.google.client-id=google-id
spring.security.oauth2.client.registration.google.client-secret=google-secret

spring.security.oauth2.client.registration.facebook.client-id=facebook-id
spring.security.oauth2.client.registration.facebook.client-secret=facebook-secret

spring.security.oauth2.client.registration.okta.client-id=okta-id
spring.security.oauth2.client.registration.okta.client-secret=okta-secret
When we add at least one oauth2 client, spring boot will enable the Oauth2ClientAutoConfiguration class and set up all the necessary beans.
In real-world applications, client id and secret should be obtained from a secured configuration source or database, and we should never directly write credentials in the source code.
4. Default Configuration and Login Page
By default, if we do not provide any custom login page or logic, only adding the above properties will serve the default login page generated by the spring security module and it will present the login options as configured in the properties file.
The default security is equivalent to only configuring the http.oauth2Login() method. The oauth2Login() method adds the OAuth2LoginAuthenticationFilter to the filter chain that intercepts the request and applies OAuth 2 authentication logic.
@Configuration
public class SecurityConfig extends WebSecurityConfigurerAdapter {

    @Override
    protected void configure(HttpSecurity http) throws Exception {
        http.authorizeRequests()
         .anyRequest().authenticated()
         .and()
         .oauth2Login();
    }
}
Spring Security uses the ClientRegistration interface to represent an Oauth2 provider registration details in the application. For a provider to work correctly, spring-security must have the following information:
- The client ID and secret
- The grant type used for authentication
- The redirect URI
- The scopes
The Spring security auto-configuration provides most of these details for the following inbuilt providers in the enum CommonOAuth2Provider.
- GitHub
- Okta
To register a non-inbuilt provider, we need to define all the configuration elements ourselves.
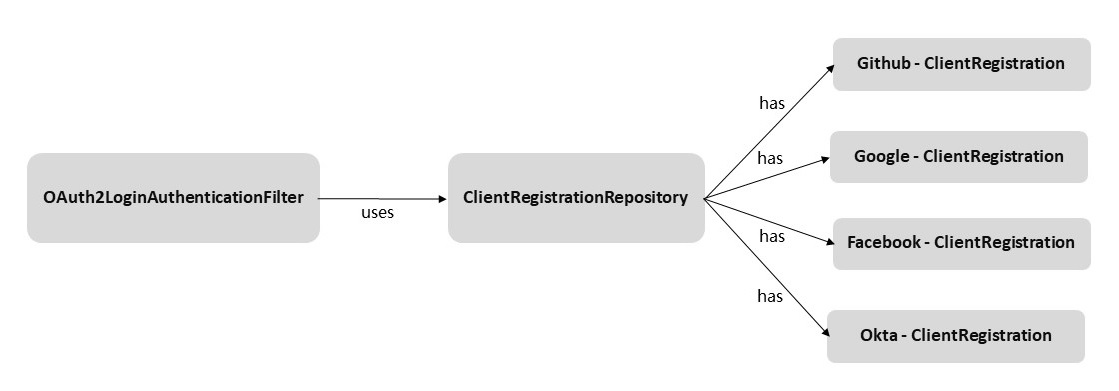
5. Registering ClientRegistrationRepository
The ClientRegistrationRepository is used by the OAuth2LoginAuthenticationFilter to fetch the configured ClientRegistration types. If we are not using the properties configuration then we need to define it in Java configuration.
ClientRegistrationRepository is very similar to UserDetailsService interface that helps in finding UserDetails by its username in a typical username-password based login form. It finds ClientRegistration by its registration ID.
Spring Security offers InMemoryClientRegistrationRepository that stores in memory the instances of ClientRegistration.
@Bean
  public ClientRegistrationRepository clientRepository() {

    ClientRegistration githubRegistration =
        CommonOAuth2Provider.GITHUB.getBuilder("github")
        .clientId("id")
        .clientSecret("secret")
        .build();

    ClientRegistration facebookRegistration =
        CommonOAuth2Provider.FACEBOOK.getBuilder("facebook")
        .clientId("id")
        .clientSecret("secret")
        .build();

    return new InMemoryClientRegistrationRepository(githubRegistration,
        facebookRegistration);
  }
6. Customizing OAuth2 Configuration
Though Spring boot provides sensible defaults to all OAuth2 configuration elements, we can customize specific sections for specific requirements.
6.1. Custom Login Page
The default login page generated by spring security is good enough for POC and getting started. But for a production-class application, we need to have a custom login page matching the theme of the rest of the application.
To create a custom login page, we need to provide the loginPage() method of http element, as follows:
@Override
protected void configure(HttpSecurity http) throws Exception {
    http.authorizeRequests()
	      .antMatchers("/login").permitAll()
	      .anyRequest().authenticated()
      .and()
	      .oauth2Login()
	      .loginPage("/login");
}
Now we need to create a handler method for URL /login that shall render the custom HTML for login page.
@Controller
public class LoginController {

  @GetMapping("/login")
  public String login() {
    return "oauth2-login.html";
  }
}
The login page HTML can be created as per requirements.
<!doctype html>
<html lang="en">

<body>
<div class="container">
    <h3>OAuth2 Login Demo</h3>
    <p>Login to HowToDoInJava:</p>
    <div>
        <div>
            With GitHub: <a href="/oauth2/authorization/github">click here</a>
        </div>
        <div>
            With Google: <a href="/oauth2/authorization/google">click here</a>
        </div>
        <div>
            With Facebook: <a href="/oauth2/authorization/facebook">click here</a>
        </div>
    </div>
</div>
</body>

</html>
6.2. Handling Login Success and Failure
To control which page to display post-authentication, we have two options:
- Provide login and failure URLs as defaultSuccessUrl() and failureUrl() methods
- Provide custom logic in successHandler() and failureHandler() methods or define the beans of type AuthenticationSuccessHandler and AuthenticationFailureHandler.
Providing login success and failure URLs is simple:
.oauth2Login()
  .defaultSuccessUrl("/home")
  .failureUrl("/login");
The handlers are better for executing custom logic, such as auditing the auth info and then forwarding the request to corresponding URLs.
@Bean
  AuthenticationSuccessHandler authenticationSuccessHandler() {
    return new CustomAuthenticationSuccessHandler();
  }

  @Bean
  AuthenticationFailureHandler authenticationFailureHandler() {
    return new CustomAuthenticationFailureHandler();
  }
7. Social Login Demo
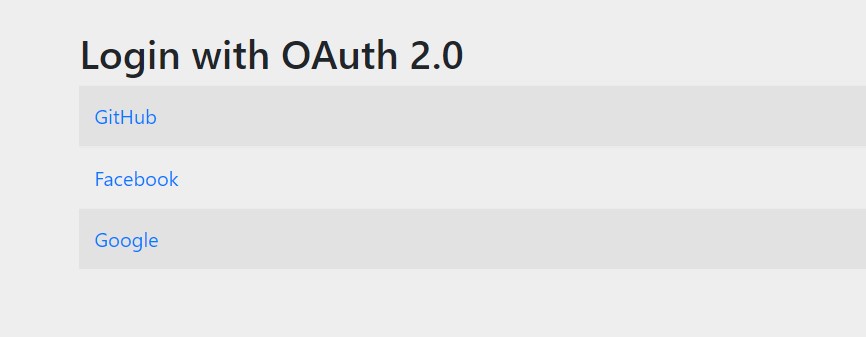
For a quick demo, load the login page at http://localhost:8080/login URL. It will display all configured OAuth2 providers.

Now click on the Github link, it will redirect to Github portal’s login page.
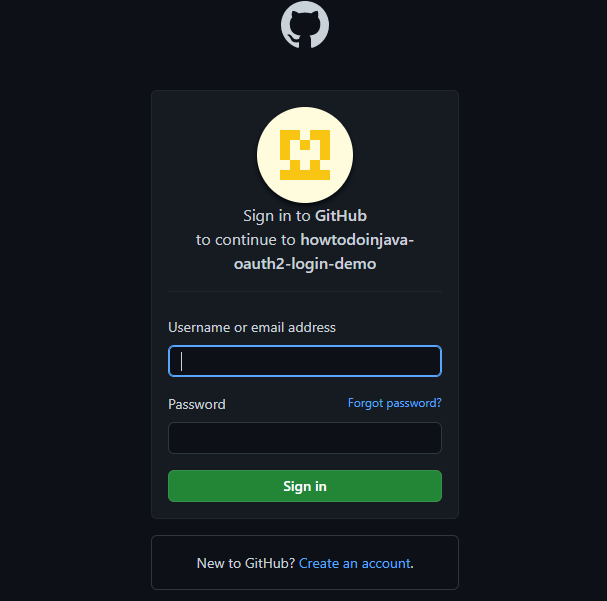
Once we put the correct credentials, we will be redirected to authorize access page.
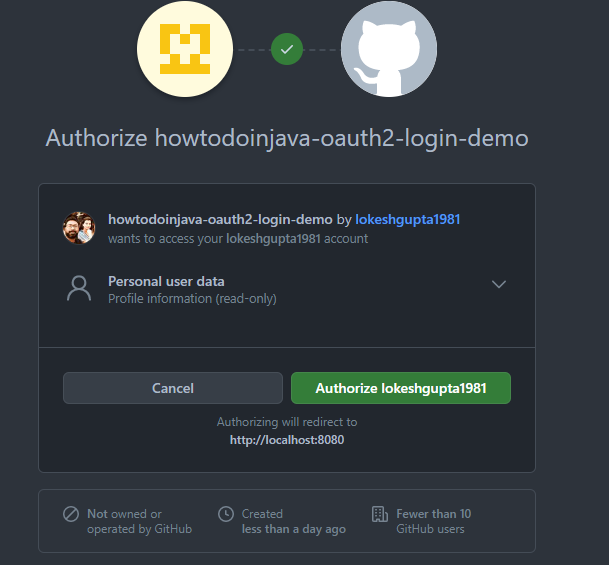
Finally, we allow the access and the browser is redirected to the secured home page of our application. Because now the user is authenticated and authorized, he can access the home page without any access denied error.
8. Conclusion
In this Spring security tutorial, we learned to configure OAuth2 authorization-based login security in a Spring boot application. We learned the default applied Oauth security as well as customized the various elements of the OAuth configuration.
We also learned to create a custom login page and handle success and failure scenarios using custom handlers.
Happy Learning !!
Hi, This example i.e. Spring-security-oauth2-login doesnt work. I checked out from your repo and tried to run only this module by doing mvn clean install and then mvn springboot:run, the application starts fine but when I hit http://localhost:8080/login it gives:
PageNotFound : No mapping for GET /templates/oauth2-login.html
Please check and fix.
Thanks,
Hevo
Somehow the thymeleaf template was not working. Fixed it.
Hi, Appreciate the quick fix, I can see the login page now.
The only thing is post OAuth authorisation the Logout option is not shown (tried with Github)
Thanks
Can you please do the same for SAML2 login with spring boot
It is planned.