Spring Security framework supports a wide range of authentication models, and in this tutorial, we will cover OAuth2 authentication using Amazon Cognito. We will walk through a step-by-step guide from creating the user pool in the AWS, adding the app client, and configuring it in the Spring Boot application.
1. Intro to AWS Cognito
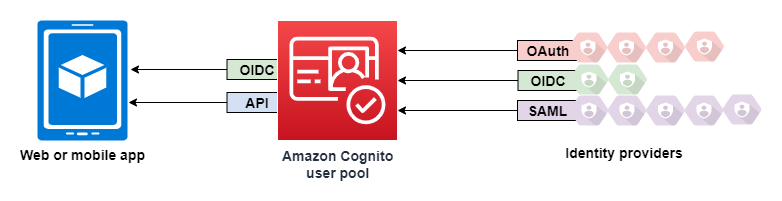
Amazon Cognito is an identity platform for web and mobile apps. It is a user directory, an authentication server, and an authorization service for OAuth 2.0 access tokens and AWS credentials. We can authenticate and authorize the application users from our own built-in user directory, in our AWS Cognito user pool. We can also add external identity providers like Facebook, Google, Apple, Amazon, etc. to authenticate and authorize users from that external identity provider.
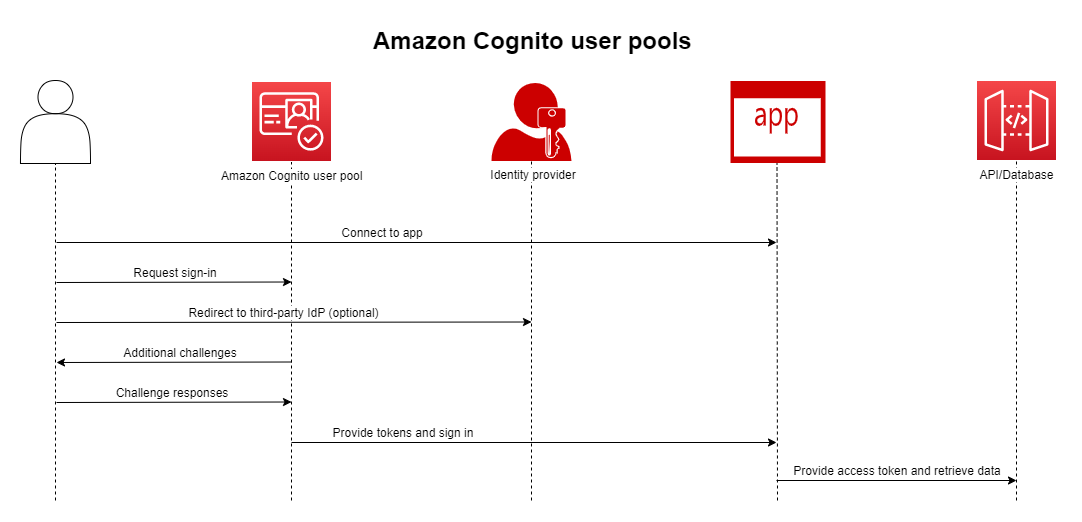
The main advantage of using AWS Cognito is that we can focus on building apps rather than spending our time writing code for authenticating and authorizing our users, providing tokens, decoding those tokens, validating those tokens, and adding social logins or external identity provider logins.
An AWS user pool is a user directory that acts as a database for storing our web app’s user information. AWS Cognito also provides various Admin APIs through SDKs to manage that user pool using different programming languages.
2. Setting Up AWS Cognito
First of all, login or create an account in AWS, and then navigate to the Cognito service.
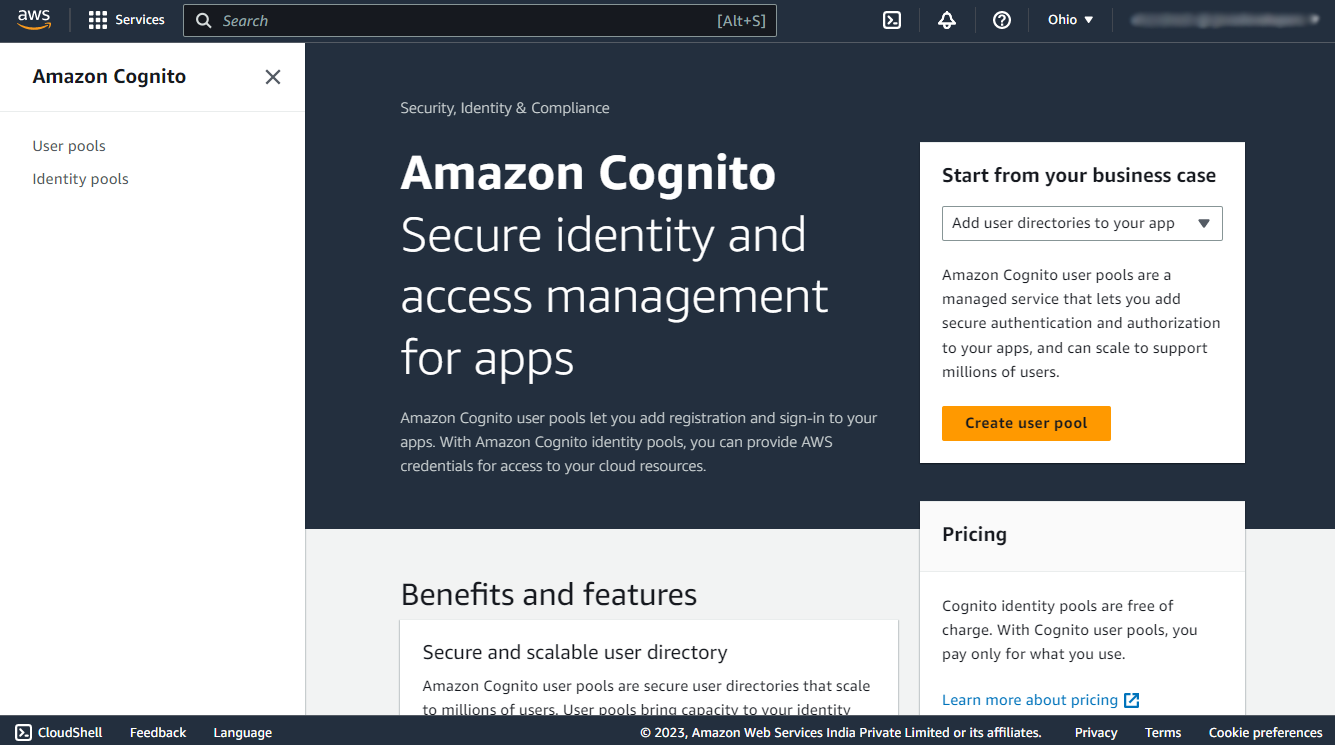
Now, navigate to the user pools section using the Create User Pool button.
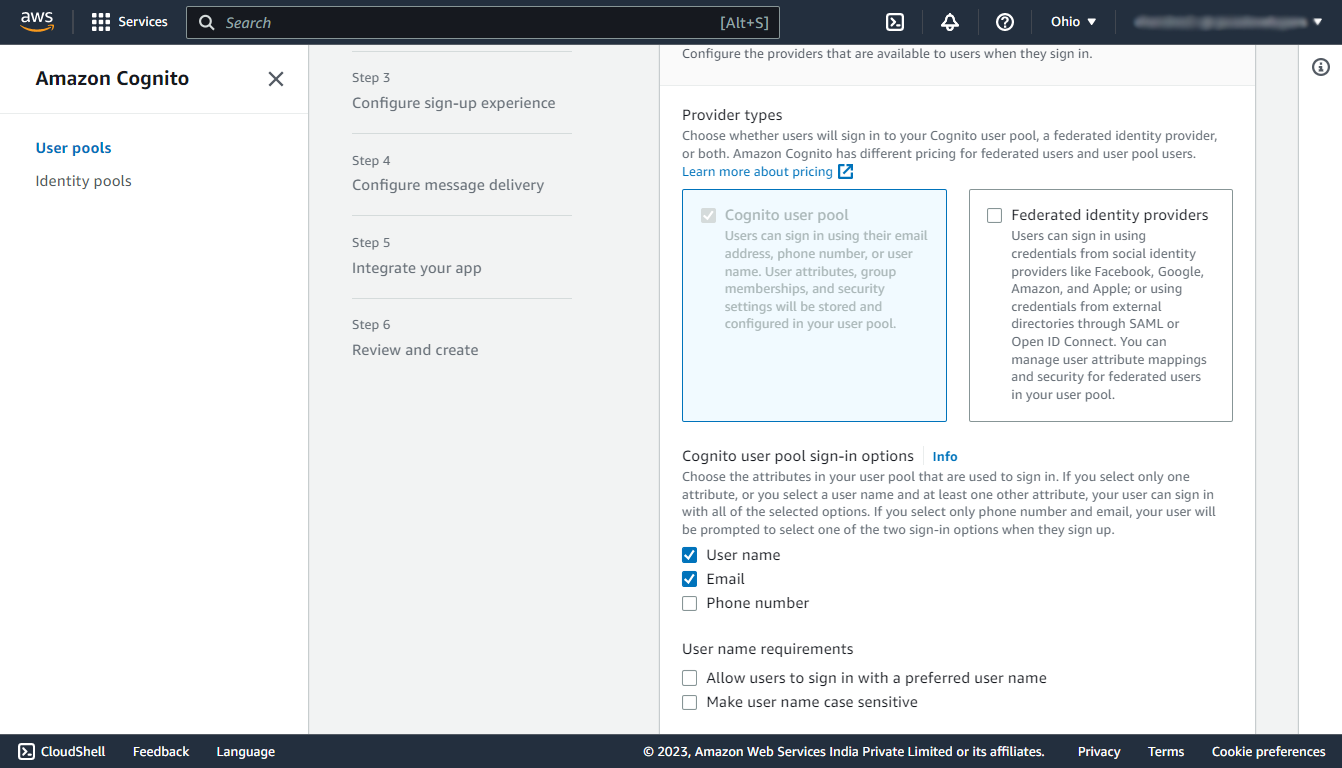
Step 1: Configure sign-in experience
In this step under the Cognito user pool sign-in options select the check box using which information the user can sign in.
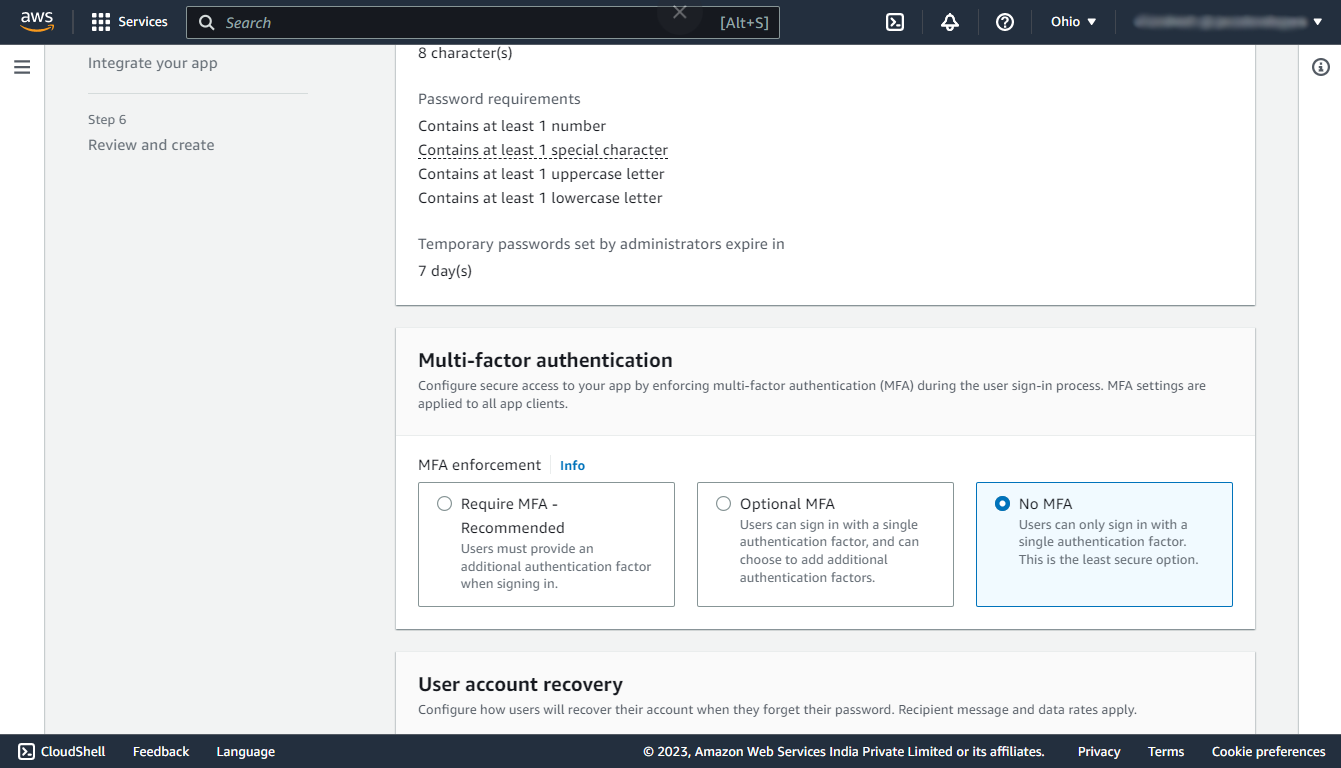
Step 2: Configure security requirements
In this step under the Multi-factor authentication section select No MFA, By choosing this option the user can directly login using the single authentication factor and it will not require any other authentication factor like OTP or authenticator app.
Under the Password policy, and User account recovery section keep the defaults.
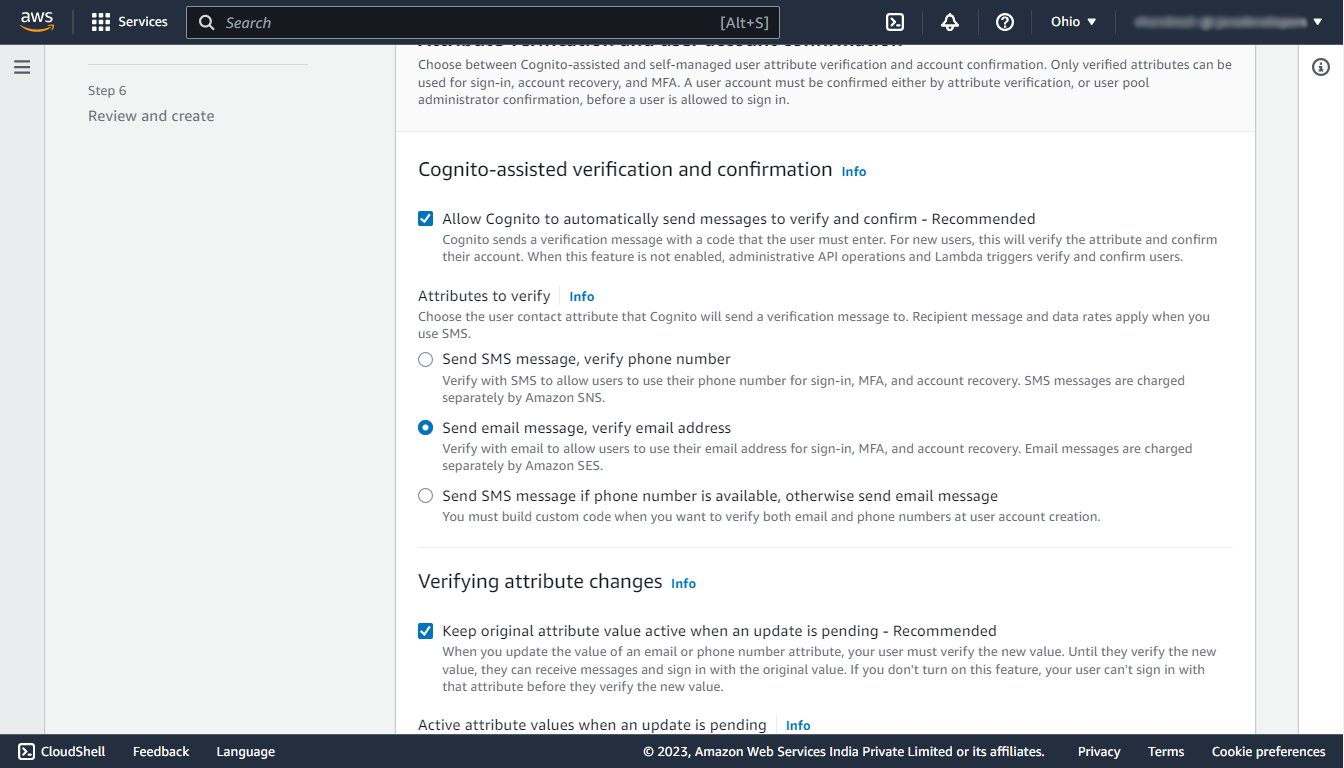
Step 3: Configure sign-up experience
Here we can override the settings used for the signup process. We are leaving the defaults for this demo.
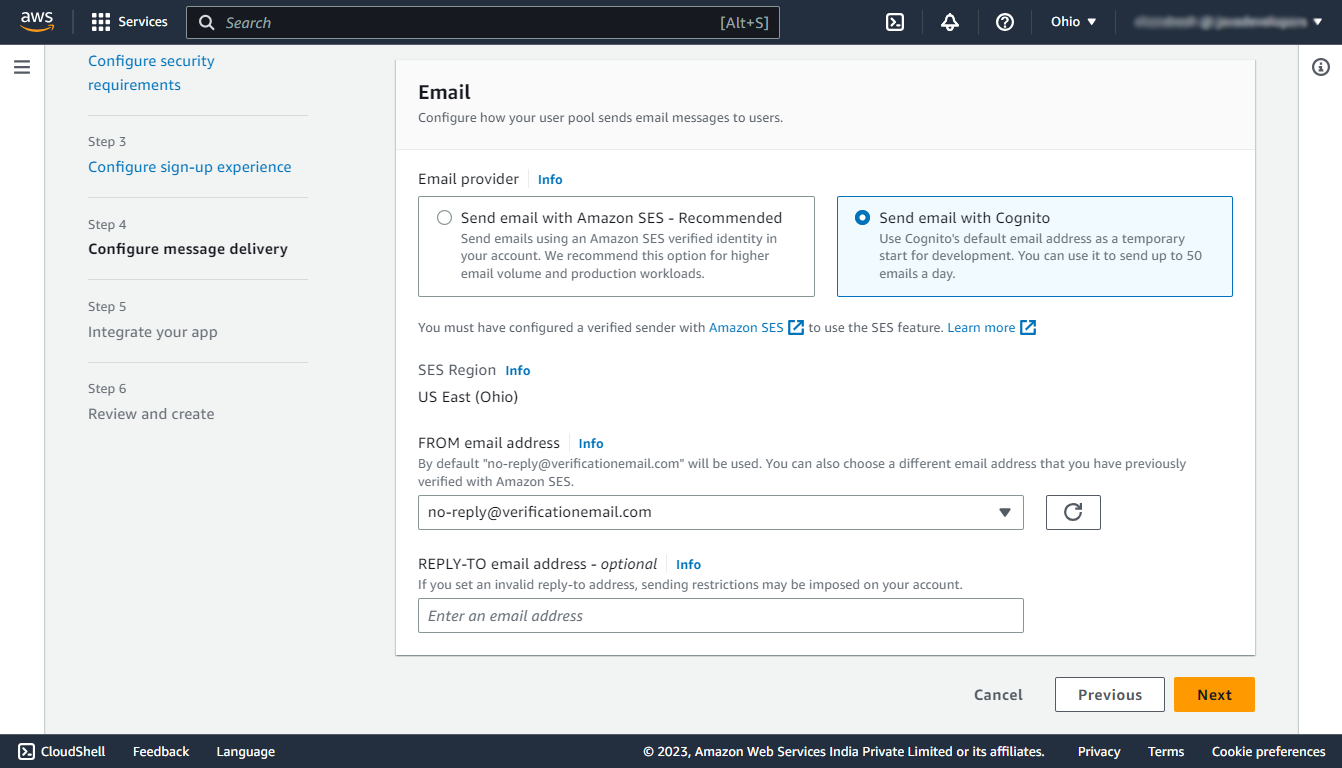
Step 4: Configure message delivery
In this step select the Send email with Cognito which will use Cognito’s default email address for different verification purposes.
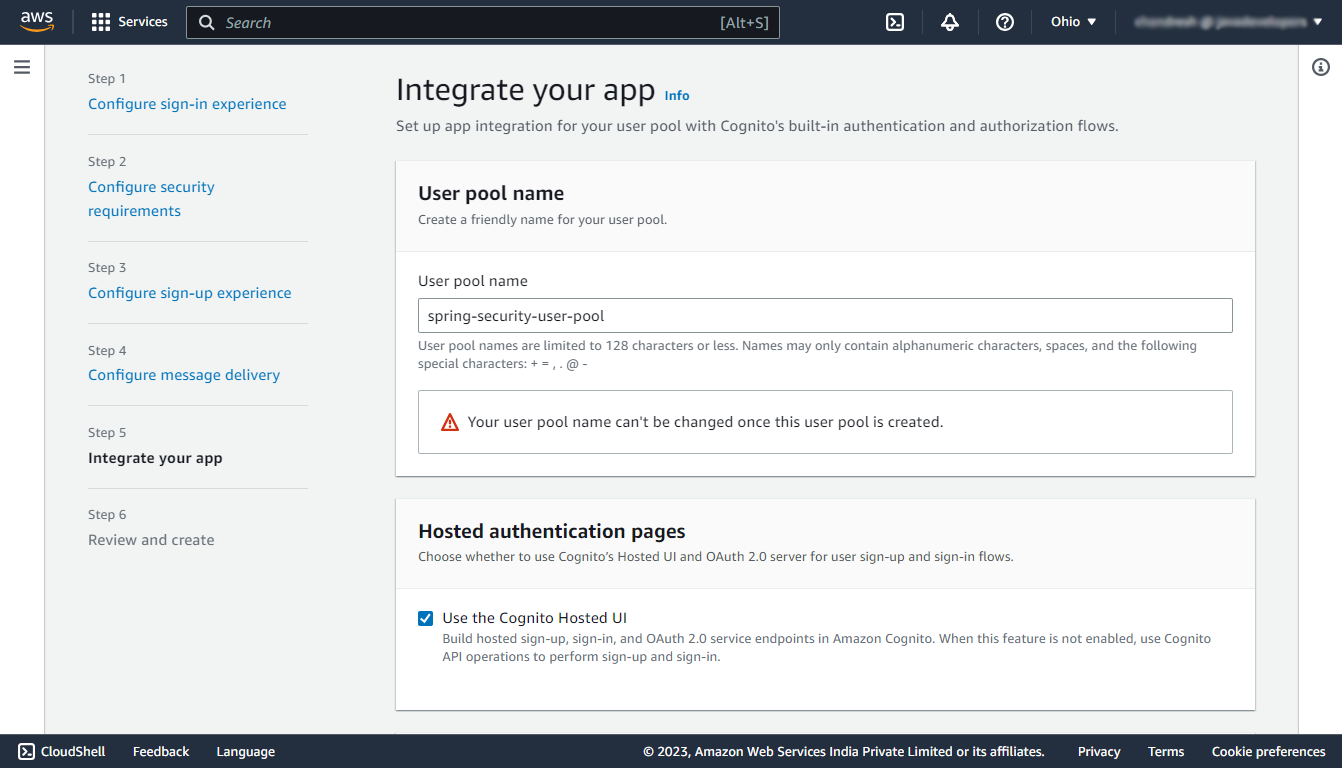
Step 5: Integrate the application
In this step enter any name for the user pool and select the Use the Cognito Hosted UI checkbox to use the default login and sign-up page provided by AWS Cognito.
Under the Domain section, select the Use a Cognito domain and enter a domain name on which the UI will be hosted.

Under the Initial app client section, select the app type as Other and enter a name for your app client, and select the Generate a client secret option. And in the callback URL enter http://localhost:8080/login/oauth2/code/cognito. (Make sure it is http)
Note that the allowed callback URL is the URL to which the user will be redirected with an authentication code after the successful authentication.
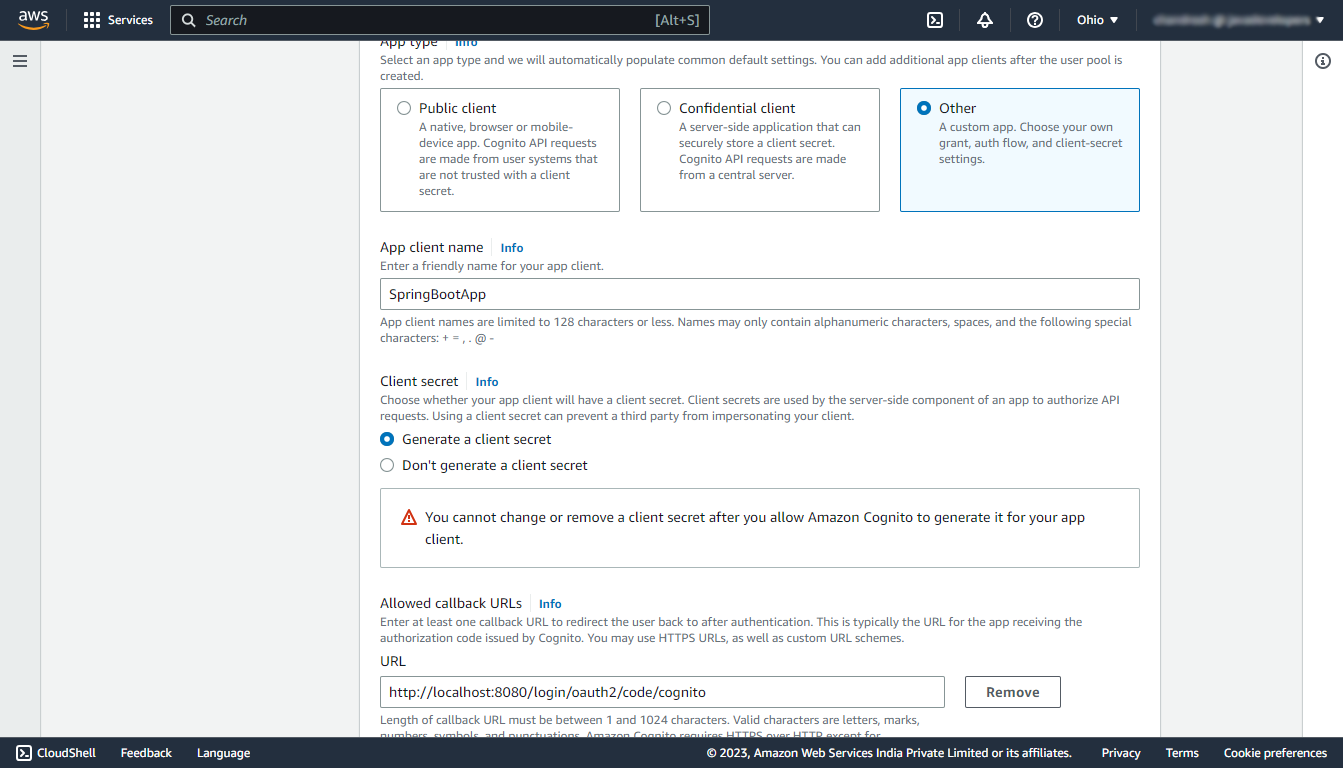
Keep the rest of the things as default.
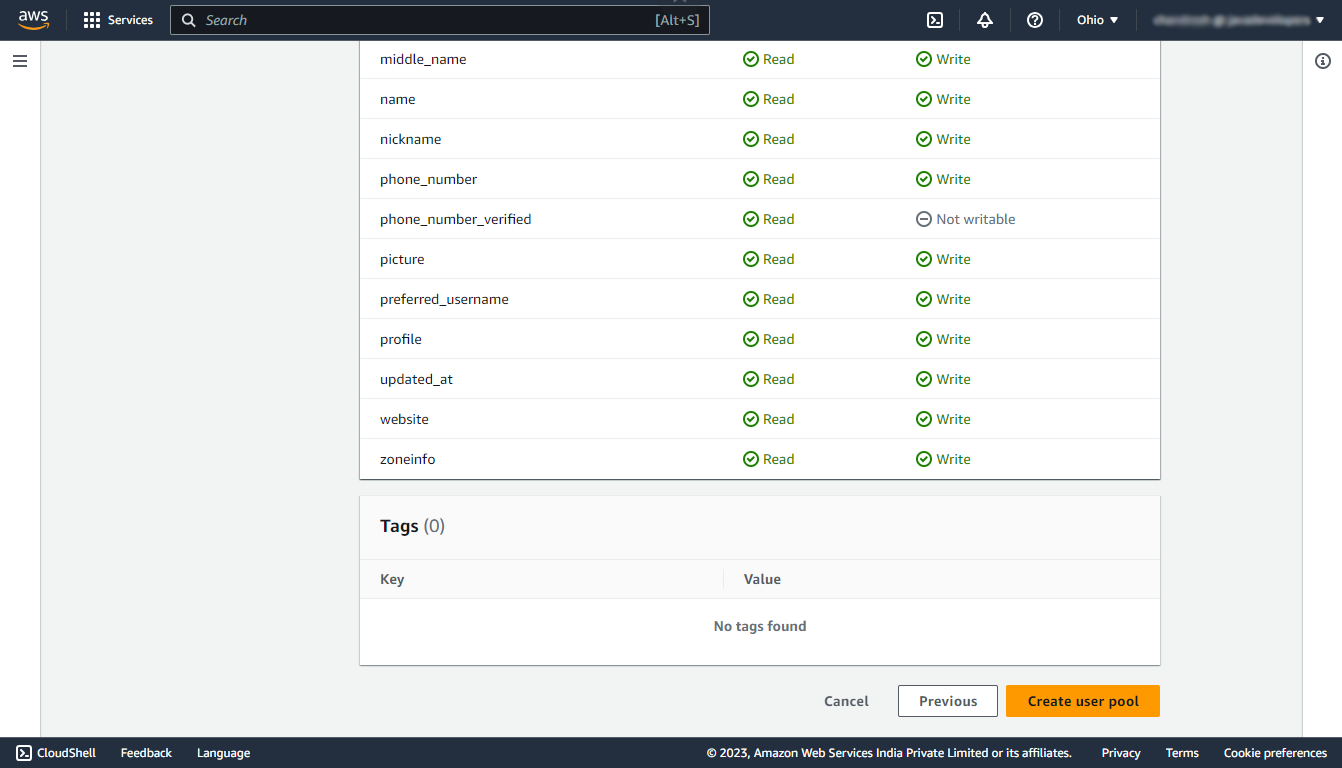
Step 6: Review and Create
In this step review the entire configuration of your user pool and finally create the user pool.
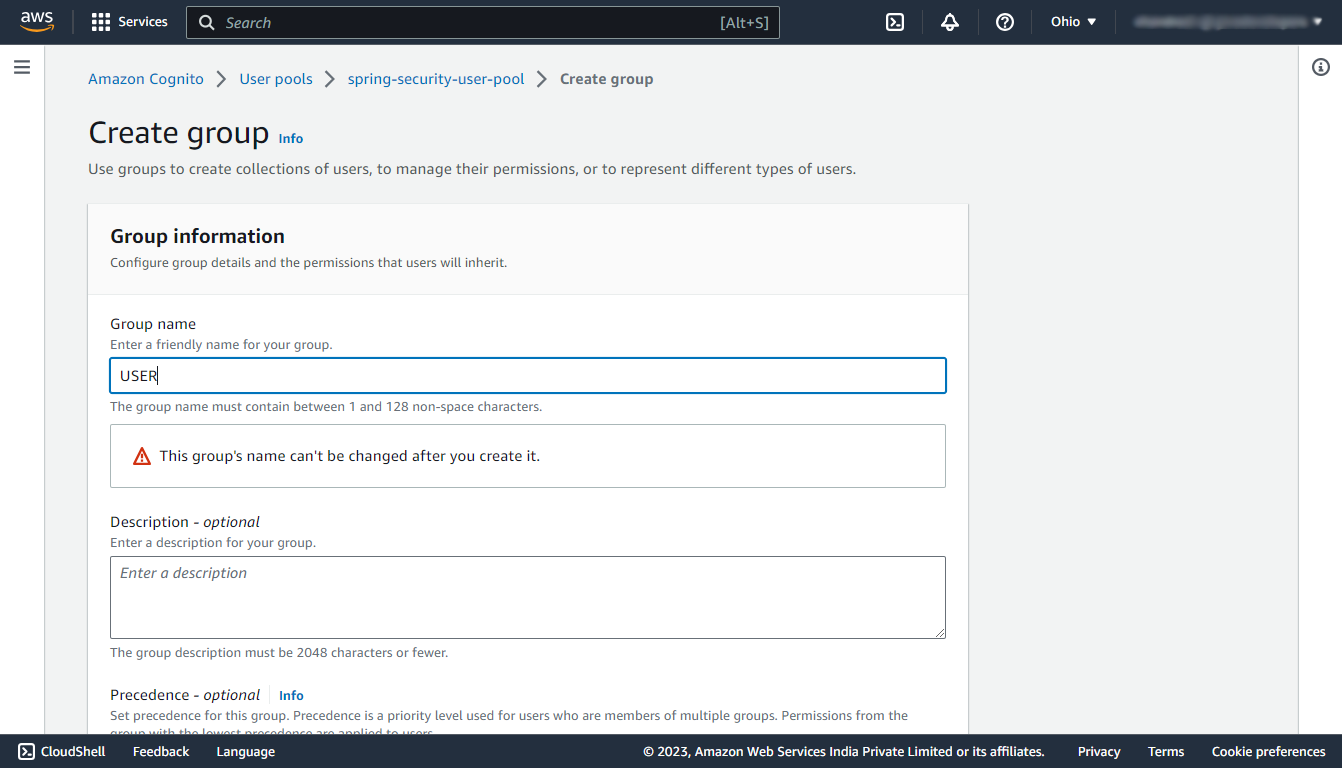
Step 7: Create User Group
Navigate to your newly created user pool, then under the Groups section, click on Create group button and create two groups named USER, and ADMIN. In this demo, we are having only two types of users so we are creating only two user groups.
Test
Navigate to your newly created user pool, then under the App integration section select the client name that you’ve created during the creation of the user pool.
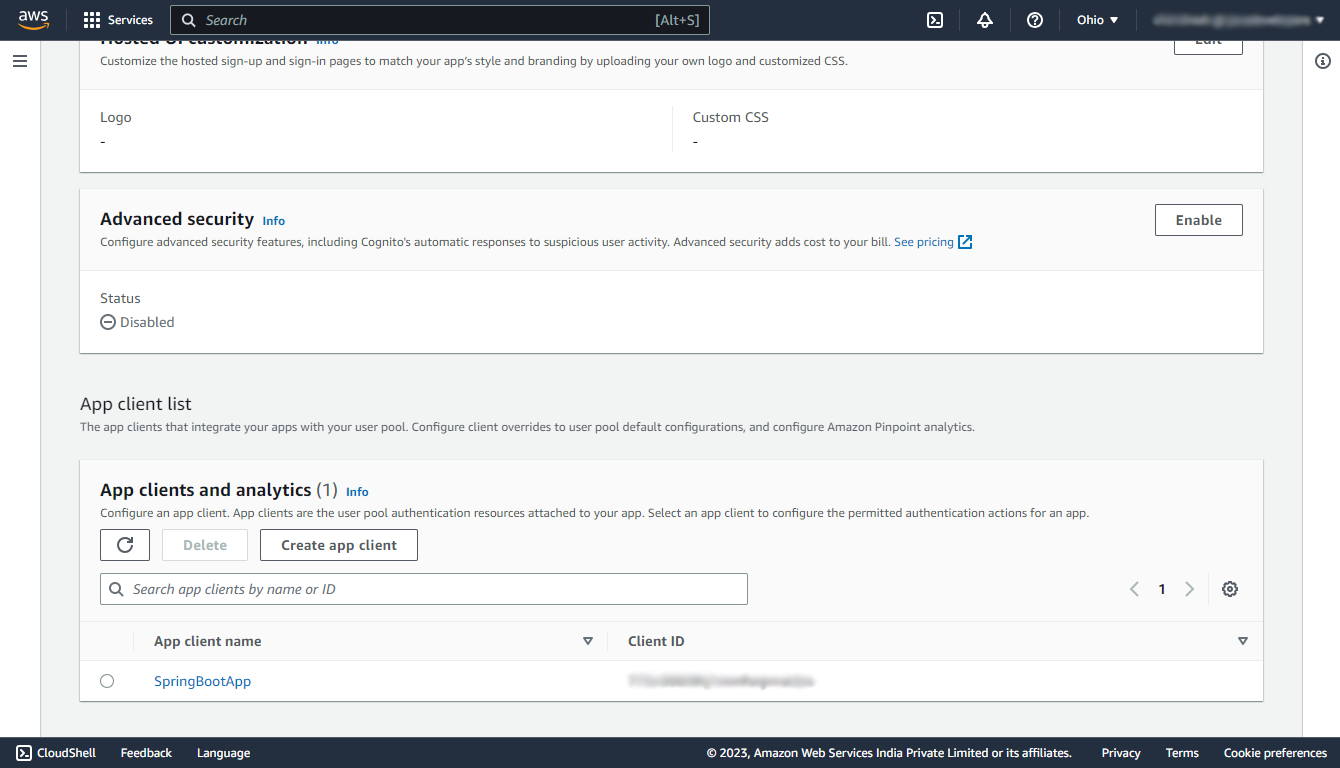
In that navigate to the Hosted UI section and click on the View Hosted UI button.
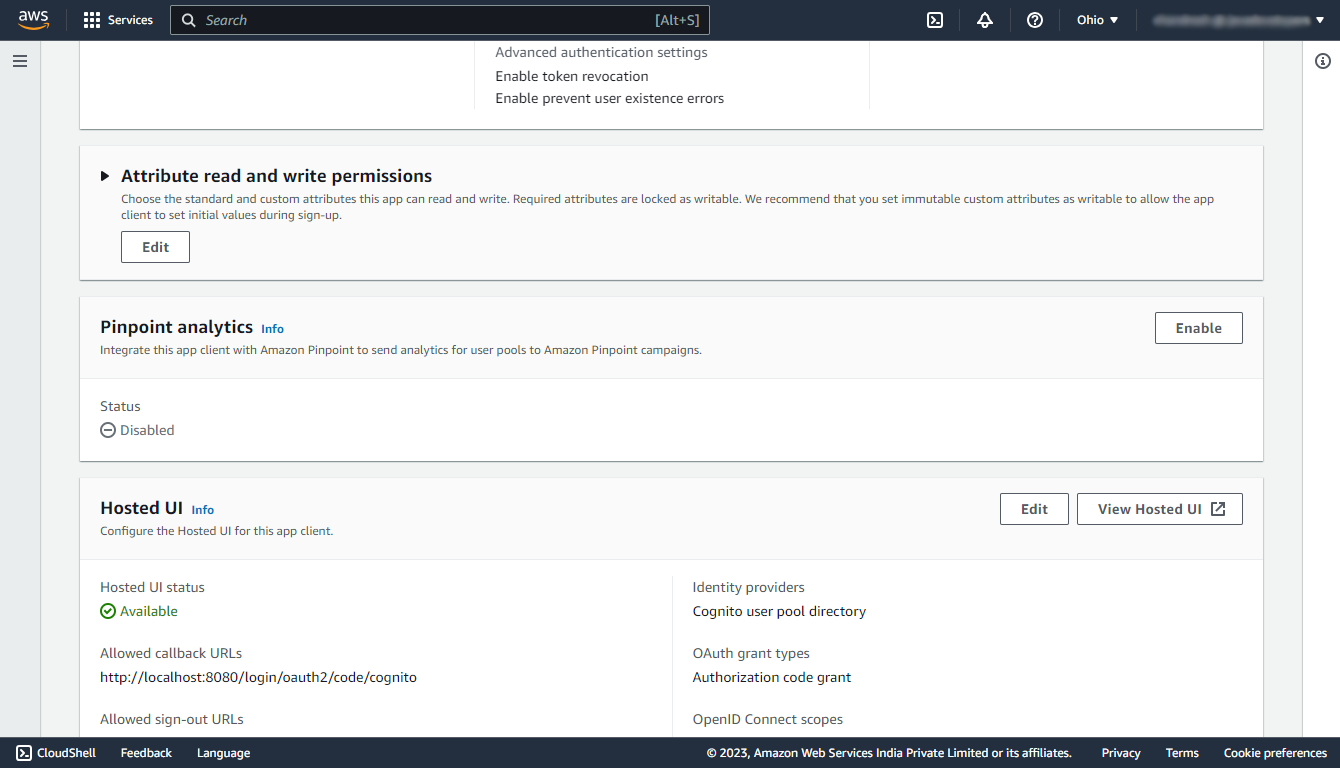
It will open a sign in page that is created by AWS itself, and if this page opens up successfully that means we’ve configured AWS Cognito successfully.

3. Spring Boot Security Configuration
Let’s create a simple spring boot application containing three APIs.
- “/” – opens up an index page that does not require user authentication. i.e. permitted for all.
- “/admin/greetMe” – opens up a greeting page for the admin which will require the name of the user and admin role, hence this API requires user authentication and authorization.
- “/user/greetMe” – opens up a greeting page for the user which will also require the name of the user and user role, hence this API also requires user authentication and authorization.
3.1. Maven
Add the maven dependencies for spring-security, and oauth2-client into your pom.xml.
<dependency>
    <groupId>org.springframework.boot</groupId>
    <artifactId>spring-boot-starter-oauth2-client</artifactId>
</dependency>
<dependency>
    <groupId>org.springframework.boot</groupId>
    <artifactId>spring-boot-starter-security</artifactId>
</dependency>
3.2. Client Registration
Navigate to the application.properties file present in the src/main/resources folder to register the client with the spring security which we have created during the configuration of the AWS Cognito user pool.
server.port=8080
spring.security.oauth2.client.registration.cognito.client-id = {your-app-client-id}
spring.security.oauth2.client.registration.cognito.client-secret = {your-app-client-secret}
spring.security.oauth2.client.registration.cognito.scope = openid
spring.security.oauth2.client.registration.cognito.redirect-uri = http://localhost:8080/login/oauth2/code/cognito
spring.security.oauth2.client.registration.cognito.clientName = {your-app-client-name}
spring.security.oauth2.client.registration.cognito.authorization-grant-type=authorization_code
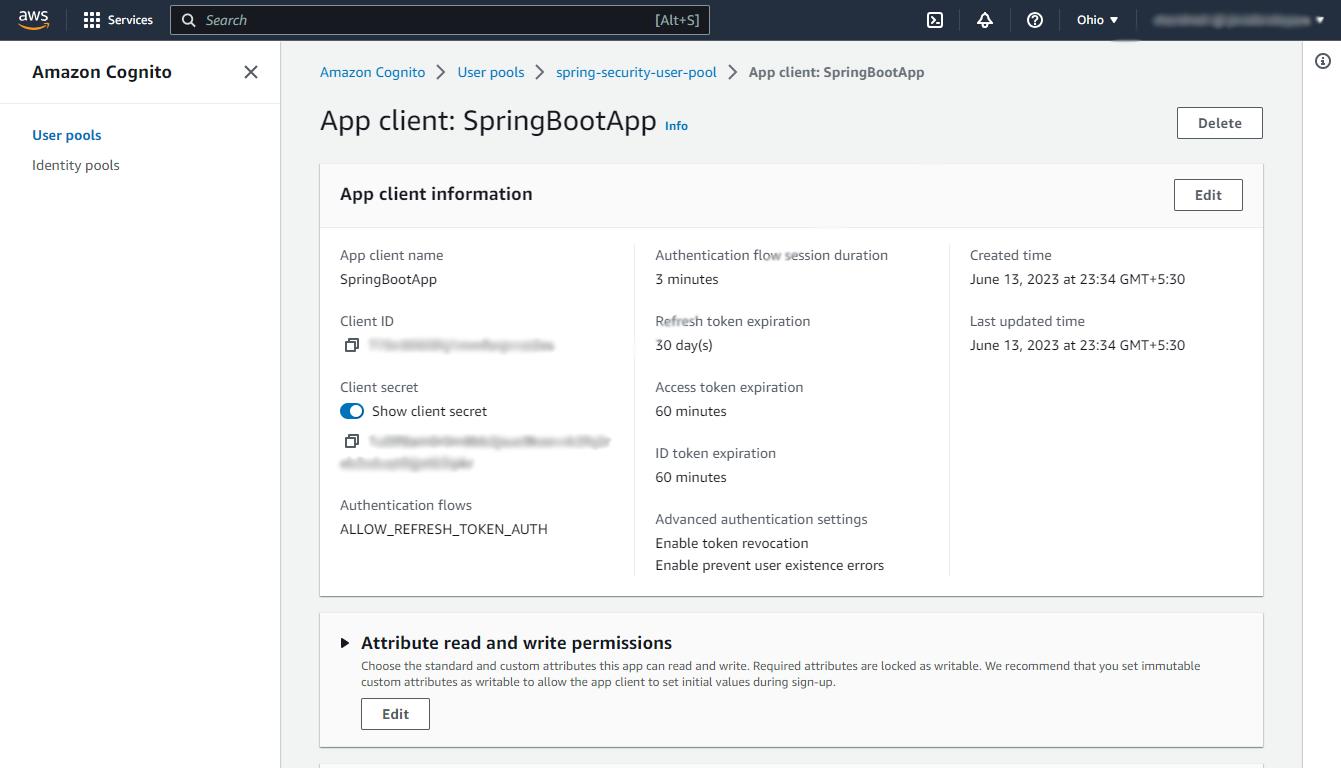
spring.security.oauth2.client.provider.cognito.issuerUri = https://cognito-idp.{your-user-pool-region}.amazonaws.com/{user-pool-id}To find your app client id and secret navigate to your user pool and in the App integration section, click on your app client name.
3.3. Security Configuration
Now, let’s configure the Spring security to specify which endpoints are protected that will require user authentication and which are public and will not require any authentication. For that create a package named config in your base package, and in that package create a SecurityConfiguration.java file.
In our case, the “/” endpoint is public and open to all, and the “admin/greetMe”, “user/greetMe” endpoints are protected.
@Configuration
@EnableWebSecurity
public class SecurityConfiguration {

    private final CustomizeAuthenticationSuccessHandler customizeAuthenticationSuccessHandler;

    public SecurityConfiguration(CustomizeAuthenticationSuccessHandler customizeAuthenticationSuccessHandler) {

        this.customizeAuthenticationSuccessHandler = customizeAuthenticationSuccessHandler;
    }

    @Bean
    public SecurityFilterChain securityFilterChain(HttpSecurity http) throws Exception {

        http.authorizeHttpRequests(request -> request.requestMatchers("/").permitAll()
                        .requestMatchers("/admin/*").hasRole("ADMIN")
                        .requestMatchers("/user/*").hasAnyRole("ADMIN", "USER").anyRequest().authenticated())
                .oauth2Login(oauth -> oauth.redirectionEndpoint(endPoint -> endPoint.baseUri("/login/oauth2/code/cognito"))
                        .userInfoEndpoint(userInfoEndpointConfig -> userInfoEndpointConfig.userAuthoritiesMapper(userAuthoritiesMapper()))
                        .successHandler(customizeAuthenticationSuccessHandler))
                .logout(logout -> logout.logoutSuccessUrl("/"));
        return http.build();
    }

    @Bean
    public GrantedAuthoritiesMapper userAuthoritiesMapper() {
        return (authorities) -> {
            Set<GrantedAuthority> mappedAuthorities = new HashSet<>();

            try {
                OidcUserAuthority oidcUserAuthority = (OidcUserAuthority) new ArrayList<>(authorities).get(0);

                mappedAuthorities = ((ArrayList<?>) oidcUserAuthority.getAttributes().get("cognito:groups")).stream().map(role -> new SimpleGrantedAuthority("ROLE_" + role)).collect(Collectors.toSet());
            } catch (Exception exception) {
                System.out.println("Not Authorized!");

                System.out.println(exception.getMessage());
            }

            return mappedAuthorities;
        };
    }

}
Here we have to specify the redirectionEndpoint which we have configured in the AWS Cognito and also in application.properties, Specifying redirectionEndpoint means we are telling the spring security that after successful authentication from AWS Cognito user will be redirected to this Endpoint with the Authorization Code, so collect the code from this endpoint.
3.4. Login Success Handler
Next, create a file named CustomizeAuthenticationSuccessHandler.java in the same config package, which will handle the successful authentication and will redirect the user to the greetings page according to the user’s role.
@Component
public class CustomizeAuthenticationSuccessHandler implements AuthenticationSuccessHandler {

    @Override
    public void onAuthenticationSuccess(HttpServletRequest request, HttpServletResponse response, Authentication authentication) throws IOException, ServletException {

        for (GrantedAuthority auth : authentication.getAuthorities()) {

            DefaultOidcUser defaultOidcUser = (DefaultOidcUser) authentication.getPrincipal();

            Map<String, Object> userAttributes = defaultOidcUser.getAttributes();

            System.out.println(userAttributes);

            if ("ROLE_ADMIN".equals(auth.getAuthority())) {
                System.out.println(userAttributes.get("cognito:username") + " Is Admin!");
                response.sendRedirect("/admin/greetMe");
            } else if ("ROLE_USER".equals(auth.getAuthority())) {
                System.out.println(userAttributes.get("cognito:username") + " Is User!");
                response.sendRedirect("/user/greetMe");
            }
        }
    }
}
3.5. Logout Success Handler
Spring Security’s default logout mechanism does not directly work with AWS Cognito’s logout endpoint due to their separate authentication systems. We need to implement a customized solution to ensure that both Spring Security and AWS Cognito are properly logged out when a user logs out from the application.
The logout is done in the following steps:
- Trigger Spring Security logout to clear the local session and authentication information.
- Trigger AWS Cognito logout by invoking its logout endpoint to ensure that the user is logged out from AWS Cognito as well.
The AWS logout endpoint accepts HTTP GET requests and parameters are sent as query parameters.
GET https://mydomain.auth.us-east-1.amazoncognito.com/error?null
   client_id=ad398u21ijw3s9w3939&
   logout_uri=https://mydomain/logout
So start with adding the logout URL in the properties so we can later use it in the configuration:
aws.cognito.logoutUrl=https://mydomain.auth.us-east-1.amazoncognito.com/logout
aws.cognito.logout.success.redirectUrl=https://mydomain/logout
In Spring Security, the SimpleUrlLogoutSuccessHandler class is used to handle the actions that should be taken after a user successfully logs out of the Spring application. We can utilize this class by extending it and redirecting the user to a Cognito Logout URL upon successful logout.
public class CustomLogoutHandler extends SimpleUrlLogoutSuccessHandler {

  private final String logoutUrl;
  private final String logoutRedirectUrl;
  private final String clientId;

  public CustomLogoutHandler(String logoutUrl, String logoutRedirectUrl, String clientId) {
    this.logoutUrl = logoutUrl;
    this.logoutRedirectUrl = logoutRedirectUrl;
    this.clientId = clientId;
  }

  @Override
  protected String determineTargetUrl(HttpServletRequest request, HttpServletResponse response,
      Authentication authentication) {

    return UriComponentsBuilder
        .fromUri(URI.create(logoutUrl))
        .queryParam("client_id", clientId)
        .queryParam("logout_uri", logoutRedirectUrl)
        .encode(StandardCharsets.UTF_8)
        .build()
        .toUriString();
  }
}
Now, we need to register the CustomLogoutHandler with Spring security configuration.
@Configuration
@EnableWebSecurity
public class SecurityConfiguration {

  @Value("${aws.cognito.logoutUrl}")
  private String logoutUrl;

  @Value("${aws.cognito.logout.success.redirectUrl}")
  private String logoutRedirectUrl;

  @Value("${spring.security.oauth2.client.registration.cognito.clientId}")
  private String clientId;

  @Bean
  public SecurityFilterChain securityFilterChain(HttpSecurity http) throws Exception {

    http.authorizeHttpRequests(request -> request.requestMatchers("/").permitAll()
        ...
        ...
        ...
        .logout(httpSecurityLogoutConfigurer -> {
          httpSecurityLogoutConfigurer.logoutSuccessHandler(
              new CustomLogoutHandler(logoutUrl, logoutRedirectUrl, clientId));
        });
    return http.build();
  }

  //...
}
3.6. REST Controller
In the final step let’s create a controller that is having URL mappings and handler methods for the main two endpoints of our application.
import org.springframework.stereotype.Controller;
import org.springframework.ui.Model;
import org.springframework.web.bind.annotation.GetMapping;

@Controller
public class WelcomeController {

    @GetMapping("/")
    public String home(Model model) {
        model.addAttribute("message", "Welcome To The Index Page!");
        return "index";
    }

    @GetMapping("admin/greetMe")
    public String adminGreet(Model model) {
        String response = "Welcome admin ! You developed an amazing website! :)";

        model.addAttribute("response", response);

        return "greeting";
    }

    @GetMapping("user/greetMe")
    public String userGreet(Model model) {

        String response = "Welcome user ! God bless you with amazing future ahead! :)";

        model.addAttribute("response", response);

        return "greeting";
    }
}
Note that we are using @Controller, and not @RestController, as we are using thymeleaf as our template engine.
4. Demo
Let’s finally run the Spring Boot application by running the main() method in the Application.java and test whether the Spring security allows us to open the protected endpoint without authenticating us!
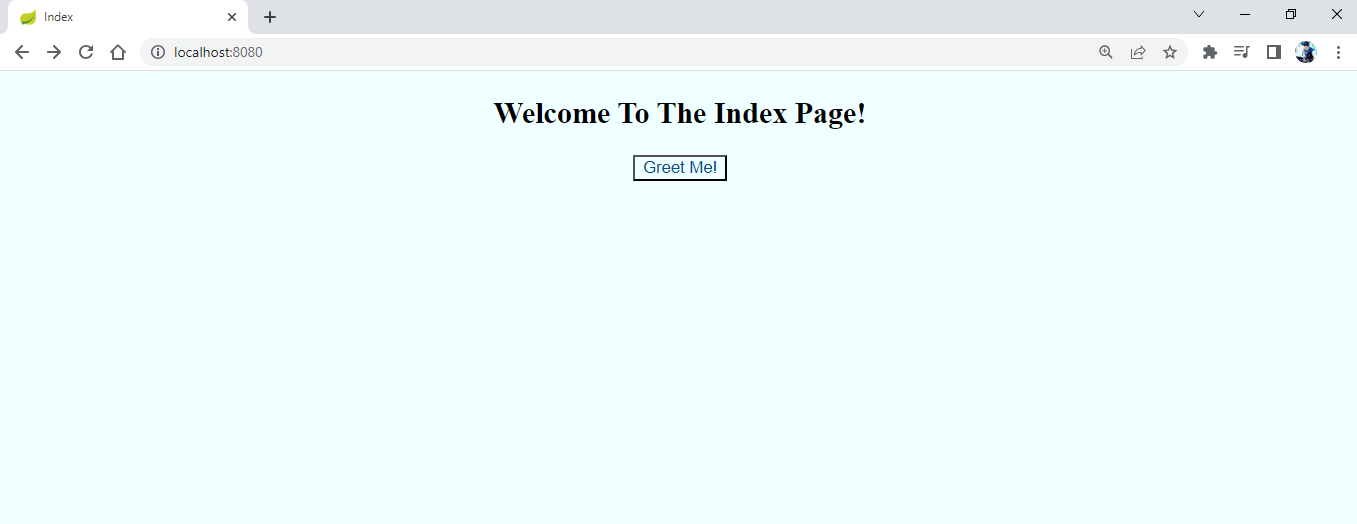
Click on Greet Me! button. It will open a Sign in page.
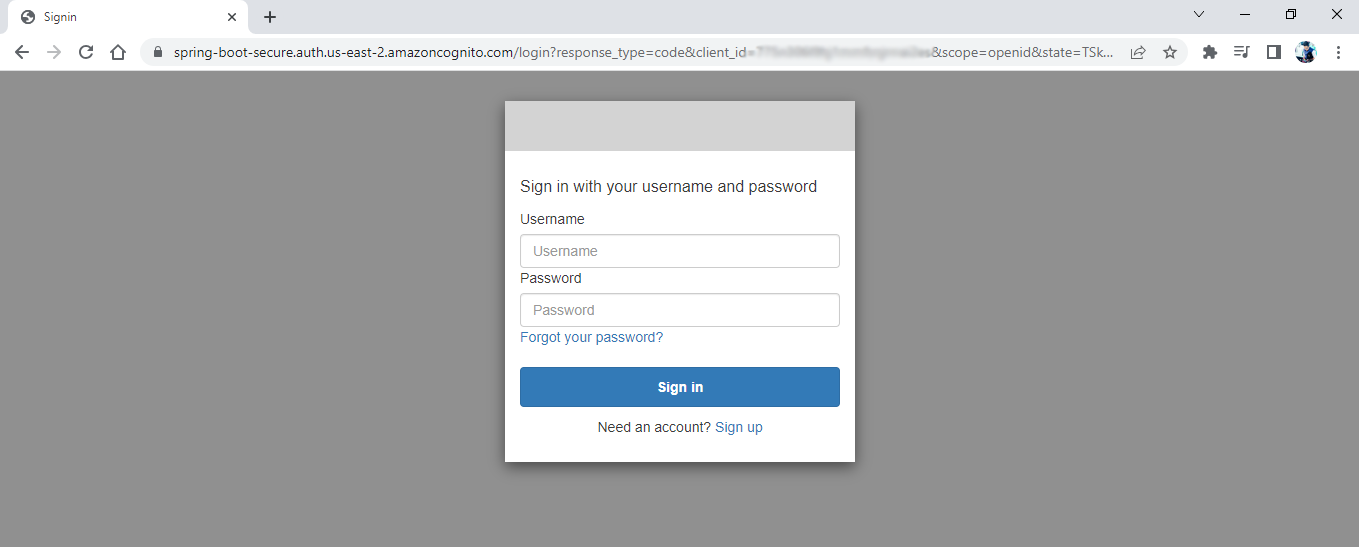
Let’s create an account by clicking the Sign up button at the bottom.
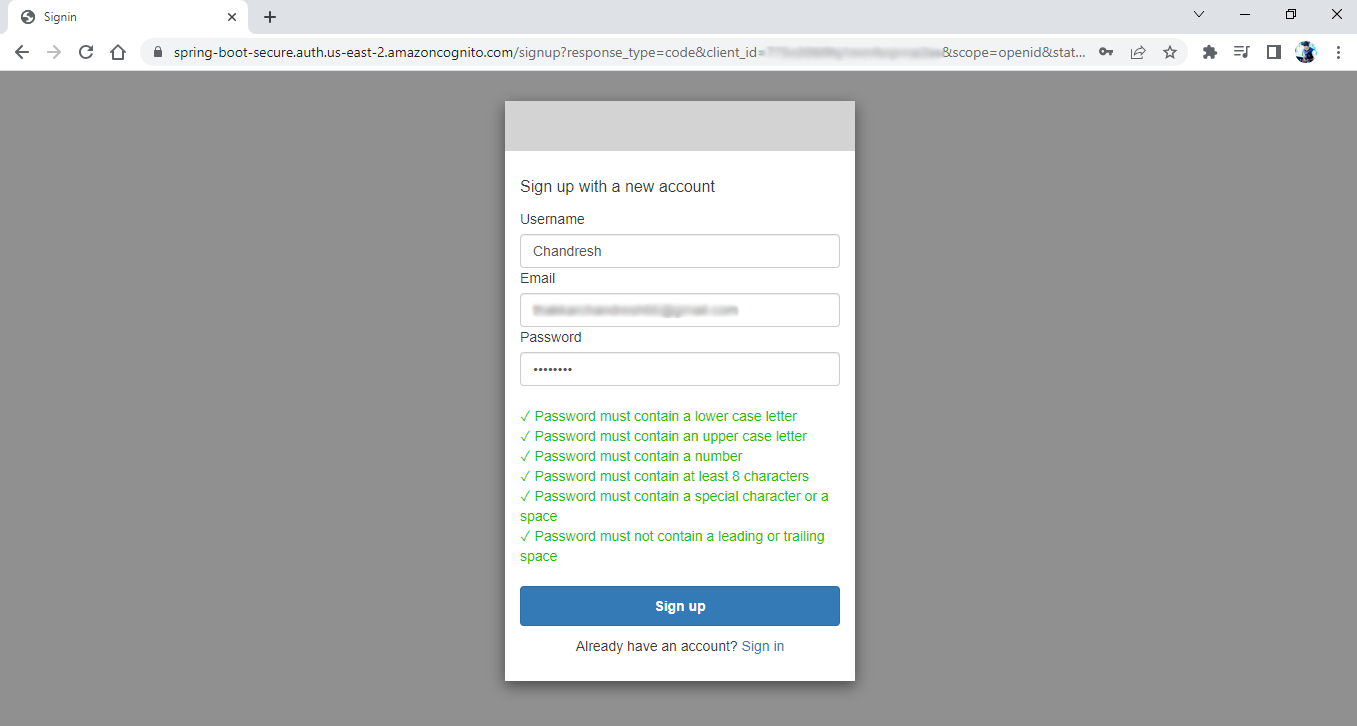
Click on the Sign up button. It will open a confirmation page that will require a Verification code which you will receive on the entered Email id.

Clicking on Confirm account button will open a blank page with one error in the console.
Not Authorized!
Cannot invoke "java.util.ArrayList.stream()" because the return value of "java.util.Map.get(Object)" is null
The reason behind this error is that the newly created user is not added to any group and hence the user is not having any role yet, for that we have to add the user into the user group manually. We will learn to automate this thing using the AWS Lambda function further in this article but for a demo let’s manually add this user to the USER group.
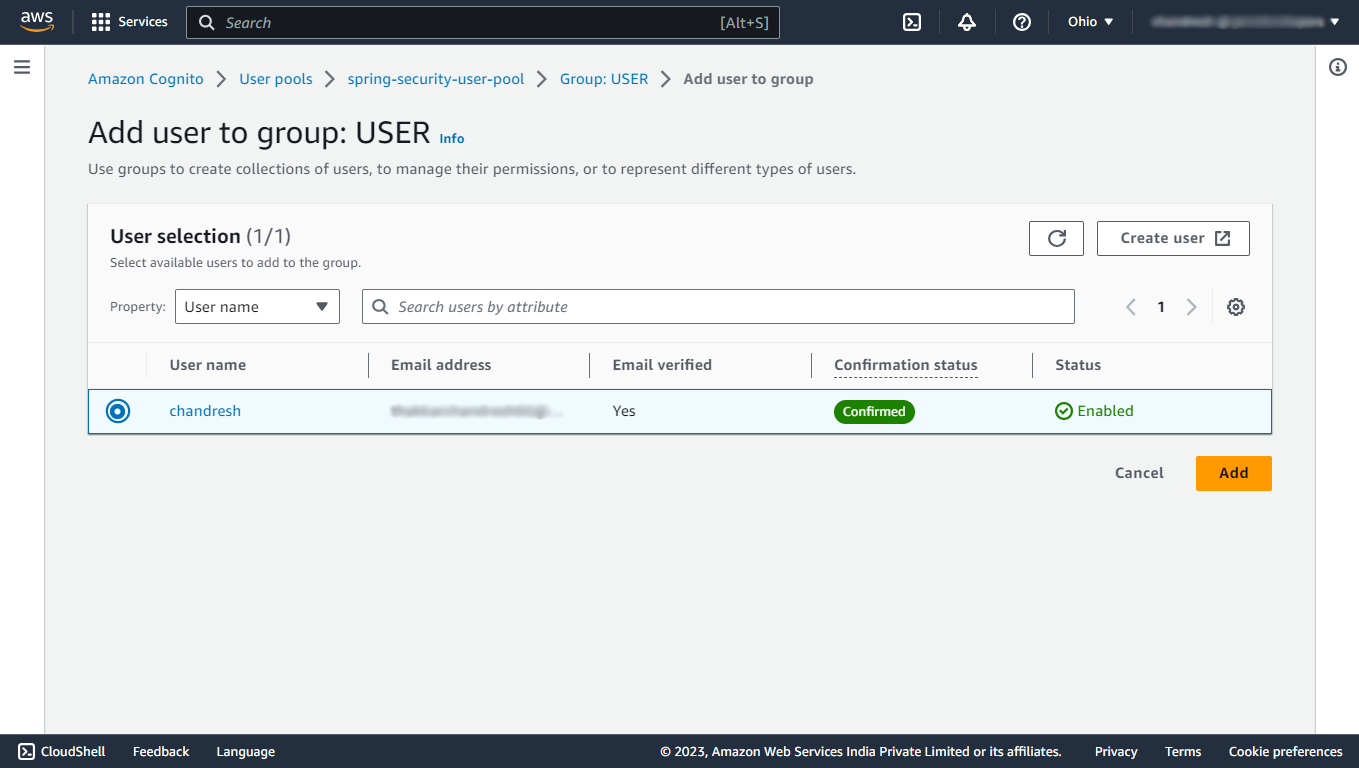
Again navigate to your newly created user pool, then under the Groups section, click on USER group, there you will find a button to add the user to that group, add the newly created user to the group.
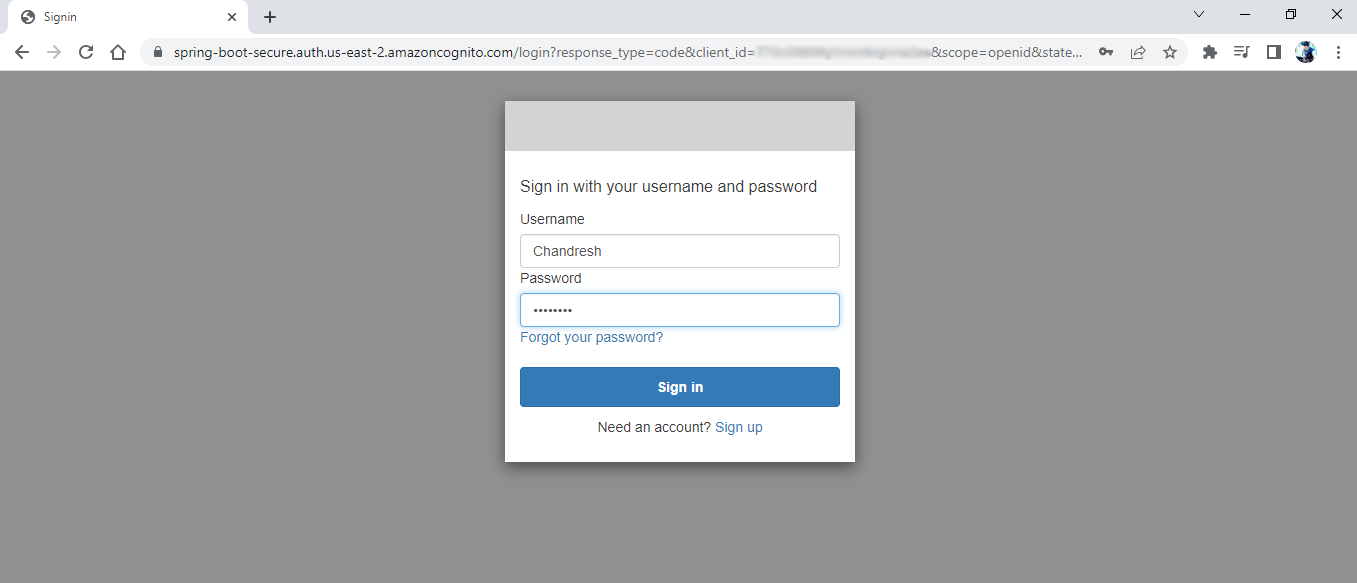
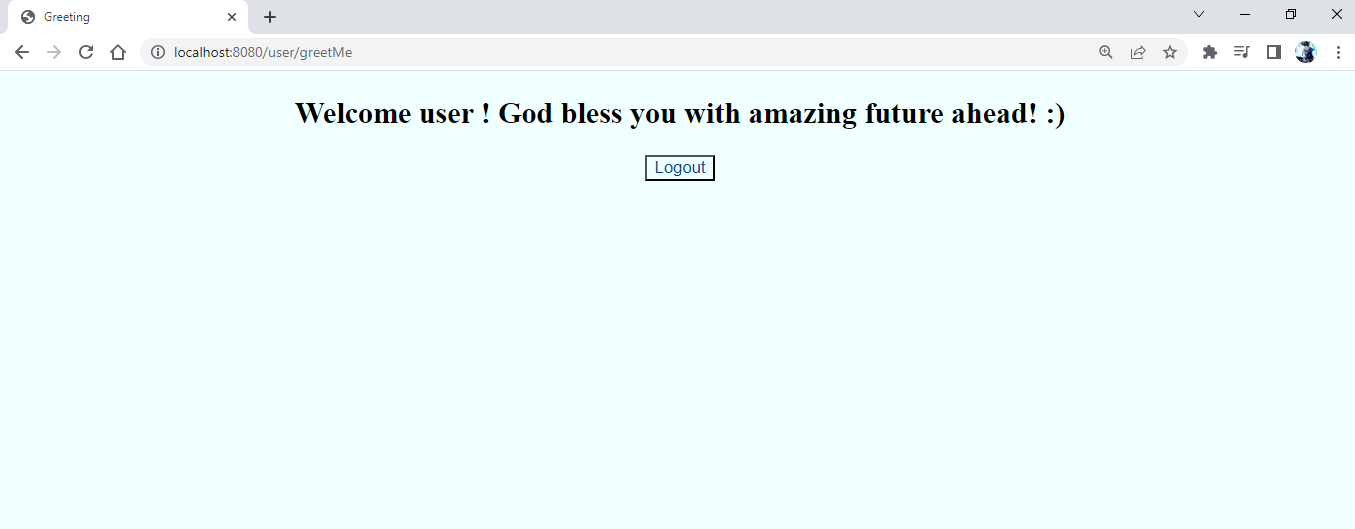
Now, clear the cookies of this localhost:8080 and restart your application and try to login with the account that you have just created and test whether it opens up the greeting page for the ROLE_USER or not!
Amazing! it opens the greetings page!
Now, let’s try to access the admin greetings page by just changing the /user/ with the /admin/ in the URL, and see if it allows us to access that or not!
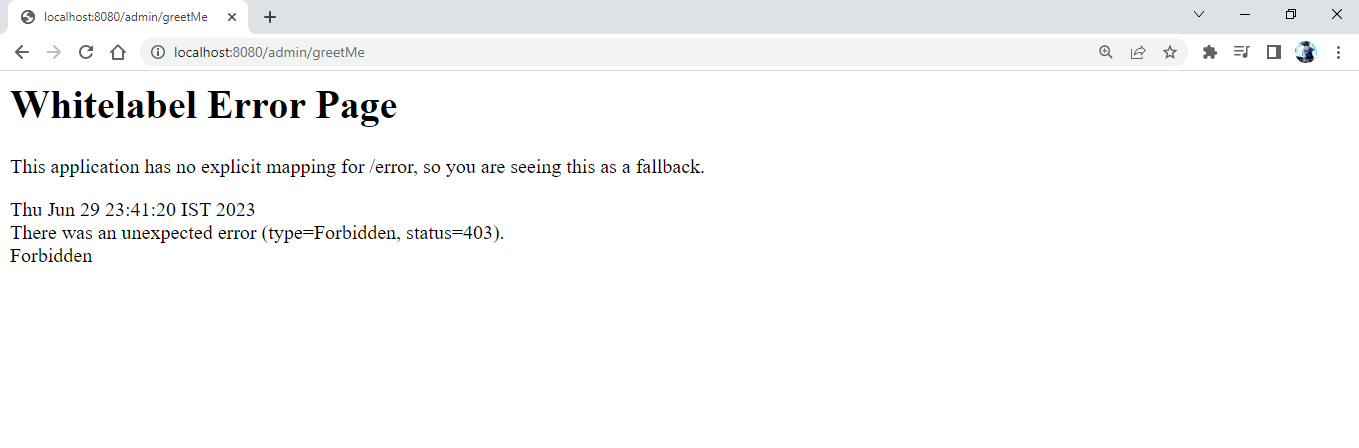
Oops! it’s giving us a Forbidden error! Because we are not authorized to do so!
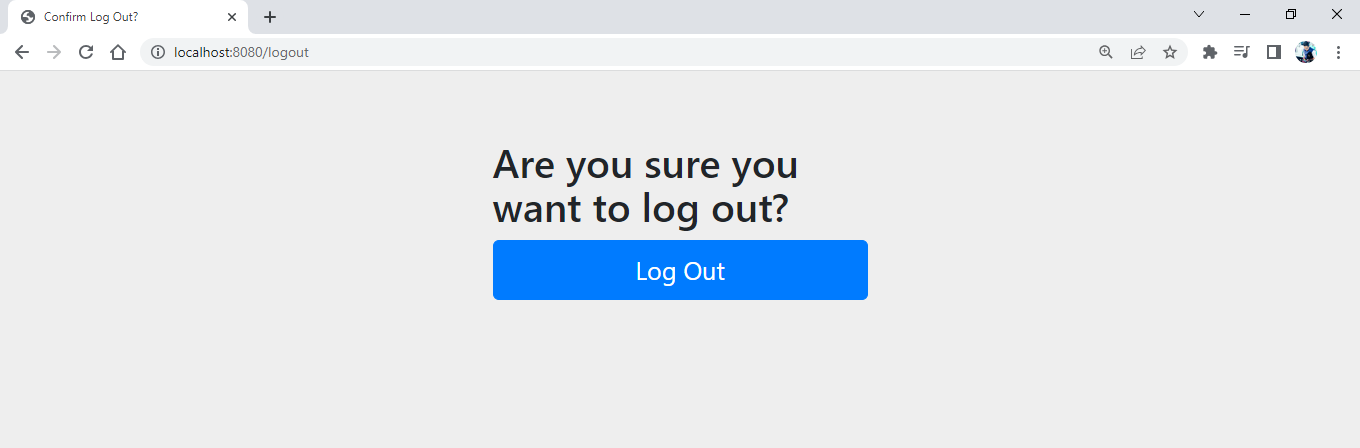
Now, click on the Logout button to logout, which will log out and redirect you to the index page again.
5. Automating the assignment of the default group to the user
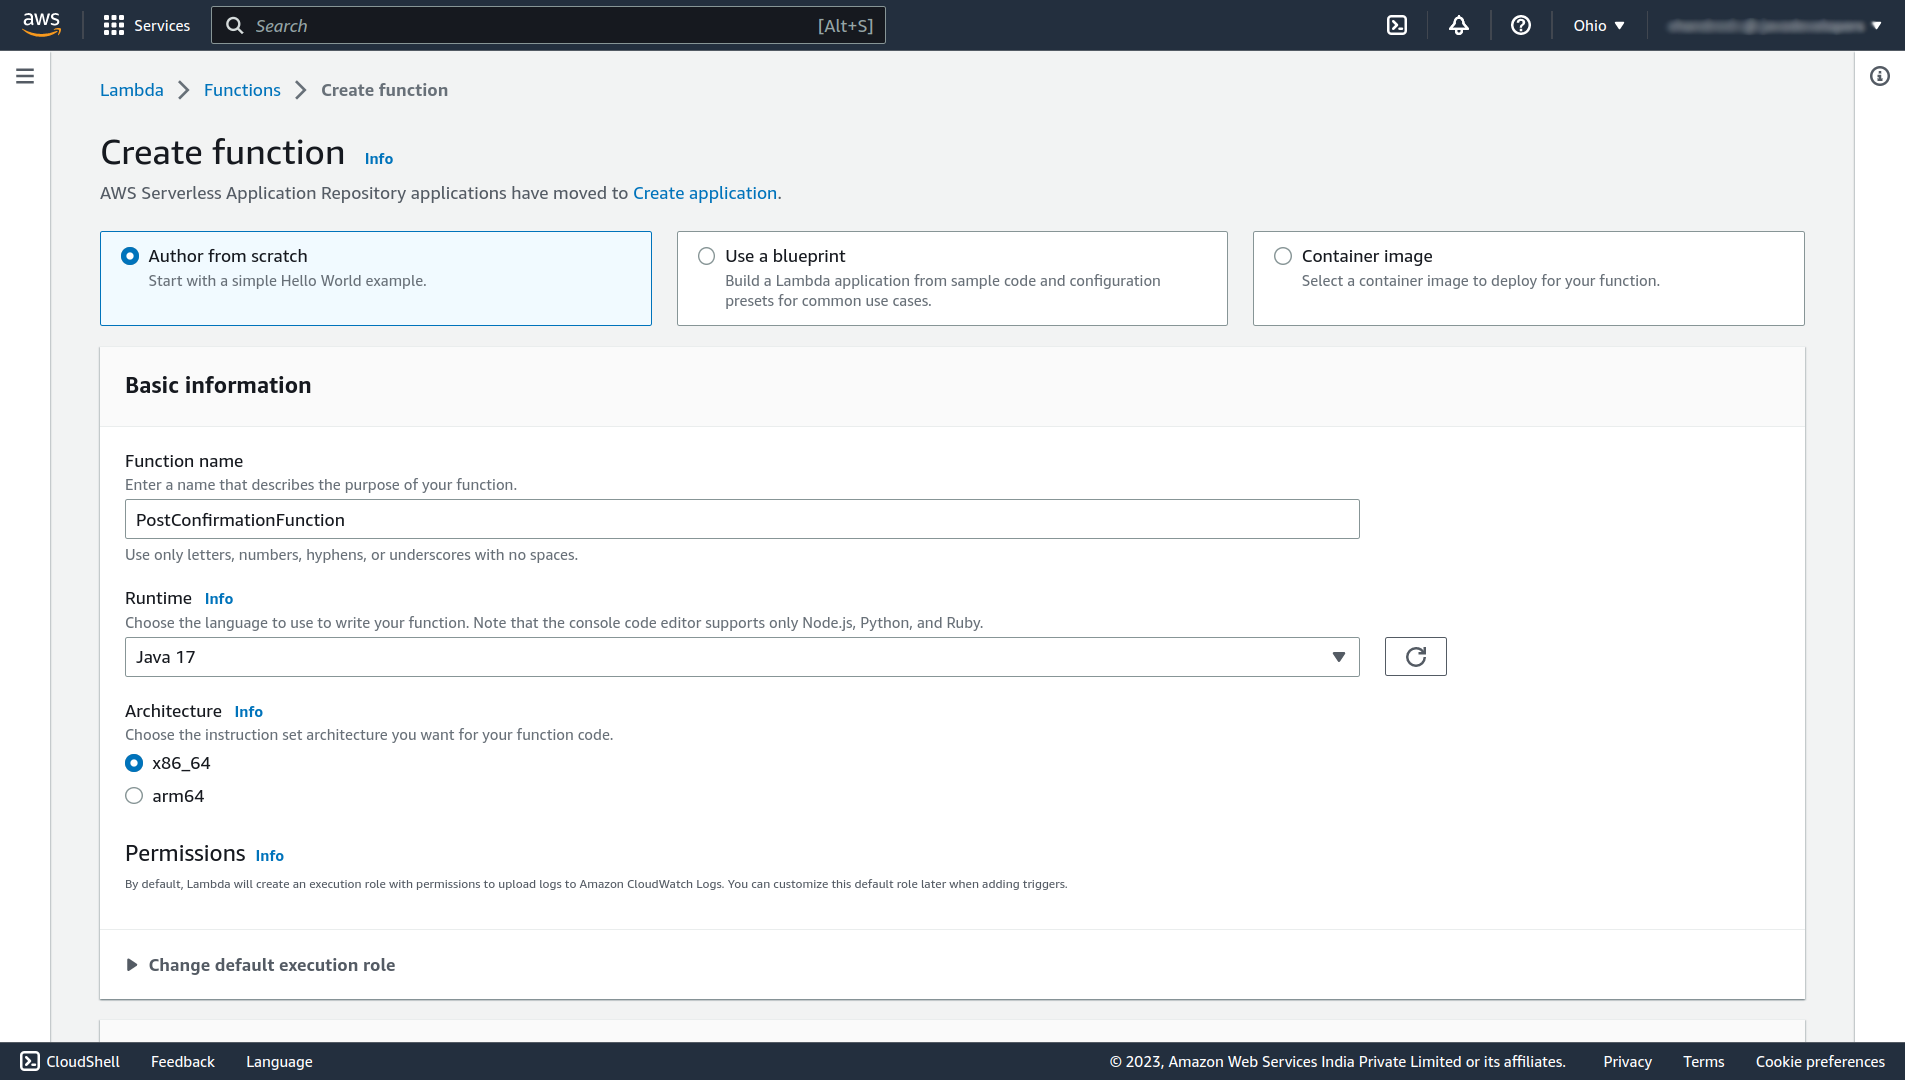
To assign the default group to any new user automatically, we can use the AWS Lambda function. For that navigate to the Lambda service.

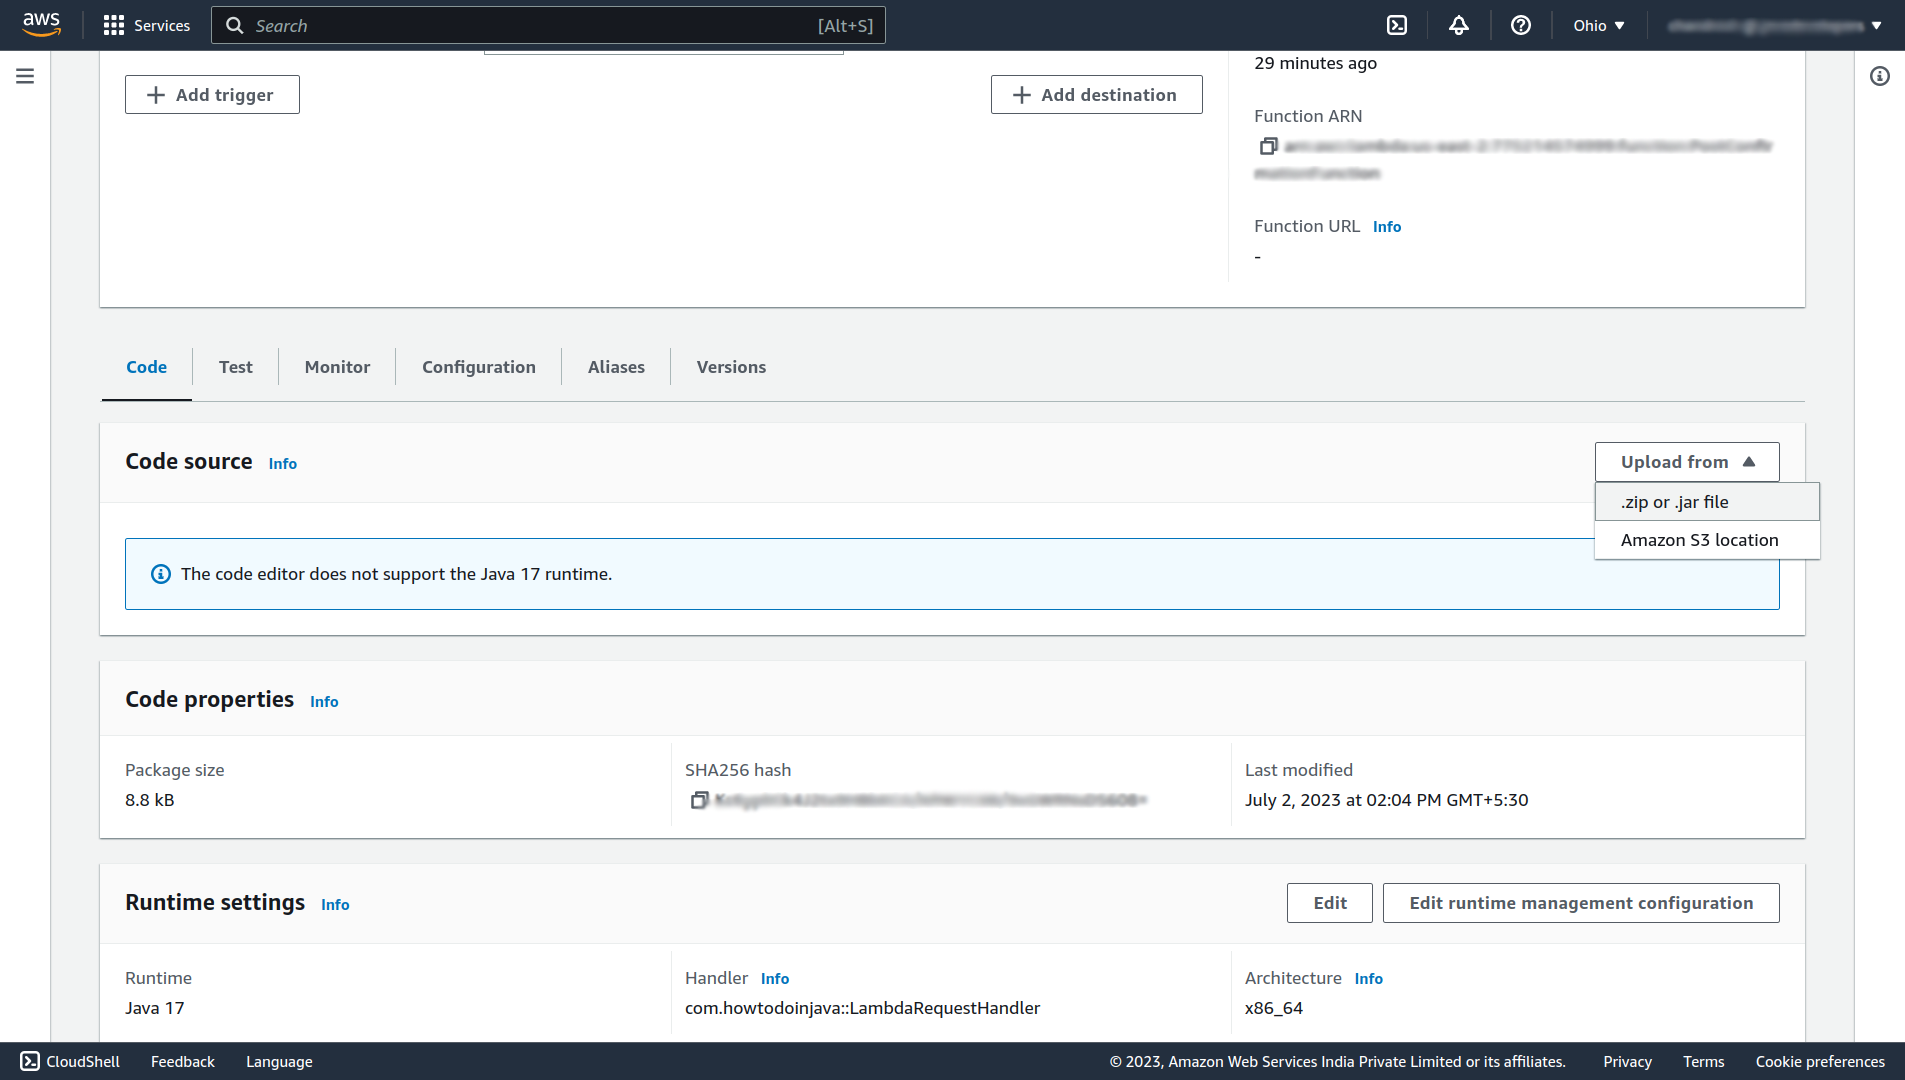
Click on the Create function button to create a new function. In that give the function a name (e.x. PostConfirmationFunction), select Java 17 as runtime, scroll down, and click Create function.
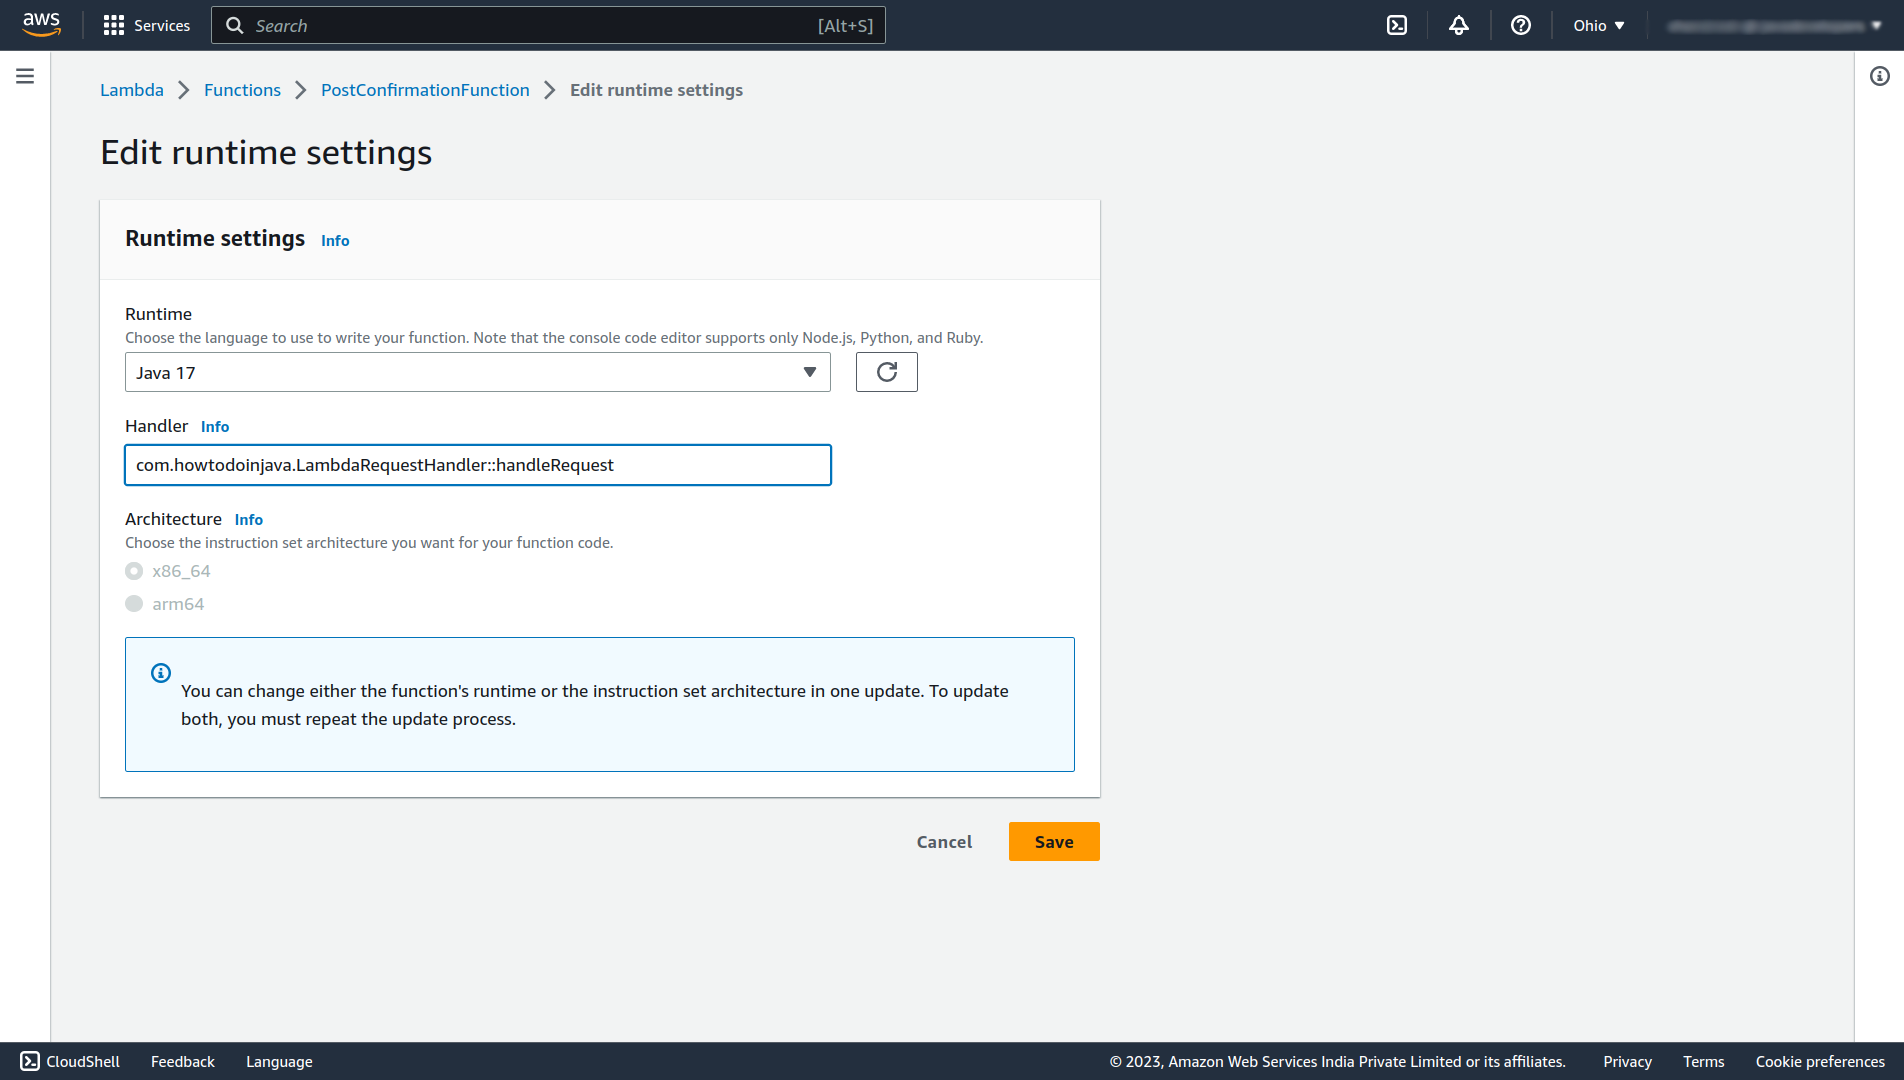
After the successful creation of the function, click the Edit button Under Runtime settings and change the Handler to the fully qualified class name followed by the method name that you want to run (e.x. com.howtodoinjava.LambdaRequestHandler::handleRequest), and click on Save.
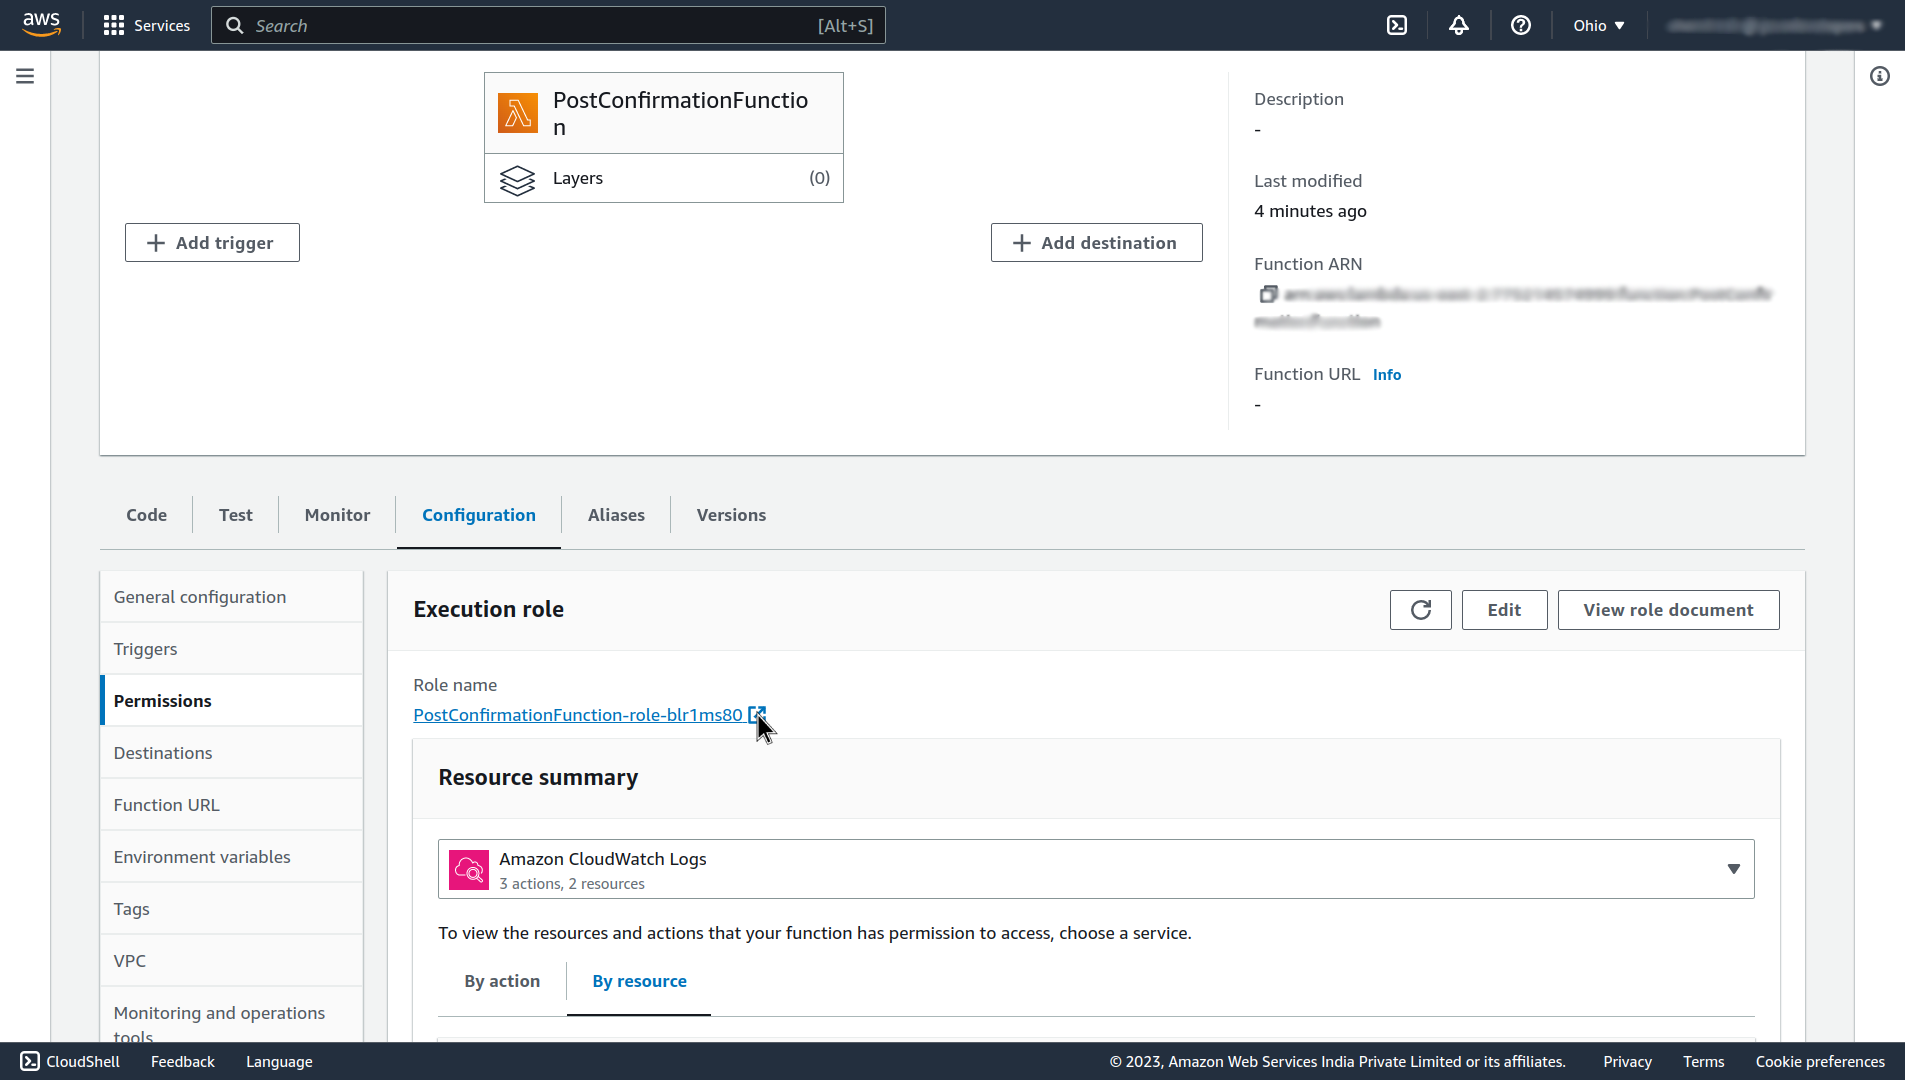
Next, let’s give that function the permission for adding the user to the user group, for that navigate to the Configuration section, and click on the Role name in the Permissions tab in that section.
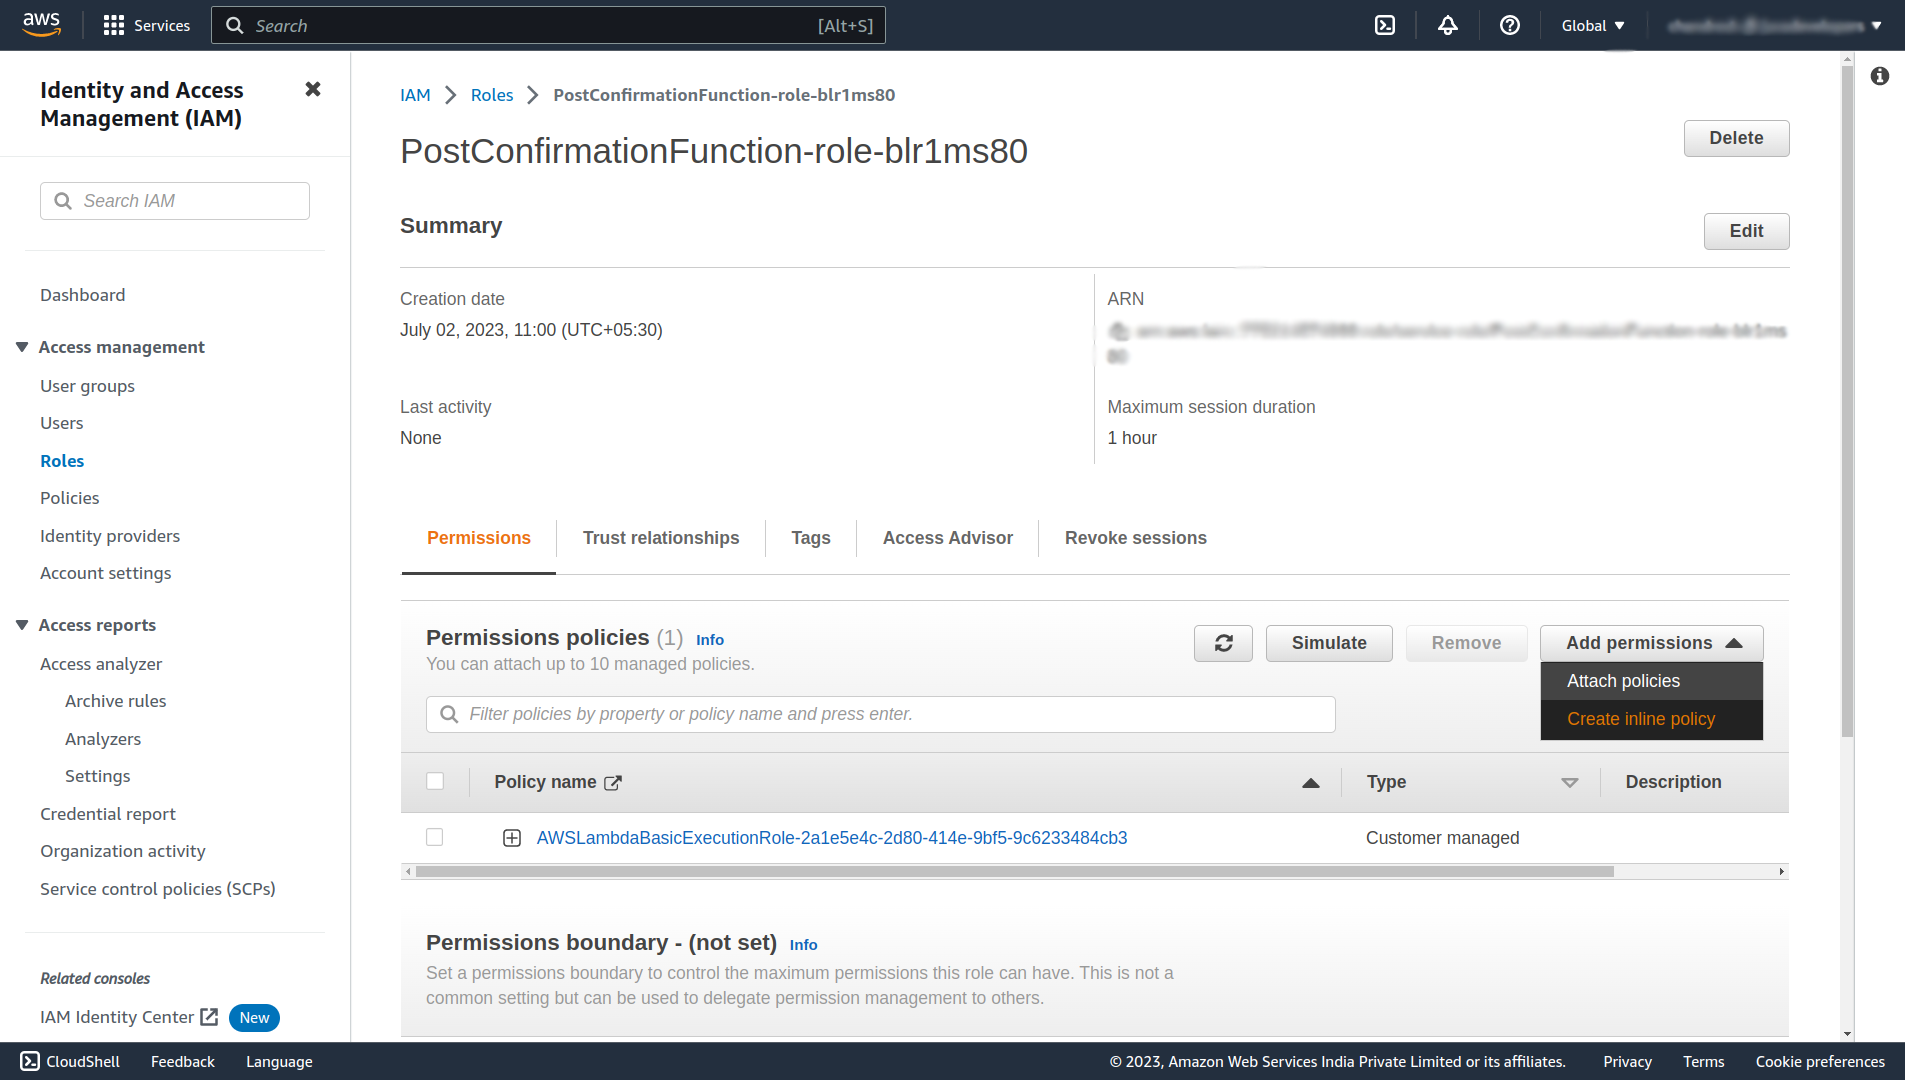
It will open up an Identity and Access Management (IAM) page, click on the Add permissions, and select Create inline policy.
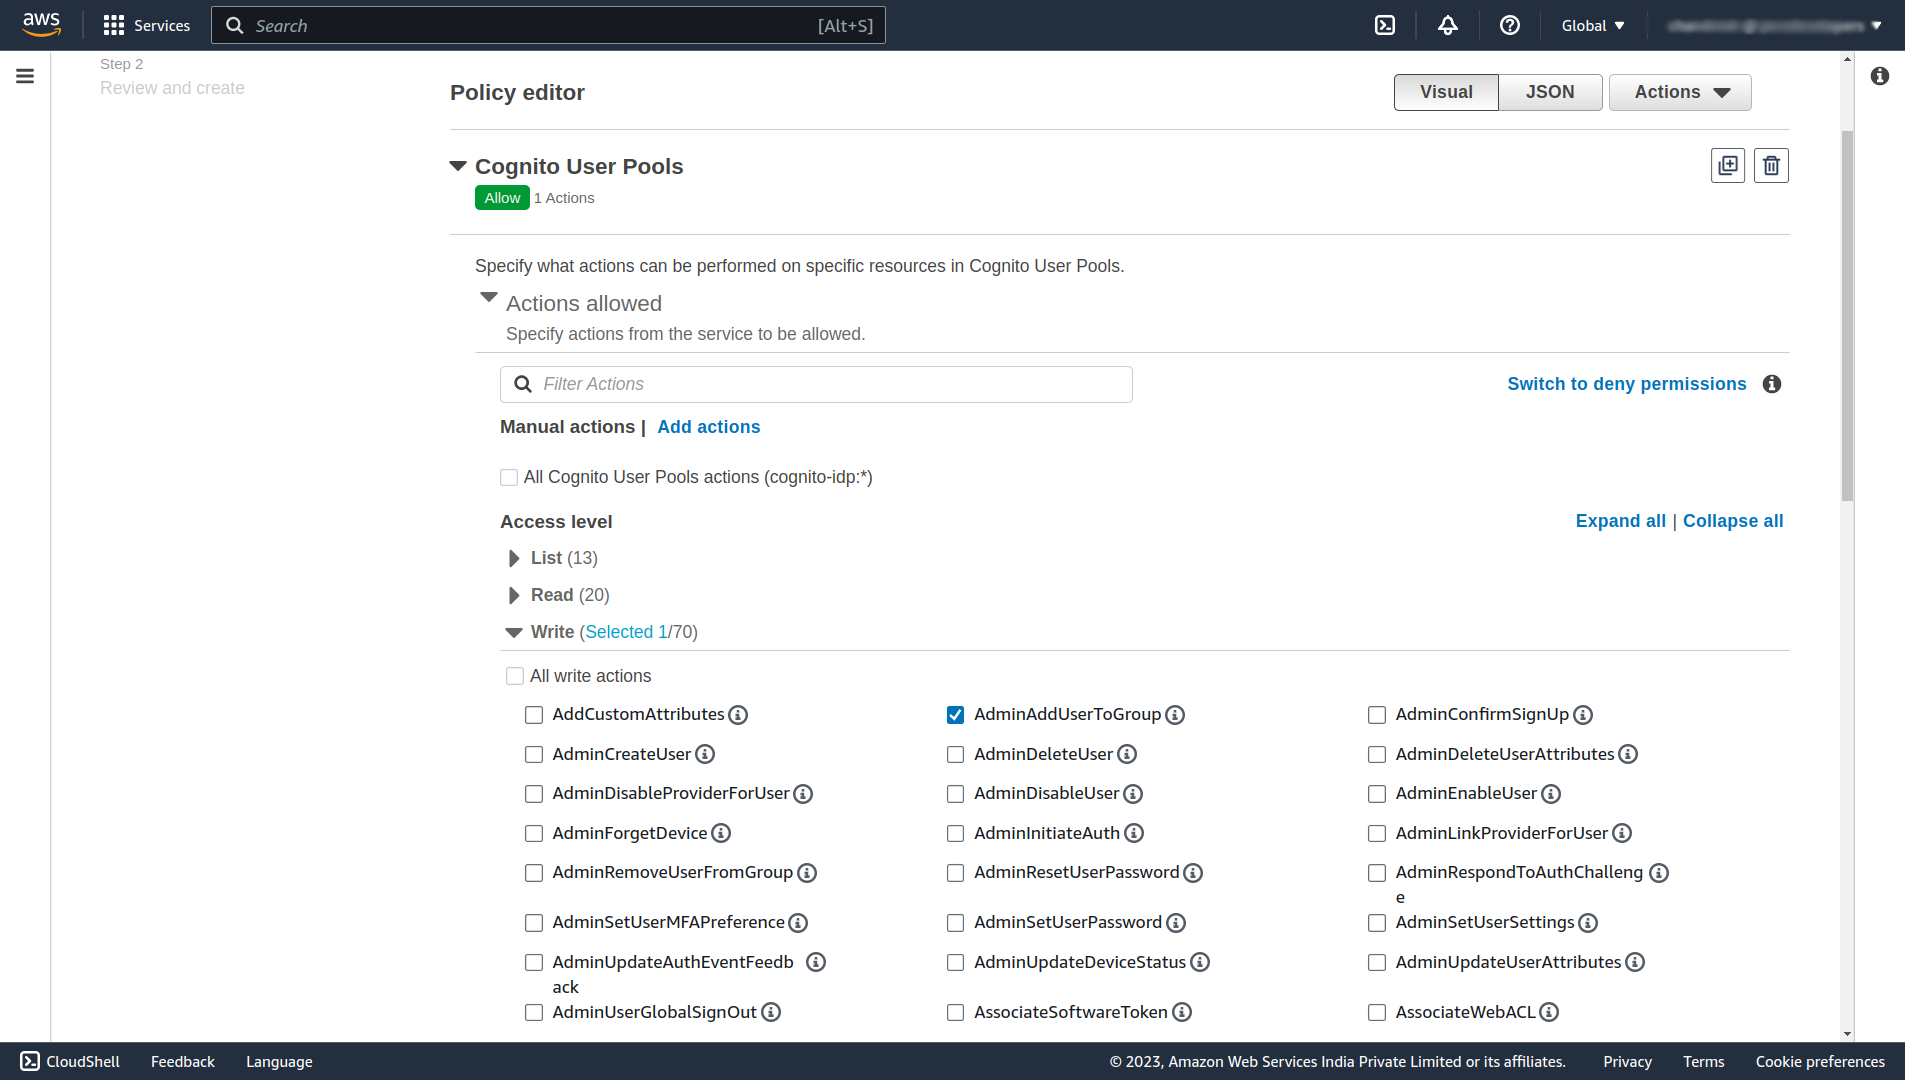
On this page select Cognito User Pools service, and under the Write section select AdminAddUserToGroup.
Scroll down and under the Resources section select the ARN of your user pool or check the Any in this account checkbox.
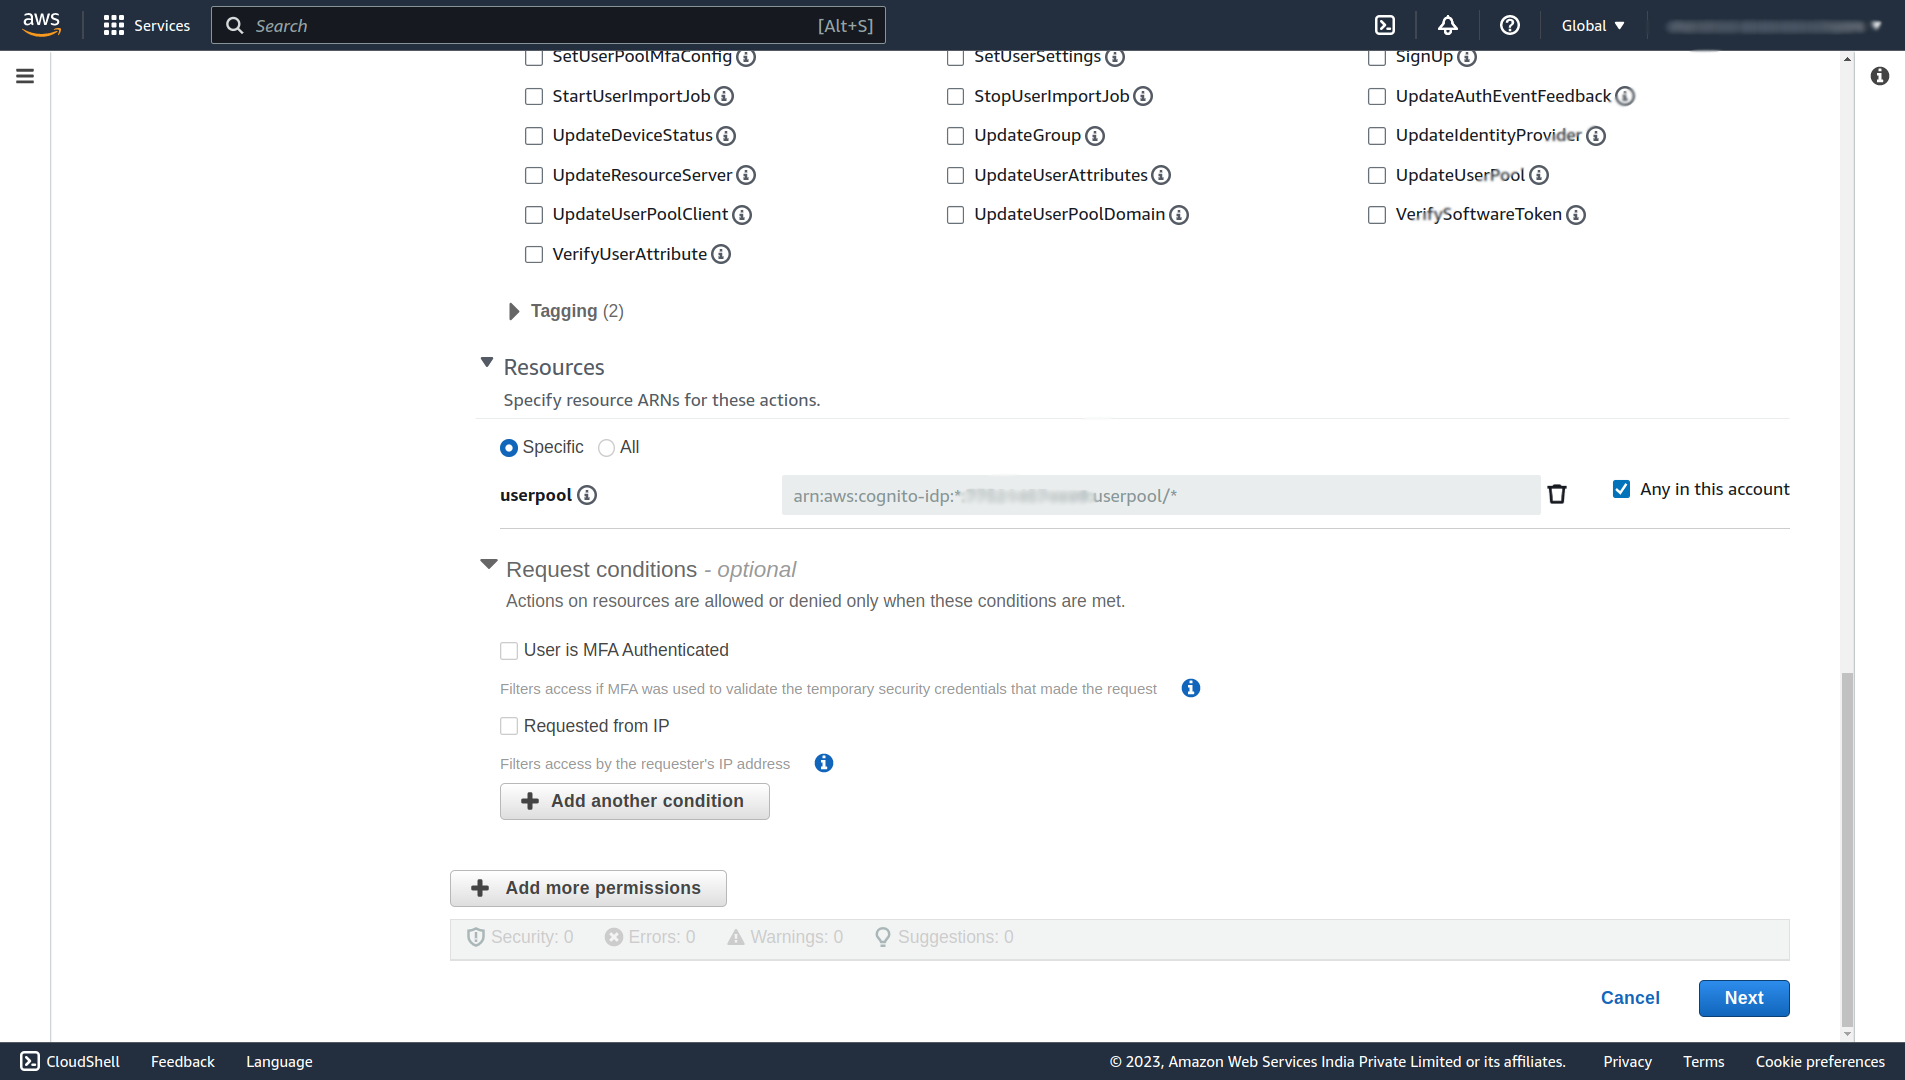
Click on Next, and on the next page Give the Policy name any name (e.x. AdminAddUserToGroupPolicy), and finally click Create policy.
Now let’s code that lambda function. Create a new simple maven project, open the pom.xml file of that new project, add these two dependencies, and maven shade plugin.
<dependency>
    <groupId>com.amazonaws</groupId>
    <artifactId>aws-lambda-java-core</artifactId>
    <version>1.2.1</version>
</dependency>

<dependency>
    <groupId>software.amazon.awssdk</groupId>
    <artifactId>cognitoidentityprovider</artifactId>
    <version>2.20.92</version>
</dependency>

<build>
    <plugins>
        <plugin>
            <groupId>org.apache.maven.plugins</groupId>
            <artifactId>maven-shade-plugin</artifactId>
            <version>2.4.3</version>
            <configuration>
                <createDependencyReducedPom>false</createDependencyReducedPom>
            </configuration>
            <executions>
                <execution>
                    <phase>package</phase>
                    <goals>
                        <goal>shade</goal>
                    </goals>
                </execution>
            </executions>
        </plugin>
    </plugins>
</build>
Then, create a LambdaRequestHandler.java file in your base package (e.x. com.howtodoinjava) and write code to add the newly created user to the default user group.
public class LambdaRequestHandler implements RequestHandler<Map<String, Object>, Map<String, Object>> {

    @Override
    public Map<String, Object> handleRequest(Map<String, Object> event, Context context) {

        try (CognitoIdentityProviderClient client = CognitoIdentityProviderClient.create()) {
            AdminAddUserToGroupRequest adminAddUserToGroupRequest = AdminAddUserToGroupRequest.builder()
                    .groupName("USER")
                    .username(event.get("userName").toString())
                    .userPoolId(event.get("userPoolId").toString())
                    .build();

            client.adminAddUserToGroup(adminAddUserToGroupRequest);

            context.getLogger().log("User " + event.get("userName").toString() + " Added to group USER");
        } catch (Exception exception) {
            context.getLogger().log("Failed to add user " + event.get("userName").toString() + "Reason: " + exception.getMessage());
        }
        return event;
    }
}
Now, open the terminal and write the following command to generate an executable shaded jar file.
mvn package shade:shadeIt will generate the executable jar files in the target folder of your project. Upload that jar file into the lambda function that we’ve created.
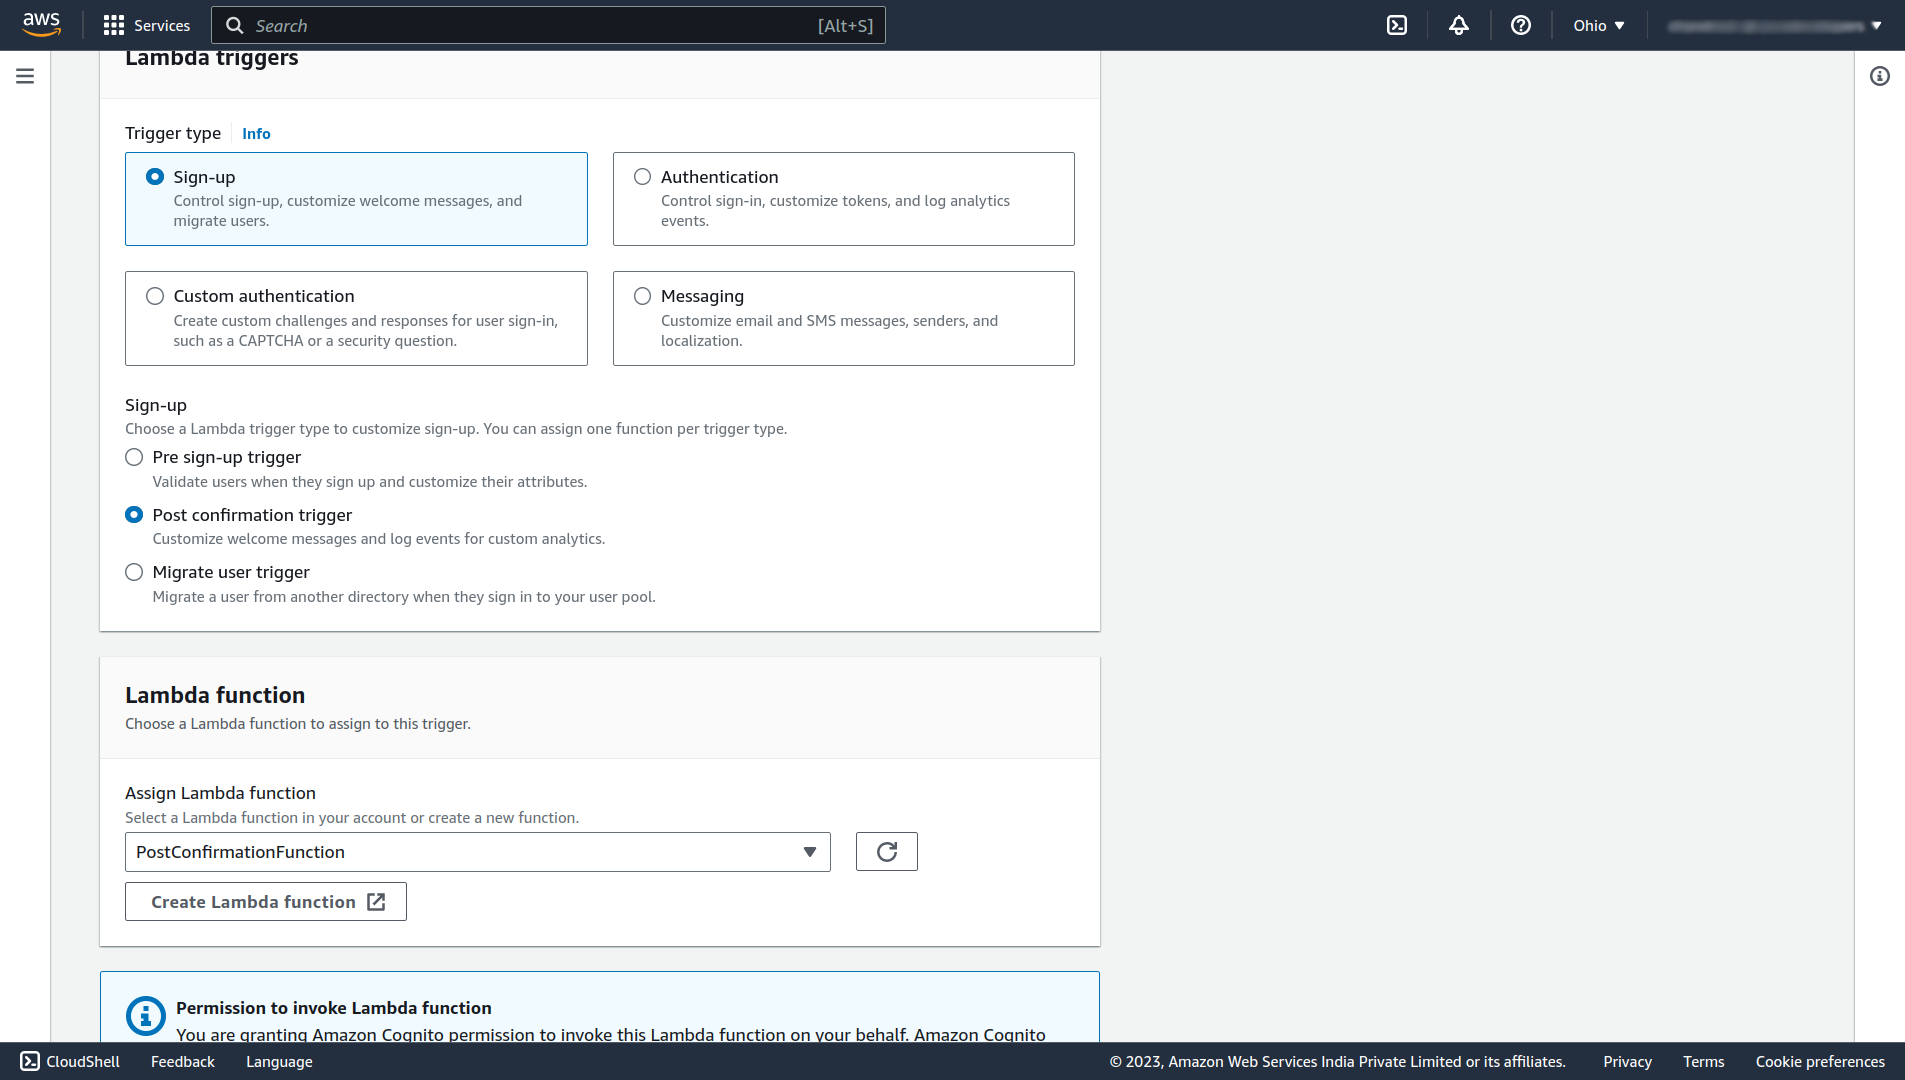
After uploading the code successfully, now let’s configure the trigger to invoke the lambda function on Post confirmation of the user’s new account. For that navigate to your user pool and under the User pool properties section, click on the Add Lambda trigger button.
Select the Post confirmation trigger and your lambda function name in which you’ve just uploaded the code to add the user to the user group. Scroll down and click on Add Lambda trigger.
Done, now whenever a new user will confirm his account the user will be automatically added to the USER group of our user pool. So it will be given ROLE_USER access by default. Now there is no need to add the user manually to the user group.
6. Customize the Login Page
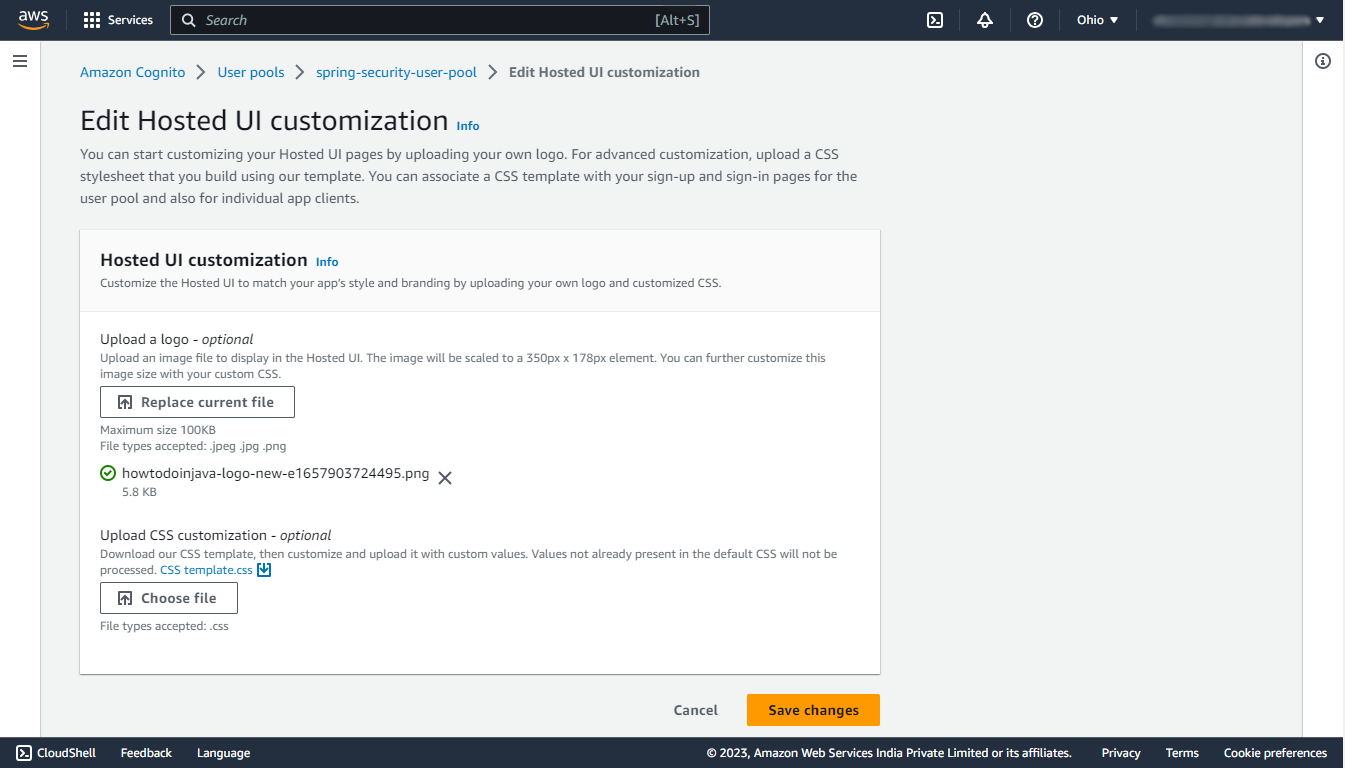
In order to customize the default Hosted UI of aws, navigate to your user pool, in that under the App integration section you’ll find an Edit button for Hosted UI customization, click on that button. There you can upload your own logo and download the CSS template, edit it, and upload that CSS file to customize the UI.
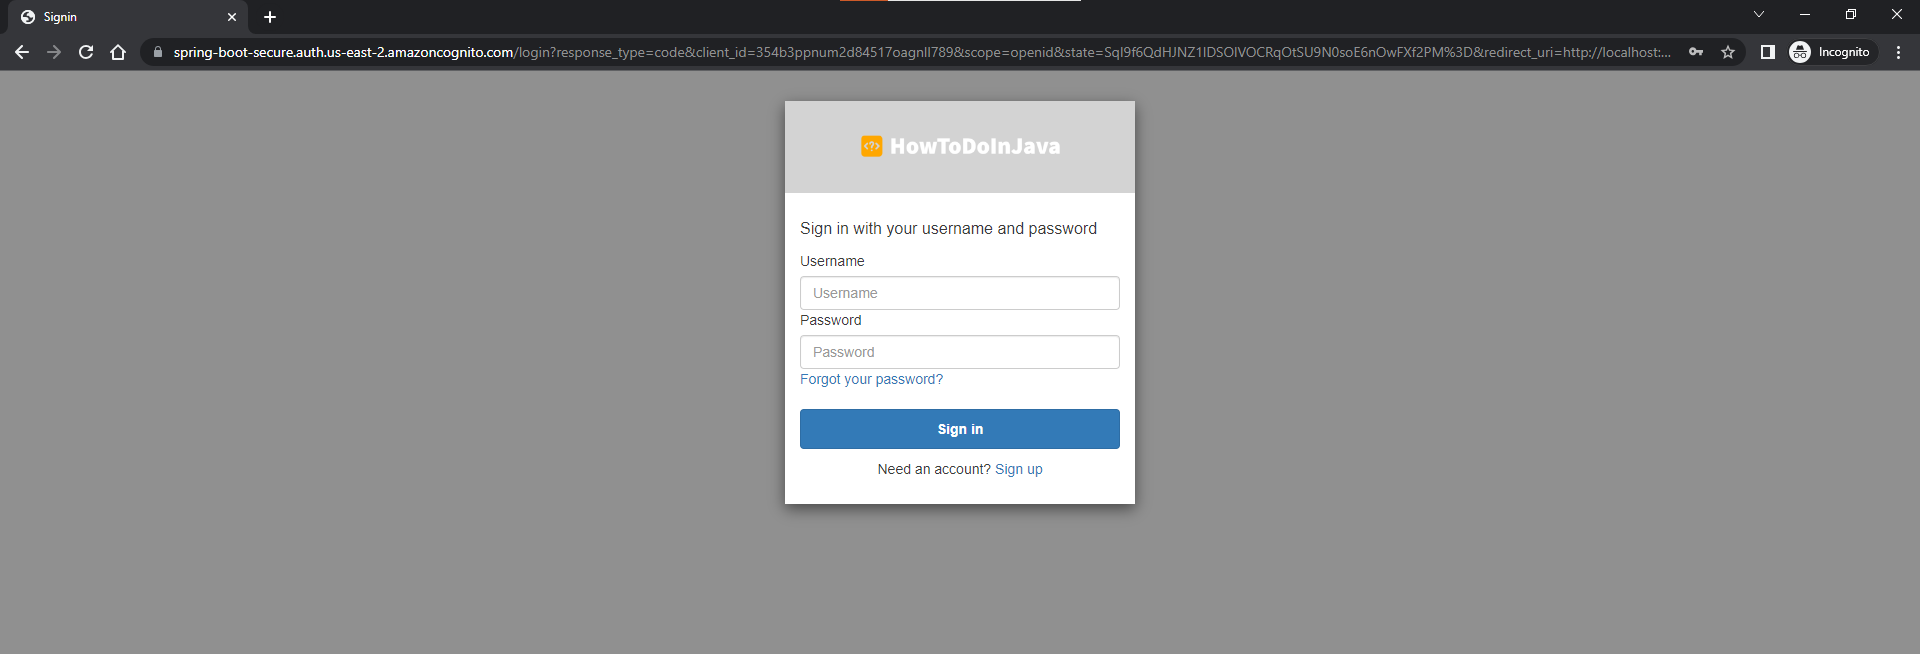
Let’s try again to login in incognito mode! Now the UI will contain our logo too!
7. Conclusion
In this tutorial, we have learned about how to configure the user pool in the AWS Cognito, how to create the app client, how to integrate it with our Spring boot application using Spring security, how to work with user groups to provide authorization, and how to automate the assignment of the default user group to the new user.
Happy Learning !!
Hello Lokesh Gupta, i was searching for this kind of tutorial, Thank you, you have solved my issue. BUT I am curious to know how you prepared this code! what is the source you followed. what should be the approach of studying it. from where shall i study as most of the code on internet is deprecated. Please blaze the trail. PS: I have sent you a linkedin request please consider. my name is Vipin Bhatiwal.
There is no particular source(s). The author (its paid contribution) went through official guides of AWS and Spring boot and some Stackoverflow threads and built a working demo.
Hi Lokesh. Thank you for such a great article. Your example worked perfectly for me and is the one article I found that uses the latest Spring Security framework with AWS Cognito.
One thing I noticed is that when you log out, it doesn’t fully log you out of Cognito. After logging out, if I navigate to the user/greetMe or admin/greetMe endpoints, I am NOT prompted for my email and password again.
Do you know how I can implement this to log out both within my app and Cognito?
I updated the post. Please try and share if it works for you.