A DataSource is a factory for connections to a physical database. This tutorial will discuss what is a datasource and how to create and customize the DataSource bean in Spring boot applications.
1. What is DataSource?
The DataSource works as a factory for providing database connections. It is an alternative to the DriverManager facility. A datasource uses a URL along with username/password credentials to establish the database connection.
In Java, a datasource implements the javax.sql.DataSource interface. This datasource will typically be registered with the JNDI service and can be discovered using its JNDI name.
We may use a datasource to obtain the following:
- standard
Connectionobject - a connection that can be used in connection pooling
- a connection that can be used in distributed transactions and connection pooling
2. Configuring a DataSource in Spring Boot
Spring boot allows defining datasource configuration in the following ways:
- Java bean configuration
- Properties configuration
- JNDI configuration
During application startup, the DataSourceAutoConfiguration checks for DataSource.class (or EmbeddedDatabaseType.class) on the classpath and a few other things before configuring a DataSource bean for us.
2.1. Maven Dependency
If not already defined, include spring-boot-starter-data-jpa to the project that transitively brings all necessary dependencies including JDBC drivers for various databases e.g. mysql-connector-java for connecting to MySQL database.
<dependency>
    <groupId>org.springframework.boot</groupId>
    <artifactId>spring-boot-starter-data-jpa</artifactId>
</dependency>
If we plan to use an embedded database at some step (e.g., testing), we can import H2 DB separately.
2.2. Properties Configuration
DataSource configuration is provided by configuration properties entries ( spring.datasource.* ) in application.properties file. The properties configuration decouples the configuration from the application code. This way, we can import the datasource configurations from even external configuration provider systems.
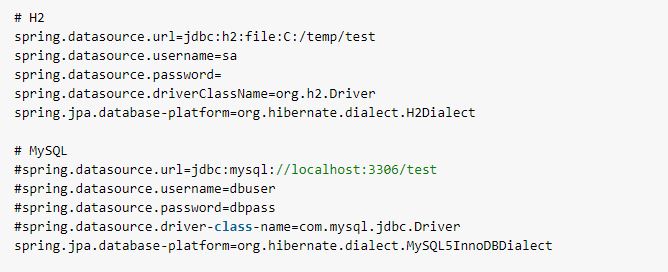
Below given configuration shows sample properties for H2, MySQL, Oracle and SQL Server databases.
We often do not need to specify the
driver-class-name, since Spring Boot can deduce it for the most databases from the connection url.
# H2 DB
spring.datasource.url=jdbc:h2:file:C:/temp/test
spring.datasource.username=sa
spring.datasource.password=
spring.datasource.driverClassName=org.h2.Driver
spring.jpa.database-platform=org.hibernate.dialect.H2Dialect

# MySQL
spring.datasource.url=jdbc:mysql://localhost:3306/test
spring.datasource.username=dbuser
spring.datasource.password=dbpass
spring.datasource.driver-class-name=com.mysql.jdbc.Driver
spring.jpa.database-platform=org.hibernate.dialect.MySQL5InnoDBDialect

# Oracle
spring.datasource.url=jdbc:oracle:thin:@localhost:1521:orcl
spring.datasource.username=dbuser
spring.datasource.password=dbpass
spring.datasource.driver-class-name=oracle.jdbc.OracleDriver
spring.jpa.database-platform=org.hibernate.dialect.Oracle10gDialect

# SQL Server
spring.datasource.url=jdbc:sqlserver://localhost;databaseName=springbootdb
spring.datasource.username=dbuser
spring.datasource.password=dbpass
spring.datasource.driverClassName=com.microsoft.sqlserver.jdbc.SQLServerDriver
spring.jpa.hibernate.dialect=org.hibernate.dialect.SQLServer2012Dialect
2.3. Java Configuration
The recommended way to create a DataSource bean is using DataSourceBuilder class within a class annotated with the @Configuration annotation.
Given is an example bean for H2 DB. Please configure other beans as necessary.
@Configuration
public class JpaConfig {

    @Bean
    public DataSource dataSource()
    {
        DataSourceBuilder dataSourceBuilder = DataSourceBuilder.create();
        dataSourceBuilder.driverClassName("org.h2.Driver");
        dataSourceBuilder.url("jdbc:h2:file:C:/temp/test");
        dataSourceBuilder.username("sa");
        dataSourceBuilder.password("");
        return dataSourceBuilder.build();
    }

    //...
}
2.4. JNDI DataSource
Suppose we deploy our Spring Boot application to an application server. In that case, we might want to configure and manage the DataSource using the Application Server’s built-in features and access it using JNDI.
We can do this using the spring.datasource.jndi-name property.
#JBoss defined datasource using JNDI

spring.datasource.jndi-name = java:jboss/datasources/testDB
3. Configuring Connection Pooling
For a pooling datasource to be created, Spring Boot verifies that a valid Driver class is available. Note that if we set spring.datasource.driver-class-name property then the mentioned driver class must be found and loaded.
- The auto-configuration first tries to find and configure HikariCP. If HikariCP is available, it always chooses it.
- Otherwise, if the Tomcat Pooling is found, it is configured.
- If neither HikariCP nor the Tomcat Pooling datasource is available, then Commons DBCP2 is used if found on the classpath.
The
spring-boot-starter-data-jpastarter automatically get a dependency toHikariCP.
3.1. HikariCP is the Default Connection Pool
If we’re using spring-boot-starter-data-jpa in the project, we don’t need to explicitly add the HikariCP dependency because it’s already included as a transitive dependency.
When we use this starter, Spring Boot will automatically configure a HikariCP connection pool based on sensible default settings. We can further customize the HikariCP configuration, if required, using the implementation-specific settings by changing their respective prefix (spring.datasource.hikari.*, spring.datasource.tomcat.*, and spring.datasource.dbcp2.*).
spring.datasource.hikari.connection-timeout=30000
spring.datasource.hikari.maximum-pool-size=10
spring.datasource.hikari.minimum-idle=5
spring.datasource.hikari.idle-timeout=600000
spring.datasource.hikari.max-lifetime=1800000
spring.datasource.hikari.pool-name=collection-pool

# Other Properties

#spring.datasource.hikari.allow-pool-suspension
#spring.datasource.hikari.auto-commit
#spring.datasource.hikari.catalog
#spring.datasource.hikari.connection-init-sql
#spring.datasource.hikari.connection-test-query
#spring.datasource.hikari.data-source-class-name
#spring.datasource.hikari.data-source-j-n-d-i
#spring.datasource.hikari.data-source-properties
#spring.datasource.hikari.driver-class-name
#spring.datasource.hikari.exception-override-class-name
#spring.datasource.hikari.health-check-properties
#spring.datasource.hikari.initialization-fail-timeout
#spring.datasource.hikari.isolate-internal-queries
#spring.datasource.hikari.jdbc-url
#spring.datasource.hikari.keepalive-time
#spring.datasource.hikari.leak-detection-threshold
#spring.datasource.hikari.login-timeout
#spring.datasource.hikari.metrics-tracker-factory
#spring.datasource.hikari.password
#spring.datasource.hikari.read-only
#spring.datasource.hikari.register-mbeans
#spring.datasource.hikari.scheduled-executor
#spring.datasource.hikari.schema
#spring.datasource.hikari.transaction-isolation
#spring.datasource.hikari.username
#spring.datasource.hikari.validation-timeout
3.2. DBCP2
To use Commons DBCP2 in a Spring Boot application, include the DBCP2 dependency:
<dependency>
    <groupId>org.apache.commons</groupId>
    <artifactId>commons-dbcp2</artifactId>
</dependency>
Further, we can use the below properties to customize a DBCP2 connection pool.
spring.datasource.dbcp2.initial-size = 50
spring.datasource.dbcp2.max-idle = 50
spring.datasource.dbcp2.default-query-timeout = 10000
spring.datasource.dbcp2.default-auto-commit = true

# Refer other properties in documentation
3.3. Customizing Default Values
Tomcat Pooling is a connection pool provided by Apache Tomcat. To use Tomcat Pooling in a Spring Boot application, include the Tomcat JDBC dependency.
<dependency>
    <groupId>org.apache.tomcat</groupId>
    <artifactId>tomcat-jdbc</artifactId>
</dependency>
Further, we can use the below properties to customize a Tomcat connection pool.
spring.datasource.tomcat.initial-size=5
spring.datasource.tomcat.max-active=10

# Refer other properties in documentation
4. Configuring Multiple DataSources with Spring Boot
To configure multiple data sources, create as many bean definitions as you want but mark one of the DataSource instances as @Primary.
Remember that if we create our own DataSource bean then auto-configuration backs off. In this case, we are responsible for providing configurations for all datasource beans.
@Configuration
public class JpaConfig {

    @Bean(name = "h2DataSource")
    public DataSource h2DataSource()
    {
        DataSourceBuilder dataSourceBuilder = DataSourceBuilder.create();
        dataSourceBuilder.driverClassName("org.h2.Driver");
        dataSourceBuilder.url("jdbc:h2:file:C:/temp/test");
        dataSourceBuilder.username("sa");
        dataSourceBuilder.password("");
        return dataSourceBuilder.build();
    }

    @Bean(name = "mysqlDataSource")
    @Primary
    public DataSource mysqlDataSource()
    {
        DataSourceBuilder dataSourceBuilder = DataSourceBuilder.create();
        dataSourceBuilder.url("jdbc:mysql://localhost/testdb");
        dataSourceBuilder.username("dbuser");
        dataSourceBuilder.password("dbpass");
        return dataSourceBuilder.build();
    }
}
While autowiring the datasource, spring boot will prefer the primary datasource i.e., “mysqlDataSource”. To autowire another non-primary datasource, use @Qualifier annotation.
@Autowired
DataSource dataSource;
@Autowired
@Qualifier("h2DataSource")
DataSource dataSource;5. Conclusion
Spring boot provides straightforward ways to create datasource beans – either using properties configuration or using Java configuration. Spring boot offers ready-made auto configuration to use which can be further customized with advanced options in application.properties file.
Spring boot tries to find and configure connection pooling, first HikariCP, second Tomcat pooling, and finally Commons DBCP2. HikariCP comes inbuilt with spring-boot-starter-jdbc or spring-boot-starter-data-jpa starters.
We can configure multiple datasources, and we must mark as one of them @Primary. The primary datasource is autowired by default, and other datasources need to be autowired along with @Qualifier annotation.
Happy Learning !!


Comments