Learn to use basic authentication to secure the REST APIs created in a Spring boot application. The secured API will ask for user authentication credentials before giving access to the API response.
1. Maven Dependency
The simplest way to add all required jars is to add the latest version of spring-boot-starter-security dependency.
<dependency>
    <groupId>org.springframework.boot</groupId>
    <artifactId>spring-boot-starter-security</artifactId>
</dependency>
2. Configure Spring Security
To enable authentication and authorization support, we can configure the utility class WebSecurityConfigurerAdapter (deprecated). It helps in requiring the user to be authenticated prior to accessing any configured URL (or all URLs) within our application.
In the following configuration, we are using httpBasic() which enables basic authentication. We are also configuring the in-memory authentication manager to supply a username and password.
@Configuration
@EnableWebSecurity
public class SecurityConfig extends WebSecurityConfigurerAdapter
{
    @Override
    protected void configure(HttpSecurity http) throws Exception
    {
        http
         .csrf().disable()
         .authorizeRequests().anyRequest().authenticated()
         .and()
         .httpBasic();
    }

    @Autowired
    public void configureGlobal(AuthenticationManagerBuilder auth)
            throws Exception
    {
        auth.inMemoryAuthentication()
        	.withUser("admin")
        	.password("{noop}password")
        	.roles("ROLE_USER");
    }
}
Starting Spring Boot 2.7.0, WebSecurityConfigurerAdapter is deprecated. We can rewrite the above basic auth configuration in the latest versions as follows:
@Configuration
public class BasicAuthWebSecurityConfiguration
{
  @Autowired
  private AppBasicAuthenticationEntryPoint authenticationEntryPoint;

  @Bean
  public SecurityFilterChain filterChain(HttpSecurity http) throws Exception {
    http.authorizeRequests()
        .antMatchers("/public").permitAll()
        .anyRequest().authenticated()
        .and()
        .httpBasic()
        .authenticationEntryPoint(authenticationEntryPoint);
    return http.build();
  }

  @Bean
  public InMemoryUserDetailsManager userDetailsService() {
    UserDetails user = User
        .withUsername("user")
        .password(passwordEncoder().encode("password"))
        .roles("USER_ROLE")
        .build();
    return new InMemoryUserDetailsManager(user);
  }

  @Bean
  public PasswordEncoder passwordEncoder() {
    return new BCryptPasswordEncoder(8);
  }
}
See Also: Basic Auth with Spring Security
3. Basic Authentication Demo
For demo purposes, we can write a simple REST API given below.
3.1. REST API
@RestController
@RequestMapping(path = "/employees")
public class EmployeeController
{
@Autowired
private EmployeeDAO employeeDao;
@GetMapping(path="/", produces = "application/json")
public Employees getEmployees()
{
return employeeDao.getAllEmployees();
}
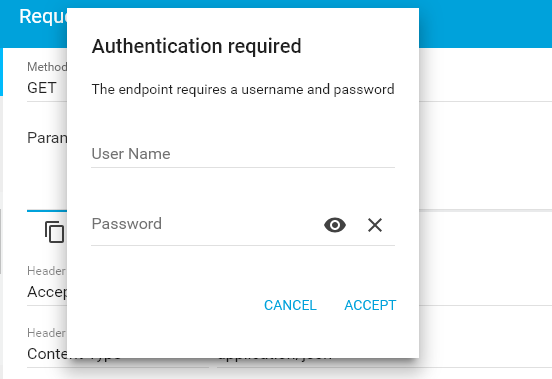
}3.2. Accessing the API without ‘authorization‘ Header
Access rest api at URL: HTTP GET http://localhost:8080/employees/
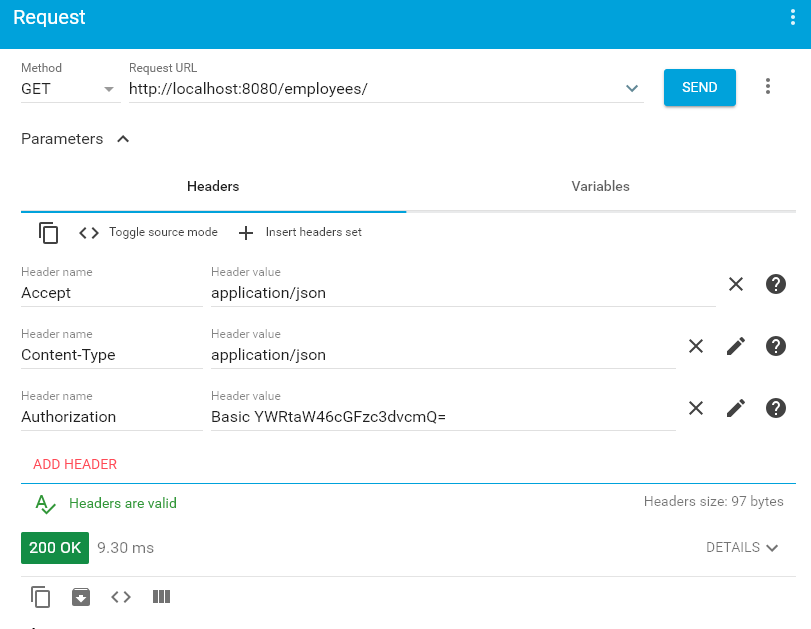
3.3. With ‘authorization‘ Header
Upon passing authorization request header with encoded basic-auth user name and password combination, we will be able to access the rest api response.
Access rest api at URL: HTTP GET http://localhost:8080/employees/
3.4. Generate Basic Auth Encoding
Browser apI testing tools are able to generate the base-64 encoded token by themselves using the plain username and password. But if we need to generate the encoded token ourselves to pass the token programmatically, then we can use the following code that uses the java.util.Base64 class.
String encoding = Base64.getEncoder().encodeToString((user + ":" + password).getBytes());
String authHeader = "Basic " + encoding;
For example, when making a call from Apache HttpClient, we can use the following code:
String encoding = Base64.getEncoder().encodeToString((user + ":" + password).getBytes());
HttpPost httpPost = new HttpPost("http://localhost:8080/api-url");
httpPost.setHeader(HttpHeaders.AUTHORIZATION, "Basic " + encoding);

HttpResponse response = httpClient.execute(httpPost);
HttpEntity entity = response.getEntity();
4. Conclusion
In this spring boot security basic authentication example, we learned to secure REST APIs with basic authentication. It is done in two steps.
- The first step is to include required dependencies e.g. spring-boot-starter-security.
- The second step is to configure
WebSecurityConfigurerAdapterorSecurityFilterChainand add authentication details.
Happy Learning !!
how to disable httpBasic in spring boot 3?)
Use property
"spring.security.basic.enabled=false"This authenticates the user, in my flow I need the Principal reference to get the Id out of it. The subsequent logic depends on it. I dont see a straight forward way to achieve this.
You can pass the Principal as a method argument, and the framework will handle the insertion for you.
public String currentUserName(Principal principal) {
return principal.getName();
}
Or you can inject HttpServletRequest as method argument and use
request.getUserPrincipal()method.authentication not working for post request.
Check this link –
.csrf().disable()Instead of going through the pain of encoding username and passwords, you could always select ‘auth’ as ‘Basic auth’ in the postman/Insomnia UI and add in username and password in plain text itself.
Good example for basic understanding of spring security.
It would be better if you can add on more step on how to create authorization request header with encoded basic-auth user name and password combination. It will help.