
In this spring security tutorial, learn to add a default or custom login form to our Spring Boot MVC application. We will learn about the default login form and customize it further based on requirements.
1. Maven Dependencies
To include spring security in a Spring boot application, we need to spring-boot-starter-security dependency along with other module-specific dependencies.
<dependency>
  <groupId>org.springframework.boot</groupId>
  <artifactId>spring-boot-starter-web</artifactId>
</dependency>

<dependency>
  <groupId>org.springframework.boot</groupId>
  <artifactId>spring-boot-starter-security</artifactId>
</dependency>
If we are using a non spring-boot application then we need to include the following dependencies explicitly.
spring-security-corespring-security-configspring-security-web
<properties>
    <failOnMissingWebXml>false</failOnMissingWebXml>
    <spring.version>5.2.0.RELEASE</spring.version>
</properties>

<dependency>
  <groupId>org.springframework</groupId>
  <artifactId>spring-webmvc</artifactId>
  <version>${spring.version}</version>
</dependency>

<dependency>
  <groupId>org.springframework.security</groupId>
  <artifactId>spring-security-core</artifactId>
  <version>${spring.version}</version>
</dependency>

<dependency>
  <groupId>org.springframework.security</groupId>
  <artifactId>spring-security-config</artifactId>
  <version>${spring.version}</version>
</dependency>

<dependency>
  <groupId>org.springframework.security</groupId>
  <artifactId>spring-security-web</artifactId>
  <version>${spring.version}</version>
</dependency>
2. Login Configuration
To configure the login form-based security, we need to configure the following components:
2.1. AuthenticationProvider
An authentication provider is responsible for providing the authentication logic with the help of UserDetailsManager and PasswordEncoder implementations. To keep things simple, we are using InMemoryUserDetailsManager.
@EnableWebSecurity
public class SecurityConfig {

  @Bean
  public UserDetailsService userDetailsService() {
    UserDetails user = User.builder()
        .username("user")
        .password(passwordEncoder().encode("password"))
        .roles("USER")
        .build();
    UserDetails admin = User.builder()
        .username("admin")
        .password(passwordEncoder().encode("password"))
        .roles("USER", "ADMIN")
        .build();
    return new InMemoryUserDetailsManager(user, admin);
  }

  @Bean
  public PasswordEncoder passwordEncoder() {
    return new BCryptPasswordEncoder();
  }

  //Other beans
}
We can configure JDBC authentication also, as follows:
@Bean
public UserDetailsService jdbcUserDetailsService(DataSource dataSource) {

	return new JdbcUserDetailsManager(dataSource);
}
2.2. Serving Default Login Page
In a Spring security-protected application, an unauthenticated user is redirected to a form where they can use their credentials to authenticate. Once the application authenticates them, they are redirected to the homepage of the application.
Spring boot provides sensible defaults when it detects that form-based authentication has been configured. To enable the form-based login, we can invoke the formLogin() method with HttpSecurity class.
The formLogin() method returns an object of type FormLoginConfigurer<HttpSecurity> which allows us to work on more customizations.
@EnableWebSecurityenables Spring Security’s web security support, and also provides the Spring MVC integration.WebSecurityConfigurerAdapterprovides a set of methods that are used to enable specific web security configuration.configure(HttpSecurity http)is used to secure different URLs that need security.
@EnableWebSecurity
public class SecurityConfig {
@Bean
public SecurityFilterChain filterChain(HttpSecurity http) throws Exception {
http.authorizeRequests()
.requestMatchers("/login").permitAll()
.requestMatchers("/**").authenticated()
.and()
.formLogin().permitAll();
return http.build();
}
//...
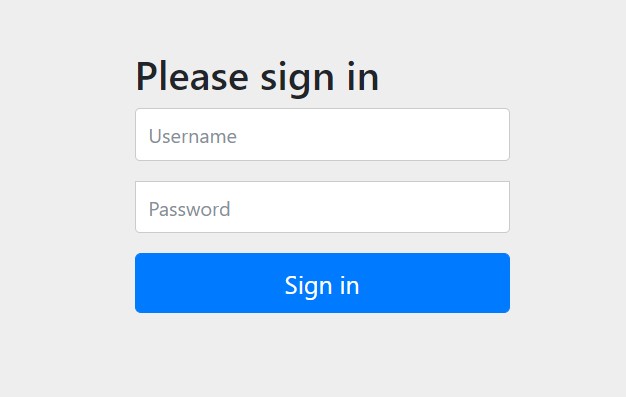
}If we run the application with this much configuration, we will get a nice-looking default login page in the browser.
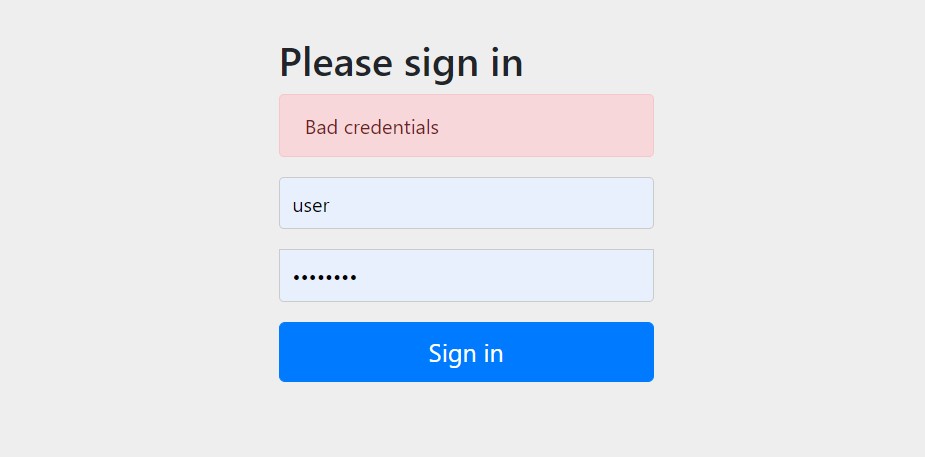
If we enter the incorrect username and password for a user, we will get the Bad credentials error.
If we enter the correct credentials, we will be redirected to the application’s root URL.
2.3 Custom Login Page Configuration
The default login form is good for starting, but in a production class application, we must provide a customized login form and various authentication options.
@EnableWebSecurity
public class SecurityConfig extends WebSecurityConfigurerAdapter {

  @Override
  protected void configure(final HttpSecurity http) throws Exception {

    //@formatter:off
    http.authorizeRequests()
        .antMatchers("/login").permitAll()
        .antMatchers("/**").hasAnyRole("USER", "ADMIN")
        .antMatchers("/admin/**").hasAnyRole("ADMIN")
        .and()
          .formLogin()
          .loginPage("/login")
          .loginProcessingUrl("/process-login")
          .defaultSuccessUrl("/home")
          .failureUrl("/login?error=true")
          .permitAll()
        .and()
          .logout()
          .logoutSuccessUrl("/login?logout=true")
          .invalidateHttpSession(true)
          .deleteCookies("JSESSIONID")
          .permitAll()
        .and()
          .csrf()
          .disable();
    //@formatter:on
  }

  @Override
  public void configure(WebSecurity web) {
    web.ignoring()
        .antMatchers("/resources/**", "/static/**");
  }
}
2.3.1. Custom Login Page
The loginPage(“/login”) function configures a custom login page at URL /login. We must define a URL mapping handler that will return the view name for it.
@Controller
public class LoginController {
@GetMapping("/login")
public String login() {
return "login";
}
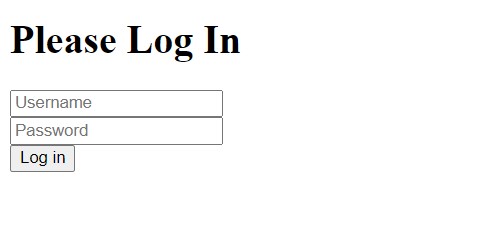
}The src/main/resources/templates/login.html file is served with the default ThymeleafViewResolver that has the default template directory as src/main/resources/templates.
Now when we run the application, the default login page has been changed with our HTML file. Rest all the functionality works the same.
2.3.2. Login Processing URL
The loginProcessingUrl(“/process-login”) function specifies a custom authentication processing URL instead of the default URL /login.
We must specify the custom URL in the view file HTML form element’s action attribute.
<!DOCTYPE html>
<html xmlns="http://www.w3.org/1999/xhtml" xmlns:th="https://www.thymeleaf.org">
<head>
    <title>Please Log In</title>
</head>
<body>
<h1>Please Log In</h1>
<div th:if="${param.error}">
    Invalid username and password.
</div>
<div th:if="${param.logout}">
    You have been logged out.
</div>
<form method="post" th:action="@{/process-login}">
    <div>
        <input name="username" placeholder="Username" type="text"/>
    </div>
    <div>
        <input name="password" placeholder="Password" type="password"/>
    </div>
    <input type="submit" value="Log in"/>
</form>
</body>
</html>
2.3.3. Login Success and Failure Landing URLs
We can configure the login success URL (default is root URL) to another URL using defaultSuccessUrl() and failureUrl() methods.
In the given configuration, if username/password matches then the request is redirected to /home else login page is refreshed with the respective error message.
http.formLogin()
      .defaultSuccessUrl("/home")
      .failureUrl("/login?error=true")
      .permitAll();
2.3.4. Custom Username and Password Fields
By default, spring security uses username field as ‘username‘ and password as ‘password‘. If we are using some other field names in login.html file then we can override the default field names.
http.formLogin()
  .loginPage("/login")
  .usernameParameter("email")
  .passwordParameter("passcode")
  .permitAll()
Now use the new field names as follows:
<form th:action="@{/login}" method="post">
    <p>
        E-mail: <input type="email" name="email" required />
    </p>
    <p>
        Password: <input type="password" name="passcode" required />
    </p>
    <p>
        <input type="submit" value="Login" />
    </p>
</form>
2.3.5. Login Success and Failure Forward URLs
Rather than forwarding to root URL, If we want to forward the control to any specific URL then we can specify using successForwardUrl() method. Using this method, we can execute custom logic after the user has logged in successfully, e.g. inserting a special audit entry and then forward to desired view.
http.formLogin()
    .successForwardUrl("/login_success_handler");
Similarly, we can specify a handler method for login failure attempts.
http.formLogin()
    .failureForwardUrl("/login_failure_handler");
Above URLs needs to be present in some MVC controller.
@Controller
public class LoginController {

  //Other code

  @PostMapping("/login_success_handler")
  public String loginSuccessHandler() {
    //perform audit action
    return "/";
  }

  @PostMapping("/login_failure_handler")
  public String loginFailureHandler() {
    //perform audit action
    return "login";
  }
}
2.3.6. Custom Authentication Handlers
Similar to login success and failure forward URLs, we can also write authentication success and failure handler methods by implementing the AuthenticationSuccessHandler and AuthenticationFailureHandler interfaces.
These implementations provide direct access to the Authentication object.
http.formLogin()
  .successHandler(authenticationSuccessHandler())
  .failureHandler(authenticationFailureHandler());
Define the beans in the security configuration file.
  @Bean
  AuthenticationSuccessHandler authenticationSuccessHandler() {
    return new CustomAuthenticationSuccessHandler();
  }

  @Bean
  AuthenticationFailureHandler authenticationFailureHandler() {
    return new CustomAuthenticationFailureHandler();
  }
The implementation classes are:
public class CustomAuthenticationSuccessHandler
    implements AuthenticationSuccessHandler {

  @Override
  public void onAuthenticationSuccess(HttpServletRequest request,
                                      HttpServletResponse response,
                                      Authentication authentication) throws IOException, ServletException {

    System.out.println("Logged user: " + authentication.getName());

    response.sendRedirect("/");
  }
}
public class CustomAuthenticationFailureHandler implements AuthenticationFailureHandler {
@Override
public void onAuthenticationFailure(HttpServletRequest httpServletRequest,
HttpServletResponse httpServletResponse
, AuthenticationException e) throws IOException {
httpServletResponse.setStatus(HttpStatus.UNAUTHORIZED.value());
String jsonPayload = "{\"message\" : \"%s\", \"timestamp\" : \"%s\" }";
httpServletResponse.getOutputStream()
.println(String.format(jsonPayload,
e.getMessage(),
Calendar.getInstance().getTime()));
}
}3. Bind Spring Security in Non-Spring-Boot Application
Spring boot, by default, uses auto-configuration feature to configure the default spring security and related beans. We need to customize the required components similar to what we did in the previous section.
In non-spring boot web applications, the security is implemented using DelegatingFilterProxy. To register it, with spring container in Java configuration, you shall use WebApplicationInitializer.
The spring will detect the instance of this class during application startup, and register the DelegatingFilterProxy to use the springSecurityFilterChain before any other registered Filter. It also registers a ContextLoaderListener.
public class AppInitializer implements WebApplicationInitializer {

    @Override
    public void onStartup(ServletContext sc) {

        AnnotationConfigWebApplicationContext root = new AnnotationConfigWebApplicationContext();
        root.register(SecurityConfig.class);

        sc.addListener(new ContextLoaderListener(root));

        sc.addFilter("securityFilter", new DelegatingFilterProxy("springSecurityFilterChain"))
          .addMappingForUrlPatterns(null, false, "/*");
    }
}
4. Conclusion
In this tutorial, we learned about the default login functionality provided by spring security. Then we learned to customize the login form to a custom HTML page. We also learned to customize basic login and logout processing.
Happy Learning !!
The sample code given has home.jsp but nothing relates to the output when we execute the GitHub checkout, it will not work correctly.
Can you please correct the sample to match like to show in the output?
I will check this out, again.
thankyou very much, i need spring security JWT config example too.
I use noOpPasswordEncoder to not to encrypt my password but I wasn’t able to redirect it to the page.
I face the same issue, I sout the login controller to see whether it is redirecting to another page or not. I found out that it’s redirecting to the same page again and again.
Tried running the code.
After login, the login page is being displayed again and again with no redirection to homepage.