Spring security configuration example to enable spring security with the help of @EnableWebSecurity annotation without the WebSecurityConfigurerAdapter class. This example is built on top of the spring webmvc hibernate integration example.
1. Maven
Start with including spring security jars. We are using Maven so added respective dependencies in pom.xml.
<properties>
    <spring.version>6.0.3</spring.version>
</properties>

<dependency>
  <groupId>org.springframework.security</groupId>
  <artifactId>spring-security-core</artifactId>
  <version>${spring.version}</version>
</dependency>

<dependency>
  <groupId>org.springframework.security</groupId>
  <artifactId>spring-security-config</artifactId>
  <version>${spring.version}</version>
</dependency>

<dependency>
  <groupId>org.springframework.security</groupId>
  <artifactId>spring-security-web</artifactId>
  <version>${spring.version}</version>
</dependency>
In case you are using Spring Boot, we can include the following dependency.
<dependency>
  <groupId>org.springframework.boot</groupId>
  <artifactId>spring-boot-starter-security</artifactId>
</dependency>
2. Configuring @EnableWebSecurity
The @EnableWebSecurity helps to configure the Spring security-related beans such as WebSecurityConfigurer or/and SecurityFilterChain.
In the following configuration example:
- We have created this simple security configuration and added two demo in-memory users ‘
user‘ and ‘admin‘. If we want to read the users from the database, we can use JdbcUserDetailsManager. - We are using BCryptPasswordEncoder to encode the user passwords for added security.
- In SecurityFilterChain bean, we are configuring the form-based login to the application. You can configure basic-auth or oauth2 login if needed.
- Using the WebSecurityCustomizer, we are disabling the security for static resources such as images and CSS.
import javax.sql.DataSource;
import org.springframework.beans.factory.annotation.Autowired;
import org.springframework.context.annotation.Bean;
import org.springframework.security.config.annotation.web.builders.HttpSecurity;
import org.springframework.security.config.annotation.web.configuration.EnableWebSecurity;
import org.springframework.security.config.annotation.web.configuration.WebSecurityCustomizer;
import org.springframework.security.core.userdetails.User;
import org.springframework.security.core.userdetails.UserDetails;
import org.springframework.security.core.userdetails.UserDetailsService;
import org.springframework.security.crypto.bcrypt.BCryptPasswordEncoder;
import org.springframework.security.crypto.password.PasswordEncoder;
import org.springframework.security.provisioning.InMemoryUserDetailsManager;
import org.springframework.security.provisioning.JdbcUserDetailsManager;
import org.springframework.security.web.SecurityFilterChain;

@EnableWebSecurity
public class SecurityConfig {

  @Bean
  public UserDetailsService inMemoryUserDetailsManager() {
    UserDetails user = User.builder()
        .username("user")
        .password(passwordEncoder().encode("password"))
        .roles("USER")
        .build();
    UserDetails admin = User.builder()
        .username("admin")
        .password(passwordEncoder().encode("password"))
        .roles("USER", "ADMIN")
        .build();
    return new InMemoryUserDetailsManager(user, admin);
  }

  /*@Bean
  public UserDetailsService jdbcUserDetailsService(DataSource dataSource) {
    return new JdbcUserDetailsManager(dataSource);
  }*/

  @Bean
  public PasswordEncoder passwordEncoder() {
    return new BCryptPasswordEncoder();
  }

  @Bean
  public SecurityFilterChain filterChain(HttpSecurity http) throws Exception {

    http.authorizeRequests()
        .requestMatchers("/login").permitAll()
        .requestMatchers("/**").authenticated()
        .and()
        .formLogin().permitAll();

    //@formatter:off
      http.authorizeRequests()
          .requestMatchers("/login").permitAll()
          .requestMatchers("/**").hasAnyRole("USER", "ADMIN")
          .requestMatchers("/admin/**").hasAnyRole("ADMIN")
          .and()
            .formLogin()
            .loginPage("/login")
            .loginProcessingUrl("/process-login")
            .defaultSuccessUrl("/home")
            .failureUrl("/login?error=true")
            .permitAll()
          .and()
            .logout()
            .logoutSuccessUrl("/login?logout=true")
            .invalidateHttpSession(true)
            .deleteCookies("JSESSIONID")
            .permitAll()
          .and()
            .csrf()
            .disable();
      //@formatter:on

    return http.build();
  }

  @Bean
  public WebSecurityCustomizer webSecurityCustomizer() {
    return (web) -> web.ignoring().requestMatchers("/resources/**", "/static/**");
  }

  /*@Bean
  AuthenticationSuccessHandler authenticationSuccessHandler() {
    return new CustomAuthenticationSuccessHandler();
  }

  @Bean
  AuthenticationFailureHandler authenticationFailureHandler() {
    return new CustomAuthenticationFailureHandler();
  }*/
}
3. Initializing Spring Security
The spring security is implemented using DelegatingFilterProxy.
- In Spring boot applications, auto-configuration detects the security configuration and automatically registers all necessary beans.
- In non-Spring boot applications, we shall use
AbstractSecurityWebApplicationInitializer.
The spring will detect the instance of this class during application startup, and register the DelegatingFilterProxy to use the springSecurityFilterChain before any other registered Filter. It also registers a ContextLoaderListener.
import org.springframework.security.web.context.AbstractSecurityWebApplicationInitializer;

public class SpringSecurityInitializer extends AbstractSecurityWebApplicationInitializer {

  //no code needed
}
Also, include SecurityConfig to AppInitializer.
public class AppInitializer extends AbstractAnnotationConfigDispatcherServletInitializer {

   @Override
   protected Class<?>[] getRootConfigClasses() {
      return new Class[] { HibernateConfig.class, SecurityConfig.class };
   }

   @Override
   protected Class<?>[] getServletConfigClasses() {
      return new Class[] { WebMvcConfig.class };
   }

   @Override
   protected String[] getServletMappings() {
      return new String[] { "/" };
   }
}
4. Verifying Security
Start the application and launch the home page. You will be given a login page. It means spring security is configured and working correctly.
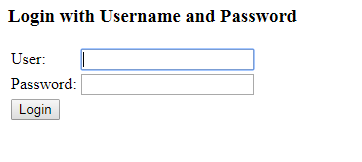
Login with username/password – ‘user’ and ‘123456’
Happy Learning !!