Spring boot is the latest and most famous backend Java Framework and Angular is the most recommended frontend UI Framework by industry experts. This tutorial will teach us how to create an angular application that consumes the REST APIs written using Spring boot MVC.
1. Introduction
In this tutorial, we will create a very simple User Management application. The application will have a very simple UI that will list all the available users in the system and options to add a user and update /or delete an existing user using the links or buttons.
We will start with creating the REST APIs first, and then we will create an angular app and design the specific screens and flows between various user actions.
2. Creating REST APIs with Spring Boot
We will develop a Spring Boot application to manage user information like “firstname”, “lastname”, “username” and “password” of a user, for demo purposes.
GET:    localhost:8080/users          // List all avialble users
POST:   localhost:8080/users          // Create a new user
GET:    localhost:8080/users/{id}     // Get a user by id
PUT:    localhost:8080/users/{id}     // Update a user information
DELETE: localhost:8080/users/{id} // Delete a User2.1. Spring Boot Starter Project
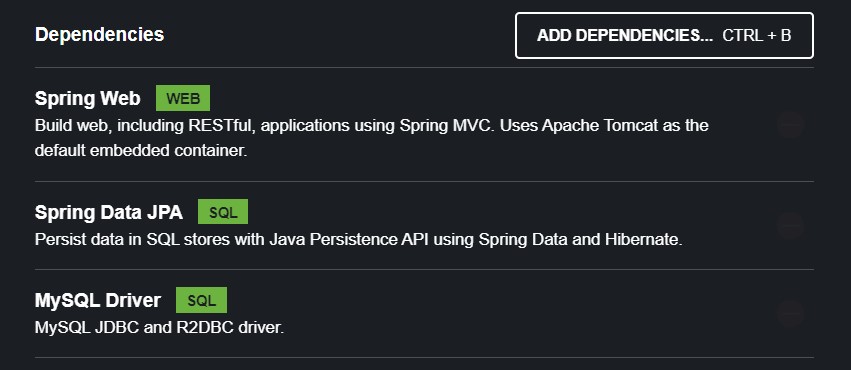
Start with creating a Spring Boot Starter Project in your favorite IDE or download it from the start.spring.io website. To keep things simple, we can include only the Web (spring-boot-starter-web) and JPA (spring-boot-starter-data-jpa). As the backend database server is MySQL, we can also include its driver.
2.2. Configure Persistence
Let’s create JpaRepository implementation UserRepository which provides all defaults operations for performing the search, get, update and delete operations on user entities
@Repository
public interface UserRepository extends CrudRepository<User, Integer> { }
Edit the application.properties to specify the database connection details and datasource configuration properties.
#JDBC connection properties

spring.datasource.driver-class-name = com.mysql.jdbc.Driver
spring.datasource.url =  jdbc:mysql://localhost:3306/howtodoinjavadb
spring.datasource.username = #your database username
spring.datasource.password = #your database password

#Hibernate properties

spring.jpa.properties.hibernate.dialect = org.hibernate.dialect.MySQL5Dialect
spring.jpa.hibernate.ddl-auto = update
spring.jpa.properties.hibernate.enable_lazy_load_no_trans=true
Let’s create User entity and add corresponding JPA annotations to map the class to a database table.
import javax.persistence.Column;
import javax.persistence.Entity;
import javax.persistence.GeneratedValue;
import javax.persistence.GenerationType;
import javax.persistence.Id;
import javax.persistence.Table;

@Entity
@Table(name = "TBL_USERS")
public class User {

	@GeneratedValue(strategy = GenerationType.IDENTITY)
	@Id private int id;

	@Column private String firstName;
	@Column private String lastName;
	@Column private String username;
	@Column private String password;

       //Getters, setters, constructors and toString() method
}
2.3. REST Controller
The UserController class has URL mappings and handler methods to manage the CRUD operations for User information
Note that we need to enable the request from the origin “http://localhost:4200” on which our Angular app will be hosted.
import java.util.List;
import org.springframework.beans.factory.annotation.Autowired;
import org.springframework.http.HttpStatus;
import org.springframework.web.bind.annotation.CrossOrigin;
import org.springframework.web.bind.annotation.DeleteMapping;
import org.springframework.web.bind.annotation.GetMapping;
import org.springframework.web.bind.annotation.PathVariable;
import org.springframework.web.bind.annotation.PostMapping;
import org.springframework.web.bind.annotation.PutMapping;
import org.springframework.web.bind.annotation.RequestBody;
import org.springframework.web.bind.annotation.RequestMapping;
import org.springframework.web.bind.annotation.ResponseStatus;
import org.springframework.web.bind.annotation.RestController;
import com.boot.rest.base.model.User;
import com.boot.rest.base.service.UserService;

@RestController
@RequestMapping(value = "user")
@CrossOrigin(origins = "http://localhost:4200")
public class UserController {

	@Autowired
	private UserService userService;

	@PostMapping
	@ResponseStatus(value = HttpStatus.CREATED)
	public User registerUser(@RequestBody User user) {

		return this.userService.insert(user);
	}

	@GetMapping
	@ResponseStatus(value = HttpStatus.OK)
	public List<User> findAllUser() {

		return this.userService.findAll();
	}

	@GetMapping(value = "/{id}")
	@ResponseStatus(value = HttpStatus.OK)
	public User findById(@PathVariable int id) {
		return this.userService.findById(id);
	}

	@PutMapping(value = "/{id}")
	@ResponseStatus(value = HttpStatus.OK)
	public User updateUser(@PathVariable int id, @RequestBody User user) {

		return this.userService.updateUser(id, userVO);
	}

	@DeleteMapping(value = "/{id}")
	@ResponseStatus(value = HttpStatus.NO_CONTENT)
	public void deleteUser(@PathVariable int id) {

		this.userService.delete(id);
	}
}- registerUser() – This method handles the HTTP POST request used to create a new user
- findAllUser() – It returns the list of all available users
- findById() – It returns a user by its id
- updateUser() – This method handles the HTTP PUT request used to update the existing user information by its id
- deleteUser() – This method handles the HTTP DELETE request used to delete user information by its id
2.4. Verify the APIs
Now start the application by running main() the method in Application. It will start the embedded tomcat server on port 8080. We can test a few APIs to make sure that services are UP and running.
3. Creating Client Views with Angular
To create an Angular application make sure Node.js is installed on your system. Check if node.js is successfully installed or not by typing the following command.
node -v 3.1. Installing Angular
To install Angular we need to install Angular-CLI. Angular-CLI is a command-line interface used to initialize, develop and maintain Angular applications. Install or update Angular CLI by typing the following command:
npm install -g @angular/cliIf Angular-CLI is already installed then we can verify the installation by checking the version of Angular-CLI by typing the following command:
ng version3.2. Angular Skeleton App Using Angular-CLI
To build a simple angular app open the command prompt and navigate to your destination folder where you want to create a project. Type the following command to create a blank angular project.
ng new angular-app
When prompted, select YES to add the angular routing module. We are using the CSS for stylesheets.
? Would you like to add Angular routing? Yes
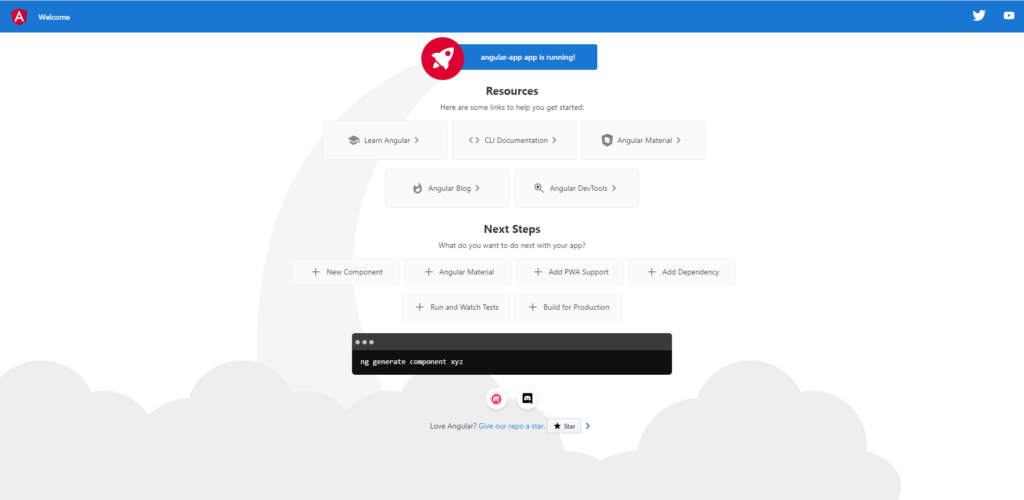
? Which stylesheet format would you like to use? CSSOpen that newly created project in your favorite IDE and in the terminal type the following command to run the basic created Angular app by Angular-CLI
ng serve --oThis will open a welcome page provided by Angular in your browser
3.3. Mapping View Model to Java Model
The model helps store the data on the UI side in the form of an object, similar to POJO in Java programming. In following example, we are creating the user.model.ts file for this purpose using the angular CLI.
ng g class User --type=modelEdit the user.model.ts located at angular-app > src > app to specify the variables
export class User {

    id!: number;
    firstName!: string;
    lastName!: string;
    username!: string;
    password!: string;
}
Using the
!non-null assertion operator, we can tell TypeScript that variable will hold value at run-time.
3.4. Creating Angular Service for Calling REST APIs
The services are responsible for providing the methods to interact with remote APIs. These services fetch and update the data in the model onto the server.
ng g s services/userEdit the user.service.ts located at ‘angular-app > src > app > services’ to specify the REST API call to our Spring Boot application. In the following code, replace the baseUrl value with the API path in your application.
import { HttpClient } from '@angular/common/http';
import { Injectable } from '@angular/core';
import { Observable } from 'rxjs';
import { User } from '../user.model';

@Injectable({
  providedIn: 'root'
})
export class UserService {

  private basUrl = "http://localhost:8080/user"

  constructor(private httpClient: HttpClient) {
  }

  getUserList(): Observable<User[]> {
    return this.httpClient.get<User[]>(`${this.basUrl}`);
  }

  createUser(user: User): Observable<Object> {
    return this.httpClient.post(`${this.basUrl}`, user);
  }

  getUserById(id: number): Observable<User>{
    return this.httpClient.get<User>(`${this.basUrl}/${id}`);
  }

  updateUser(id:number, user:User): Observable<Object>{
    return this.httpClient.put(`${this.basUrl}/${id}`, user);
  }

  deleteUser(id:number): Observable<Object>{
    return this.httpClient.delete(`${this.basUrl}/${id}`);
  }
}
We are using Angular-provided HttpClient service to make HTTP requests to our Tomcat server on which our Spring Boot application is hosted. The HttpClient service is available in the @angular/common/http package in the angular framework. For the HttpClient service to work, we need to import HttpClientModule in the application using the app module.
- getUserList() – makes “HTTP GET : localhost:8080/user” request
- createUser() – makes “HTTP POST : localhost:8080/user” request along with a user object in the request body
- getUserById() – makes “HTTP GET : localhost:8080/user/{id}” request
- updateUser() – makes “HTTP PUT : localhost:8080/user/{id}” request along with a user object in the request body
- deleteUser() – makes “HTTP DELETE : localhost:8080/user/{id}” request
3.5. Including jQuery and Bootstrap
We can use Bootstrap and Jquery to design our Angular components. Type the following command to install Bootstrap and Jquery in our Angular application as per requirements.
npm install bootstrap jquery --saveEdit angular.json file to include the Bootstrap CSS and JQuery files.
"architect": {
        ...
          "options": {
           ...

            "styles": [
              "src/styles.css",
              "node_modules/bootstrap/dist/css/bootstrap.min.css"
            ],
            "scripts": [
              "node_modules/jquery/dist/jquery.min.js",
              "node_modules/bootstrap/dist/js/bootstrap.min.js"
            ]
          }
 ...
3.6. Creating Ng Components and Views
We can create a component in Angular by typing the following command.
ng generate component your-component-name

OR

ng g c your-component-name
This command will create a folder named your-component-name inside your-project > src > app with four files in it that folder.
your-component-name.component.css– the file in which you can specify the different styles for that componentyour-component-name.component.html– the file in which you can specify the HTML code for that componentyour-component-name.component.ts– the file in which you can specify different methods to apply some business logic and handle different events.your-component-name.component.spec.ts– the file used for testing purposes
Note that app is the base component provided default by Angular.
Edit app.component.html file and write the respective HTML and CSS classes for styling the screen.
<nav class="navbar navbar-expand-lg navbar-light" style="background-color: #e3f2fd">
    <a class="navbar-brand" routerLink="">Angular App</a>

    <div class="collapse navbar-collapse" id="navbarNavAltMarkup">
        <div class="navbar-nav">
            <a class="nav-item nav-link active" routerLinkActive="active" routerLink="users">User List</a>
            <a class="nav-item nav-link" routerLinkActive="active" routerLink="create-user">Create User</a>
        </div>
    </div>
</nav>
<router-outlet></router-outlet>
Create a user-list component by typing the following command to display all available users.
ng g c user-listEdit user-list.component.html file located at angular-app > src > app > user-list.
<div class="container">
    <h2 class="text-center">User List</h2>
    <table class="table table-stripped">
        <thead>
            <tr>
                <th>First Name</th>
                <th>Last Name</th>
                <th>Username</th>
                <th>Actions</th>
            </tr>
        </thead>
        <tbody>
            <tr *ngFor="let user of users">
                <td> {{ user.firstName }} </td>
                <td> {{ user.lastName }} </td>
                <td> {{ user.username }} </td>
                <td>
                    <button (click) = "updateUser(user.id)" class="btn btn-info">Update</button>
                    <button (click) = "deleteUser(user.id)" class="btn btn-danger">Delete</button>
                </td>
            </tr>
        </tbody>
    </table>
</div>
Edit user-list.component.ts file located at angular-app > src > app > user-list.
import { Component, OnInit } from '@angular/core';
import { Router } from '@angular/router';
import { UserService } from '../services/user.service';
import { User } from '../user.model';

@Component({
  selector: 'app-user-list',
  templateUrl: './user-list.component.html',
  styleUrls: ['./user-list.component.css']
})
export class UserListComponent implements OnInit {

  users: User[] | undefined;

  constructor(private userService: UserService, private router: Router) {

  }

  ngOnInit(): void {
    this.getUsers();
  }

  private getUsers() {
    this.userService.getUserList().subscribe(data => {
      this.users = data;
    });
  }

  updateUser(id: number) {
    this.router.navigate(['update-user', id]);
  }

  deleteUser(id: number) {
    this.userService.deleteUser(id).subscribe(data => {
      console.log(data);
      this.getUsers();
    });
  }
}
- getUsers() – calls getUserList() method that we’ve created in UserService.java
- updateUser() – navigates to the
user-updatecomponent - deleteUser() – calls deleteUser() method that we’ve created in UserService.java
Create a user-create component by typing the following command to create a new user.
ng g c user-createEdit user-create.component.html file located at angular-app > src > app > user-create.
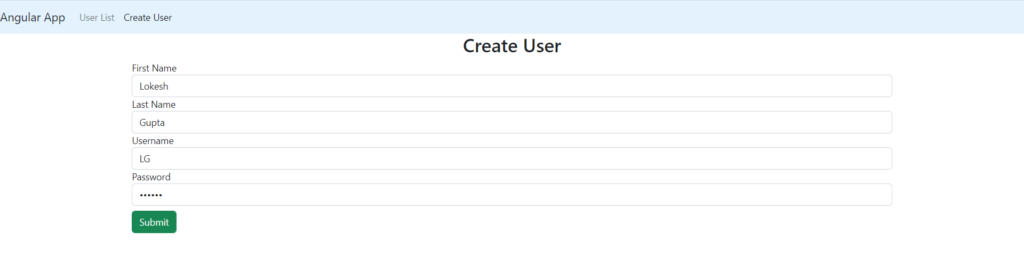
<div class="container">
    <h2 class="text-center">Create User</h2>
    <form (ngSubmit)="onSubmit()">
        <div class="form-group">
            <label for="firstName"> First Name</label>
            <input type="text" class="form-control" id="firstName" [(ngModel)]="user.firstName" name="firstName">
        </div>
        <div class="form-group">
            <label for="lastName"> Last Name</label>
            <input type="text" class="form-control" id="lastName" [(ngModel)]="user.lastName" name="lastName">
        </div>
        <div class="form-group">
            <label for="username">Username</label>
            <input type="text" class="form-control" id="username" [(ngModel)]="user.username" name="username">
        </div>
        <div class="form-group">
            <label for="password">Password</label>
            <input type="password" class="form-control" id="password" [(ngModel)]="user.password" name="password">
        </div>

        <button class="btn btn-success mt-2" type="submit">Submit</button>
    </form>
</div>
Edit user-create.component.ts file located at angular-app > src > app > user-create.
import { Component, OnInit } from '@angular/core';
import { Router } from '@angular/router';
import { UserService } from '../services/user.service';
import { User } from '../user.model';

@Component({
  selector: 'app-user-create',
  templateUrl: './user-create.component.html',
  styleUrls: ['./user-create.component.css']
})
export class UserCreateComponent implements OnInit {

  user: User = new User();

  constructor(private userService: UserService, private router: Router) { }

  ngOnInit(): void {
  }

  saveUser() {
    this.userService.createUser(this.user).subscribe({
      next: (data) => {
        console.log(data);
        this.redirectToUserList();
      },
      error: (e) => {
        console.log(e);
      }
    });
  }

  redirectToUserList() {
    this.router.navigate(['/users']);
  }

  onSubmit() {
    console.log(this.user);
    this.saveUser();
  }
}- saveUser() – calls createUser() method that we’ve created in UserService.java
- redirectToUserList() – navigates to the
user-listcomponent
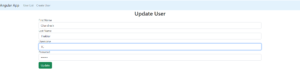
Create a user-update component by typing the following command for updating information of the existing user
ng g c user-updateEdit user-update.component.html file located at angular-app > src > app > user-update.
<div class="container">
    <h2 class="text-center">Update User</h2>
    <form (ngSubmit) = "onSubmit()">
        <div class="form-group">
            <label for="firstName"> First Name</label>
            <input type="text" class="form-control" id="firstName" [(ngModel)]="user.firstName" name="firstName">
        </div>
        <div class="form-group">
            <label for="lastName"> Last Name</label>
            <input type="text" class="form-control" id="lastName" [(ngModel)]="user.lastName" name="lastName">
        </div>
        <div class="form-group">
            <label for="username">Username</label>
            <input type="text" class="form-control" id="username" [(ngModel)]="user.username" name="username">
        </div>
        <div class="form-group">
            <label for="password">Password</label>
            <input type="password" class="form-control" id="password" [(ngModel)]="user.password" name="password">
        </div>

        <button class="btn btn-success mt-2" type="submit">Update</button>
     </form>
</div>
Edit user-update.component.ts file located at angular-app > src > app > user-update.
import { Component, OnInit } from '@angular/core';
import { ActivatedRoute, Router } from '@angular/router';
import { UserService } from '../services/user.service';
import { User } from '../user.model';

@Component({
  selector: 'app-user-update',
  templateUrl: './user-update.component.html',
  styleUrls: ['./user-update.component.css']
})
export class UserUpdateComponent implements OnInit {
  id!: number;
  user: User = new User();

  constructor(private userService: UserService,
    private route: ActivatedRoute, private router: Router) { }

  private getUserById() {
    this.id = this.route.snapshot.params['id'];
    this.userService.getUserById(this.id).subscribe({
      next: (data) => {
        this.user = data;
      },
      error: (e) => {
        console.log(e);
      }
    });
  }

  ngOnInit(): void {
    this.getUserById();
  }

  updateUser() {
    this.userService.updateUser(this.id, this.user).subscribe({
      next: (data) => {
        console.log(data);
        this.redirectToUserList();
      },
      error: (e) => {
        console.log(e);
      }
    });
  }
  redirectToUserList() {
    this.router.navigate(['/users']);
  }
  onSubmit() {
    console.log(this.user);
    this.updateUser();
  }

}- getUserById() – calls getUserById() method that we’ve created in UserService.java
- updateUser() – calls updateUser() method that we’ve created in UserService.java
3.7. Adding Routing
Edit the app-routing.module.ts file to specify the app routes and map URLs with components.
import { NgModule } from '@angular/core';
import { RouterModule, Routes } from '@angular/router';
import { UserCreateComponent } from './user-create/user-create.component';
import { UserListComponent } from './user-list/user-list.component';
import { UserUpdateComponent } from './user-update/user-update.component';

const routes: Routes = [
  { path: 'users', component: UserListComponent },
  { path: '', redirectTo: 'users', pathMatch: 'full' },
  { path: 'create-user', component: UserCreateComponent },
  { path: 'update-user/:id', component: UserUpdateComponent },
];

@NgModule({
  imports: [RouterModule.forRoot(routes)],
  exports: [RouterModule]
})
export class AppRoutingModule { }
3.8. Registering with App Module
We need to declare the components in app.module.ts but if you’ve created using the command then there is no need to declare, and we also have to import two modules HttpClientModule, and FormsModule.
import { NgModule } from '@angular/core';
import { BrowserModule } from '@angular/platform-browser';
import { HttpClientModule } from '@angular/common/http'
import { AppRoutingModule } from './app-routing.module';
import { AppComponent } from './app.component';
import { UserListComponent } from './user-list/user-list.component';
import { UserCreateComponent } from './user-create/user-create.component';
import { FormsModule } from '@angular/forms';
import { UserUpdateComponent } from './user-update/user-update.component';
import { UserDetailsComponent } from './user-details/user-details.component';

@NgModule({
  declarations: [
    AppComponent,
    UserListComponent,
    UserCreateComponent,
    UserUpdateComponent,
    UserDetailsComponent
  ],
  imports: [
    BrowserModule,
    AppRoutingModule,
    HttpClientModule,
    FormsModule
  ],
  providers: [],
  bootstrap: [AppComponent]
})
export class AppModule { }
3.9. Demo
Let’s finally run the Spring Boot application by running main() the method in Application and Angular application by typing the following command
ng serve --o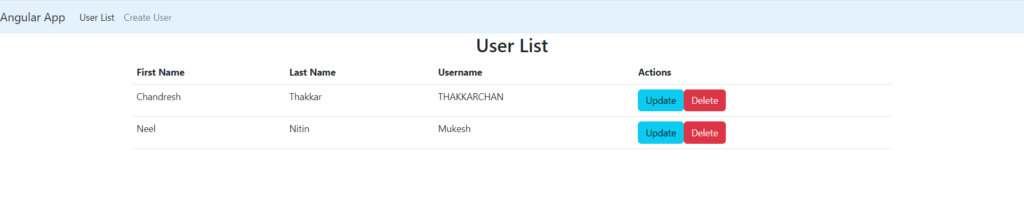

4. Conclusion
That’s all for this Spring Boot and Angular Application Example. This tutorial taught us how to create REST API and how to make calls to that REST API from the Angular Application.
Happy Learning !!