
File uploads are a common requirement in modern web applications, and implementing a robust file upload REST API is crucial for handling file uploads efficiently.
Spring has very robust support for writing MVC applications that are capable of handling multipart file uploads and subsequent file processing. In this tutorial, we will learn to write REST APIs that can be invoked from various clients such as browsers, cURL and other API clients.
1. Maven
Every kind of REST API support in Spring framework is part of Spring Web module, so let us start with adding its starter dependency in the project:
<dependency>
  <groupId>org.springframework.boot</groupId>
  <artifactId>spring-boot-starter-web<artifactId>
</dependency>
2. Spring MultipartFile
When a file is uploaded to a web application, it is sent to the server as a part of a multipart request, which can contain multiple parts or types of input data. The org.springframework.web.multipart.MultipartFile class plays a significant role in the file upload mechanism by providing a convenient and standardized way to handle multipart files in web applications.
The MultipartFile interface encapsulates the uploaded file and provides methods to access its contents and metadata easily. For example, we can obtain the file’s original filename, content type, size, and input stream, enabling validation, processing, and storage of the uploaded files.
We can access the uploaded file in the handler method by accepting it through @RequestParam and type MultipartFile as follow:
@PostMapping("/upload")
public ResponseEntity handleFileUpload(@RequestParam("file") MultipartFile file, ...) throws IOException { ... }
And to upload a file, we can send a request with the input parameter name as ‘file‘ where parameter value contains the file itself.
curl -X POST -F "file=/path/to/file.jpg" http://localhost:8080/uploadWhen sending the same request from an HTML form, we need to use the input type as file.
<input type="file" name="file" />3. Implementing a File Upload REST API
Let us discuss the different approaches for handling file uploads and make necessary changes to ensure a robust file upload process.
3.1. Handling a Single File Upload
In this subsection, we will cover the implementation of a simple controller for handling file uploads. We will upload a single file and provide a test scenario using cURL to validate its functionality.
In the following API controller, we have created a @PostMapping handler to indicate that it handles POST requests. The API returns the file details in the response. Inside the handleFileUpload method, we add a parameter of type MultipartFile to receive the uploaded file. This parameter will contain the file data sent from the client
@PostMapping("/single-file-upload")
public ResponseEntity<Map<String, String>> handleFileUploadUsingCurl(
  @RequestParam("file") MultipartFile file) throws IOException {

    Map<String, String> map = new HashMap<>();

    // Populate the map with file details
    map.put("fileName", file.getOriginalFilename());
    map.put("fileSize", file.getSize());
    map.put("fileContentType", file.getContentType());

    // File upload is successful
    map.put("message", "File upload done");
    return ResponseEntity.ok(map);
  }
}
If the file upload is successful, a message indicating “File upload done” is added to the response map. Finally, the ResponseEntity.ok(response) is returned, indicating a successful response with the populated response map as the body.
Build and run your Spring Boot application. Test the file upload functionality using cURL or any other HTTP client.
curl -X POST -F "file=@C:/Users/lokesh/Downloads/test.txt" http://localhost:8080/single-file-uploadIf the request is successful, we get the following response:
{
  "fileName":"temp.txt",
  "fileSize":28,
  "message":"File upload done",
  "fileContentType":"text/plain"
}
3.2. Handling Multiple Files Upload
To be able to submit multiple files, the handler method should accept an array of MultipartFile objects representing the uploaded files. Inside the method, each file can be processed individually.
@PostMapping("/uploadMultiple")
public ResponseEntity<String> handleFileUploadMultiple(
    @RequestParam("files") MultipartFile[] files) throws IOException {

  //handle uploaded files

  return ResponseEntity.ok("Files uploaded successfully!");
}
We can test the multiple files upload functionality using cURL as follows:
curl -X POST -F "files=@C:/Users/lokesh/Downloads/temp.txt" -F "files=@C:/Users/lokesh/Downloads/testfile.txt" http://localhost:8080/uploadMultiple3.3. Uploading Multiple Files Asynchronously
The APIs discussed above are blocking and the API client must wait until all the files have been uploaded/failed. This is not a desired behavior in most cases. Asynchronous uploading sends the response immediately and it allows the clients to work on other things while the upload process continues.
To configure the async file upload API, we need first to enable the async support in the Spring boot application using the @EnableAsync annotation and configuring a thread pool.
@Configuration
@EnableAsync
public class AsyncConfig {

  @Bean
  public Executor taskExecutor() {

    final ThreadPoolTaskExecutor executor = new ThreadPoolTaskExecutor();
    executor.setCorePoolSize(10);
    executor.setMaxPoolSize(10);
    executor.setQueueCapacity(500);
    executor.setThreadNamePrefix("AsyncFileUploader - ");
    executor.initialize();
    return executor;
  }
}
Next. we need to use a service class that is able to perform the file-handling process asynchronously. After accepting the request, we pass each submitted file to the async API exposed by FileStorageManager.
@Controller
public class FileAsyncUploadController {

  @Autowired
  FileStorageManager fileStorageManager;

  @Async
  @PostMapping("/uploadAsync")
  public CompletableFuture<ResponseEntity<String>> handleConcurrentFilesUpload(
      @RequestParam("files") MultipartFile[] files) throws IOException {

    // Handle empty file error
    if (files.length == 0) {
      return CompletableFuture
          .completedFuture(ResponseEntity.badRequest().body("No files submitted"));
    }
    // File upload process is submitted
    else {

      for (MultipartFile file : files) {
        fileStorageManager.save(file);
        //TODO: access and store each file into file storage
      }
      return CompletableFuture.completedFuture(
          ResponseEntity.ok("File upload started"));
    }
  }
}
The true async functionality is provided by the FileStorageManager which processes each request in a separate thread. To simulate the file processing, we have added a random delay in the file processing API. Notice that here we have used the @Async annotation to enable asynchronous processing.
@Service
class FileStorageManager {

  @SneakyThrows
  @Async
  public void save(MultipartFile file) {

    Thread.sleep(new Random().nextLong(4000, 8000));
    System.out.println(file.getOriginalFilename() + " is uploaded at " + LocalDateTime.now());
  }
}
Now when we invoke the API with multiple files, we get the response immediately but we can verify the async behavior in the server console that file uploading is complete for each time after a delay.
curl -X POST -F "files=@C:/Users/lokesh/Downloads/temp.txt" -F "files=@C:/Users/lokesh/Downloads/testfile.txt" http://localhost:8080/uploadAsyncThe console output:
testfile.txt is uploaded at 2023-07-07T14:38:37.173699600
temp.txt     is uploaded at 2023-07-07T14:38:39.016403200
4. Handling Form Submission
When uploading the files from a user interface, we can take advantage of the Model and ModelAttribute classes to design a desired UI experience. Generally, such forms accept a number of other UI fields along with the files to upload. In such cases, it is a good idea to have a model class encapsulating the files and other UI fields.
public class FileForm {

  private String name;
  private String email;
  private MultipartFile file;
}
Now we can accept the form fields inside the instance of this class in the model:
@PostMapping("/upload")
public String handleFileUpload(@ModelAttribute FileForm fileForm, Model model, ...) throws IOException {

  //access the file using fileForm.getFile()
  //...

  return "redirect:/home";
}
On the UI side, we can create an HTML form and bind the fileForm object to it. The form utilizes Thymeleaf attributes such as th:object="${fileForm}" to bind the form data to a model object named “fileForm“.
It is important to note that we must define the enctype="multipart/form-data" to submit the form as a multipart request.
<form th:action="@{/upload}" th:object="${fileForm}" method="post" enctype="multipart/form-data" class="form">
  <div class="form-group">
    <label for="name">Name:</label>
    <input type="text" name="name" id="name" class="form-control" th:field="*{name}"/>
  </div>
  <div class="form-group">
    <label for="email">Email:</label>
    <input type="email" name="email" id="email" class="form-control" th:field="*{email}"/>
  </div>
  <div class="form-group">
    <label for="file">Select File:</label>
    <input type="file" name="file" id="file" class="form-control-file"/>
  </div>
  <div class="mt-4">
    <input type="submit" value="Upload" class="btn btn-primary"/>
  </div>
</form>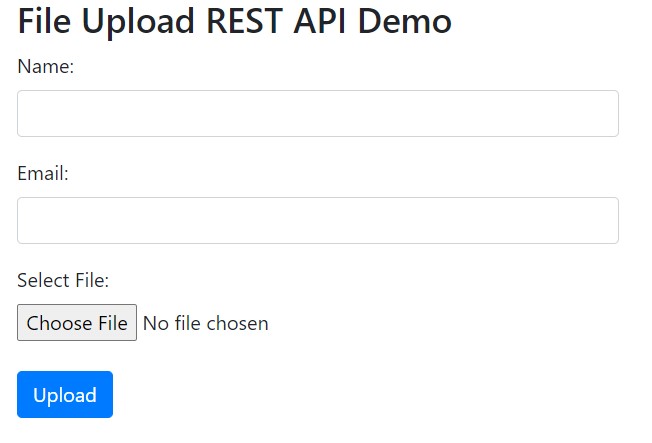
On submitting the above form, we can also need the display the entered details in a new or same template as follows:
<table th:if="${success}" class="table table-bordered">
  <thead class="thead-light">
  <tr>
    <th>File name</th>
    <td th:text="*{fileName}"></td>
  </tr>
  <tr>
    <th>File size</th>
    <td th:text="*{fileSize} + ' bytes'"></td>
  </tr>
  <tr>
    <th>File content type</th>
    <td th:text="*{fileType}"></td>
  </tr>
  </thead>
  <tbody>
  </tbody>
</table>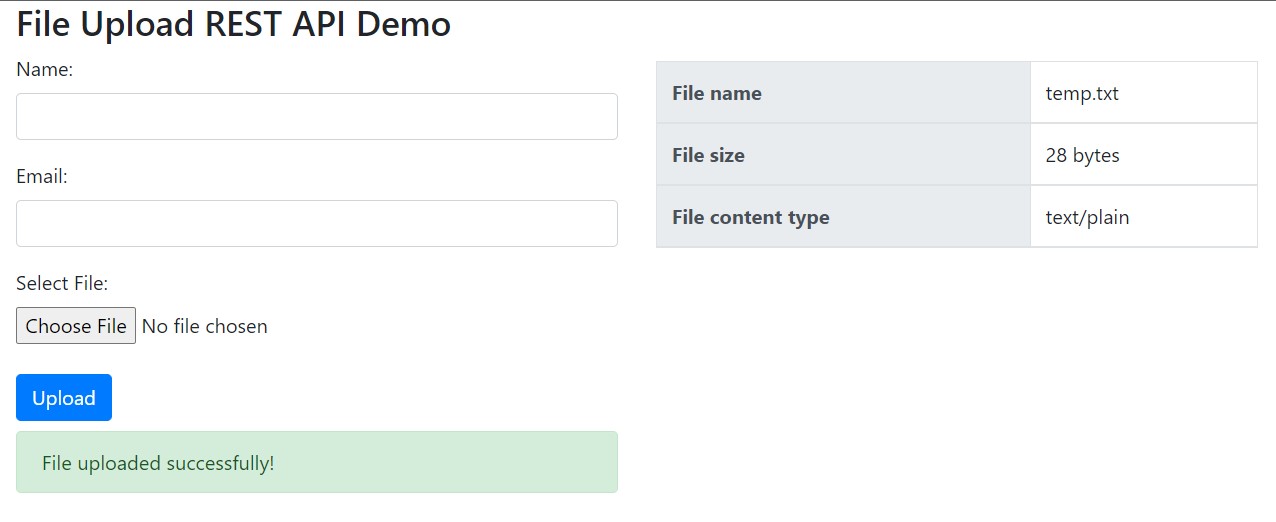
5. Validating Uploaded Files
Users will not always select the correct files when uploading. He will make mistakes. Let us learn to put validations to put on the uploaded files.
5.1. Minimum and Maximum File Size
By default, Spring Boot sets a maximum file upload size limit of 1MB. However, if we need to upload larger files, we can configure this limit in the application properties.
spring.servlet.multipart.max-file-size=10MB
spring.servlet.multipart.max-request-size=10MB
By setting these properties, the StandardServletMultipartResolver
It’s important to note that the values specified for file size limits follow the standard unit suffixes, such as KB for kilobytes, MB for megabytes, and GB for gigabytes. Make sure to use the appropriate unit suffix when specifying the file size limits.
There is no direct support for checking the empty/minimum size files at the framework level so we must accept the file in the handler method and validate it ourselves.
private static final long MIN_FILE_SIZE = 1024; // Minimum file size in bytes

public static boolean isFileSizeValid(File file) {
    if(file.isEmpty()) {
      return false;
    }
    long fileSize = file.length();
    return fileSize >= MIN_FILE_SIZE;
}
5.2. Allow Only Specific File Types
To enforce specific file type requirements, we will modify the code to allow only certain file types to be uploaded. In the handler method, we need to check the file extension and validate manually. If the file is not of the desired extension, we need to reject the file and send a bad request response indicating the root cause.
int index = file.getOriginalFilename().lastIndexOf('.');

if(index > 0) {

  String extension = fileName.substring(index + 1);
  if(listOfAllowedExtentions.contains(extension) == false){

    return ResponseEntity.badRequest().body("Invalid file format. Only these files are allowed: " + listOfAllowedExtentions);
  }
}
Alternatively, we can also validate the mime type of the file and disallow files if they don’t match the expectations.
String fileType = fileForm.getFile().getContentType();

if(allowedTypes.contains(fileType) == false){
  return ResponseEntity.badRequest().body("Invalid file type. Only these files are allowed: " + allowedTypes);
}
6. Exception Handling
Generally, the framework will throw the exception of types MaxUploadSizeExceededException (when file size is exceeded) and MultipartException (when multipart resolution fails). We can catch such exceptions in the @RestControllerAdvice and using the @ExceptionHandler annotations.
@RestControllerAdvice
public class CustomExceptionHandler {

  @ExceptionHandler(MaxUploadSizeExceededException.class)
  public ResponseEntity<String> handleMaxUploadSizeExceeded() {
    return ResponseEntity.status(HttpStatus.BAD_REQUEST).body("File size exceeds the limit.");
  }

  @ExceptionHandler(MultipartException.class)
  public ResponseEntity<String> handleMultipartException() {
    return ResponseEntity.status(HttpStatus.INTERNAL_SERVER_ERROR)
        .body("Error occurred during file upload.");
  }
}
In other cases, the request reaches the handler method and we can return an appropriate response in the ResponseEntity.
7. Conclusion
Creating a REST API in Spring boot for accepting the file uploads is not a complex task if we clearly know the requirements and boundary cases. Validating the file upload request is as important as handling the API request itself.
Also, it is worth considering building an async REST API if it accepts multiple files and files are of larger sizes.
Happy Learning!!