Learn to configure Spring boot application with embedded ActiveMQ for sending and receiving JMS messages with help of JMSTemplate.
Table of Contents

Project Structure
Maven Configuration
@EnableJms and JmsListenerContainerFactory Configuration
JMS Message Receiver with @JmsListener
Sending Message with JmsTemplate
Demo
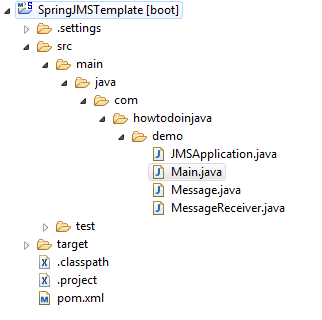
Project Structure
Please create a maven application in eclipse and create below given folder structure.

To run the example, you will need Java 1.8 in runtime.
Maven Configuration
Update the pom.xml file with Spring Boot and ActiveMQ dependencies. Additionally, we will need Jackson for object to JSON conversion.
<project xmlns="http://maven.apache.org/POM/4.0.0" xmlns:xsi="http://www.w3.org/2001/XMLSchema-instance"
	xsi:schemaLocation="http://maven.apache.org/POM/4.0.0 https://maven.apache.org/xsd/maven-4.0.0.xsd;
	<modelVersion>4.0.0</modelVersion>

	<groupId>com.howtodoinjava.demo</groupId>
	<artifactId>SpringJMSTemplate</artifactId>
	<version>0.0.1-SNAPSHOT</version>
	<packaging>jar</packaging>

	<name>SpringJMSTemplate</name>
	<url>http://maven.apache.org</url>

	<parent>
		<groupId>org.springframework.boot</groupId>
		<artifactId>spring-boot-starter-parent</artifactId>
		<version>1.5.2.RELEASE</version>
	</parent>

	<properties>
		<project.build.sourceEncoding>UTF-8</project.build.sourceEncoding>
		<java.version>1.8</java.version>
	</properties>

	<dependencies>
		<dependency>
			<groupId>org.springframework.boot</groupId>
			<artifactId>spring-boot-starter-activemq</artifactId>
		</dependency>
		<dependency>
			<groupId>org.apache.activemq</groupId>
			<artifactId>activemq-broker</artifactId>
		</dependency>

		<dependency>
			<groupId>com.fasterxml.jackson.core</groupId>
			<artifactId>jackson-databind</artifactId>
		</dependency>
	</dependencies>
</project>
@EnableJms and JmsListenerContainerFactory Configuration
Create the Spring Boot application class by annotating it with @SpringBootApplication annotation. Add this code in the class.
package com.howtodoinjava.demo;

import javax.jms.ConnectionFactory;

import org.springframework.boot.autoconfigure.SpringBootApplication;
import org.springframework.boot.autoconfigure.jms.DefaultJmsListenerContainerFactoryConfigurer;
import org.springframework.context.annotation.Bean;
import org.springframework.jms.annotation.EnableJms;
import org.springframework.jms.config.DefaultJmsListenerContainerFactory;
import org.springframework.jms.config.JmsListenerContainerFactory;
import org.springframework.jms.support.converter.MappingJackson2MessageConverter;
import org.springframework.jms.support.converter.MessageConverter;
import org.springframework.jms.support.converter.MessageType;

@SpringBootApplication
@EnableJms
public class JMSApplication
{
	@Bean
	public JmsListenerContainerFactory<?> myFactory(
							ConnectionFactory connectionFactory,
							DefaultJmsListenerContainerFactoryConfigurer configurer)
	{
		DefaultJmsListenerContainerFactory factory = new DefaultJmsListenerContainerFactory();
		// This provides all boot's default to this factory, including the message converter
		configurer.configure(factory, connectionFactory);
		// You could still override some of Boot's default if necessary.
		return factory;
	}

	@Bean
	public MessageConverter jacksonJmsMessageConverter()
	{
		MappingJackson2MessageConverter converter = new MappingJackson2MessageConverter();
		converter.setTargetType(MessageType.TEXT);
		converter.setTypeIdPropertyName("_type");
		return converter;
	}
}
@SpringBootApplicationannotation is equivalent to using@Configuration,@EnableAutoConfigurationand@ComponentScanwith their default attributes. It is shortcut to easily configure a spring application with annotation configuration.@EnableJmsenable the@JmsListenerannotated endpoints that are created under the cover by aJmsListenerContainerFactory.- The
JmsListenerContainerFactoryis responsible to create the listener container responsible for a particular endpoint. Typical implementations, as theDefaultJmsListenerContainerFactory, provides the necessary configuration options that are supported by the underlyingMessageListenerContainer. MappingJackson2MessageConverteris used to turn the payload of aMessagefrom serialized form to a typed Object and vice versa.- We have configured
MessageType.TEXT. This message type can be used to transport text-based messages. When a client receives aTextMessage, it is in read-only mode. If a client attempts to write to the message at this point, aMessageNotWriteableExceptionis thrown.
JMS Message Receiver with @JmsListener
Message receiver class ispretty much simple class with single method with annotation @JmsListener. @JmsListener allows you to expose a method of a managed bean as a JMS listener endpoint.
So whenever any message is available on configured queue (in this example queue name is “jms.message.endpoint”), annotated method (i.e. receiveMessage) will be invoked.
@JmsListener is a repeatable annotation so you can use it multiple times on same method to register several JMS destinations to the same method.
package com.howtodoinjava.demo;

import org.springframework.jms.annotation.JmsListener;
import org.springframework.stereotype.Component;

@Component
public class MessageReceiver {

    @JmsListener(destination = "jms.message.endpoint")
    public void receiveMessage(Message msg)
    {
        System.out.println("Received " + msg );
    }
}
The Message class is simple POJO class.
package com.howtodoinjava.demo;

import java.io.Serializable;
import java.util.Date;

public class Message implements Serializable {

	private static final long serialVersionUID = 1L;

	private Long id;
	private String content;
	private Date date;

	public Message() {
	}

	public Message(Long id, String content, Date date) {
		super();
		this.id = id;
		this.content = content;
		this.date = date;
	}

	public Long getId() {
		return id;
	}

	public void setId(Long id) {
		this.id = id;
	}

	public String getContent() {
		return content;
	}

	public void setContent(String content) {
		this.content = content;
	}

	public Date getDate() {
		return date;
	}

	public void setDate(Date date) {
		this.date = date;
	}

	@Override
	public String toString() {
		return "Message [id=" + id + ", content=" + content + ", date=" + date + "]";
	}
}
Sending Message with JmsTemplate
To send the JMS messsages, you will need the reference of bean class JmsTemplate from spring container. Call it’s convertAndSend() method to send messages.
package com.howtodoinjava.demo;

import java.util.Date;

import org.springframework.boot.SpringApplication;
import org.springframework.context.ConfigurableApplicationContext;
import org.springframework.jms.core.JmsTemplate;

public class Main
{
	public static void main(String[] args)
    {
        // Launch the application
        ConfigurableApplicationContext context = SpringApplication.run(JMSApplication.class, args);

        //Get JMS template bean reference
        JmsTemplate jmsTemplate = context.getBean(JmsTemplate.class);

        // Send a message
        System.out.println("Sending a message.");
        jmsTemplate.convertAndSend("jms.message.endpoint", new Message(1001L, "test body", new Date()));
    }
}
Demo
Execute the above Main class’s main() method. This will start the Spring boot application and then send a message to queue jms.message.endpoint.
MessageReceiver.receiveMessage() is already listening on this queue address. so message will be recieved by this method which can be verified by printing it to the console.
In console, output will be like this:
Sending a message.
Received Message [id=1001, content=test body, date=Fri Jul 07 14:19:19 IST 2017]
Clearly, the message was successfully sent and received. That’s all for this quick example of Spring JMSTemplate with embedded ActiveMQ.
Drop me your questions in comments section.
Happy Learning !!
how will bean JmsListenerContainerFactory be created, where is the bean for arg connectionFactory?
Dear Lokesh, do you have a sample code for spring boot-JMS-XML receive and send also
What changes would be required if i want the receiver in other project (new project which receives message from this current project ) ?
HI Mohanish,
did you got answer for this question? how did u implement this for in-memory senario