
Learn to call OpenAI ChatGPT-provided APIs in Spring Boot. We will create a Spring Boot REST API that internally will invoke the OpenAI’s /v1/chat/completions API and return the response generated by ChatGPT API.
1. Setup
1.1. OpenAI API Key
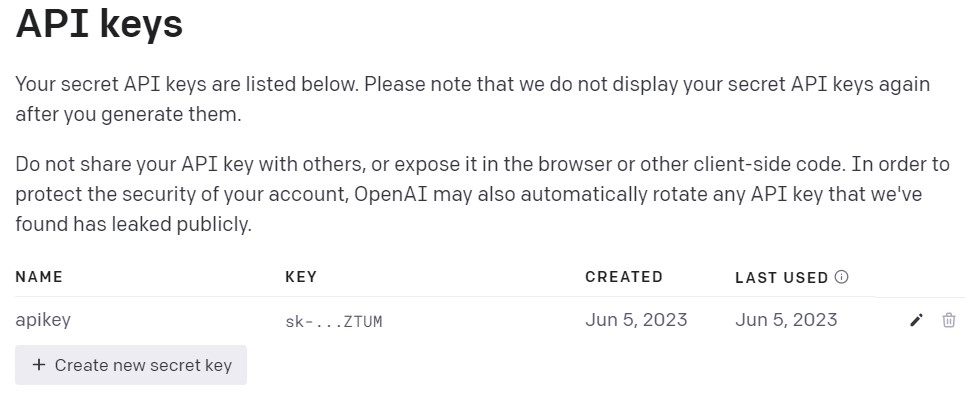
Before writing any code, make sure you have generated an OpenAI API key. We will pass the API key as a bearer token for authentication purposes.
Note that, you can create a key for testing purposes that will be valid for a certain period and credit. Post-testing usage limit, you need to upgrade the account and pay to use the APIs. Or, you can create a new test account, again, with a new phone number.
1.2. Spring Boot Web Application
Next, create a new web application using Spring Boot. Include the spring-boot-starter-web dependency for using the RestTemplate or WebClient for invoking the APIs.
<dependency>
  <groupId>org.springframework.boot</groupId>
  <artifactId>spring-boot-starter-web</artifactId>
</dependency>
2. OpenAI API’s Request and Response
The OpenAI API Reference page lists all the requests and response samples in detail. All APIs must include the API key in an Authorization HTTP header as follows:
Authorization: Bearer OPENAI_API_KEY2.1. API Request
The “Create chat completion” API returns a response for a request containing messages (or prompts that we type in ChatGPT to get the answer). We can pass one or multiple prompts in a single request.
A sample request to completion API is:
curl https://api.openai.com/v1/chat/completions \
	-H "Content-Type: application/json" \
	-H "Authorization: Bearer $OPENAI_API_KEY" \
	-d '{

	  "model": "gpt-3.5-turbo",
	  "n": 1,
	  "temperature": 0.0,
	  "max_tokens": 100,
	  "messages": [{"role": "user", "content": "Hello"}]
	}
In the above request, the body contains the following parameters:
- model: ID of the supported model to use. Such as gpt-4, gpt-4-0314, gpt-4-32k, gpt-4-32k-0314, gpt-3.5-turbo etc.
- n: number of completion choices to generate for each input message. The default value is 1.
- temperature: Sampling temperature value between 0 and 2. Higher values will make the output more random, while lower values will make the result more focused and deterministic.
- max_tokens: The maximum number of tokens to generate.
- messages: the text to send in the prompt. A role can be one of the values from
system,user, orassistant. The actual prompt is sent in content field.
2.2. API Response
The API generates the response in the form of choices. The number of choices depends on the input parameter 'n'. Each choice contains the message that is the output of the input prompt sent in the request.
{
  "id": "chatcmpl-123",
  "object": "chat.completion",
  "created": 1677652288,
  "choices": [{
    "index": 0,
    "message": {
      "role": "assistant",
      "content": "\n\nHello there, how may I assist you today?",
    },
    "finish_reason": "stop"
  }],
  "usage": {
    "prompt_tokens": 9,
    "completion_tokens": 12,
    "total_tokens": 21
  }
}
3. Integration with Spring Boot
Now let us code for consuming the OpenAI’s API into the Spring boot application. We will use the RestTemplate to send the requests.
3.1. Request and Response Models
Start with creating the models for API request and response fields.
@Data
@NoArgsConstructor
@AllArgsConstructor
public class BotRequest {

  private String model;
  private List<Message> messages;
  private int n;
  private double temperature;
  private int max_tokens;

  // getters and setters
}

public class Message {

  private String role;
  private String content;

  // getters and setters
}
The response contains the choices in an array so we will use a List.
public class BotResponse {

  private List<Choice> choices;

  // getters and setters

  public static class Choice {

    private int index;
    private Message message;

    // getters and setters
  }
}
3.2. Properties
Next, add the configuration properties to application.properties file.
logging.level.root=DEBUG

openai.model=gpt-3.5-turbo
openai.api.key=REPLACE-WITH-YOUR-API-KEY
openai.api.url=https://api.openai.com/v1/chat/completions

openai.max-completions=1
openai.temperature=0
openai.max_tokens=100
3.3. RestTemplate Configuration
In a configuration file, we will configure the RestTemplate bean to set the Authorization header in every outgoing request.
Optionally, we can add the RequestResponseLoggingInterceptor for logging HTTP request and response details including headers and body, for debugging purposes.
@Configuration
public class ChatGptConfig {

  @Value("${openai.api.key}")
  private String openaiApiKey;

  @Bean
  public RestTemplate restTemplate() {

    RestTemplate restTemplate = new RestTemplate();

    restTemplate.getInterceptors().add((request, body, execution) -> {
      request.getHeaders().add("Authorization", "Bearer " + openaiApiKey);
      return execution.execute(request, body);
    });

    //Optional
    restTemplate.getInterceptors().add(new RequestResponseLoggingInterceptor());
    restTemplate.setRequestFactory(new BufferingClientHttpRequestFactory(new SimpleClientHttpRequestFactory()));
    return restTemplate;
  }
}
3.4. API Controller
Now, we are ready to write the REST controller that will use the above configured RestTemplate for making API request and return the API response.
import com.howtodoinjava.demo.model.BotRequest;
import com.howtodoinjava.demo.model.BotResponse;
import com.howtodoinjava.demo.model.Message;
import java.util.List;
import org.springframework.beans.factory.annotation.Autowired;
import org.springframework.beans.factory.annotation.Value;
import org.springframework.web.bind.annotation.PostMapping;
import org.springframework.web.bind.annotation.RequestParam;
import org.springframework.web.bind.annotation.RestController;
import org.springframework.web.client.RestTemplate;

@RestController
public class BotController {

  @Autowired
  private RestTemplate restTemplate;

  @Value("${openai.model}")
  private String model;

  @Value("${openai.max-completions}")
  private int maxCompletions;

  @Value("${openai.temperature}")
  private double temperature;

  @Value("${openai.max_tokens}")
  private int maxTokens;

  @Value("${openai.api.url}")
  private String apiUrl;

  @PostMapping("/chat")
  public BotResponse chat(@RequestParam("prompt") String prompt) {

    BotRequest request = new BotRequest(model,
        List.of(new Message("user", prompt)),
        maxCompletions,
        temperature,
        maxTokens);

    BotResponse response = restTemplate.postForObject(apiUrl, request, BotResponse.class);
    return response;
  }
}
4. Demo
Start the application and execute the POST http://localhost:8080/chat request using any tool. Notice the output in the response.
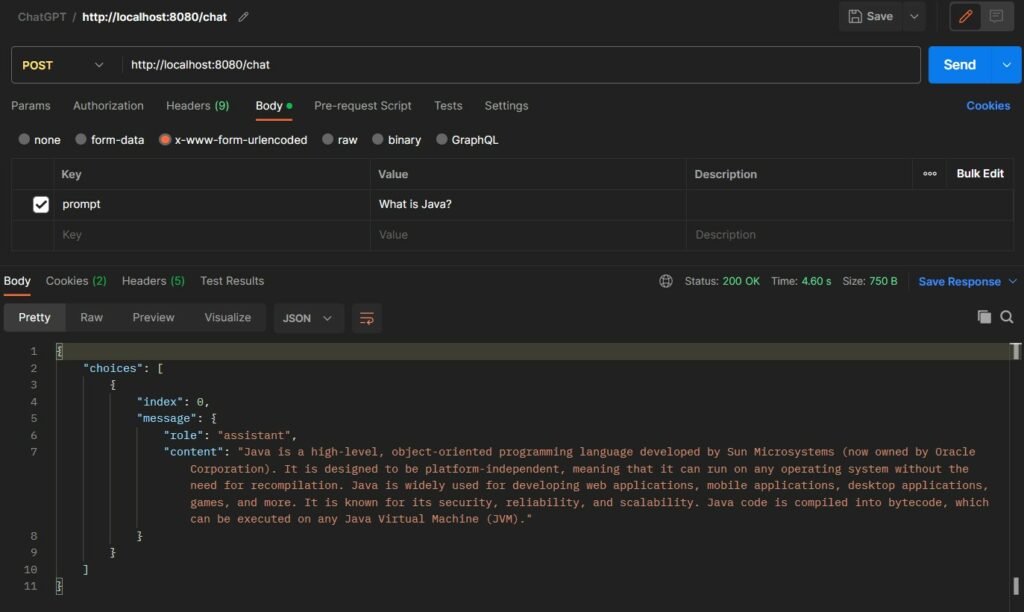
You can check the request and response details in the logs as well.
You can check the request and response details in the logs as well.

 ===========================request begin================================================
... .h.d.i.RequestResponseLoggingInterceptor : URI         : https://api.openai.com/v1/chat/completions
... .h.d.i.RequestResponseLoggingInterceptor : Method      : POST
... .h.d.i.RequestResponseLoggingInterceptor : Headers     : [...Authorization:"Bearer sk-dN4ShN2p3wTUM..."]
... .h.d.i.RequestResponseLoggingInterceptor : Request body: {"model":"gpt-3.5-turbo","messages":[{"role":"user","content":"What is Java?"}],"n":1,"temperature":0.0,"max_tokens":100}
==========================request end================================================

============================response begin==========================================
... .h.d.i.RequestResponseLoggingInterceptor : Status code  : 200 OK
... .h.d.i.RequestResponseLoggingInterceptor : Status text  : OK
... .h.d.i.RequestResponseLoggingInterceptor : Headers      : [...]
... .h.d.i.RequestResponseLoggingInterceptor : Response body: {"id":"chatcmpl-7O4ZJLudlwwt9WbsdXq329nOfnR9l...}
=======================response end=================================================
5. Conclusion
This tutorial is just the start for consuming OpenAI’s APIs in a Spring application. There are so many things we can try and learn by sending more API requests and playing request parameters.