
Learn to create an application from scratch using REST APIs created with Spring boot and the user interface created with Vue.js. We will build a simple employee management application with Create, Read, Update, and Delete (CRUD) functionality.
1. Application Overview
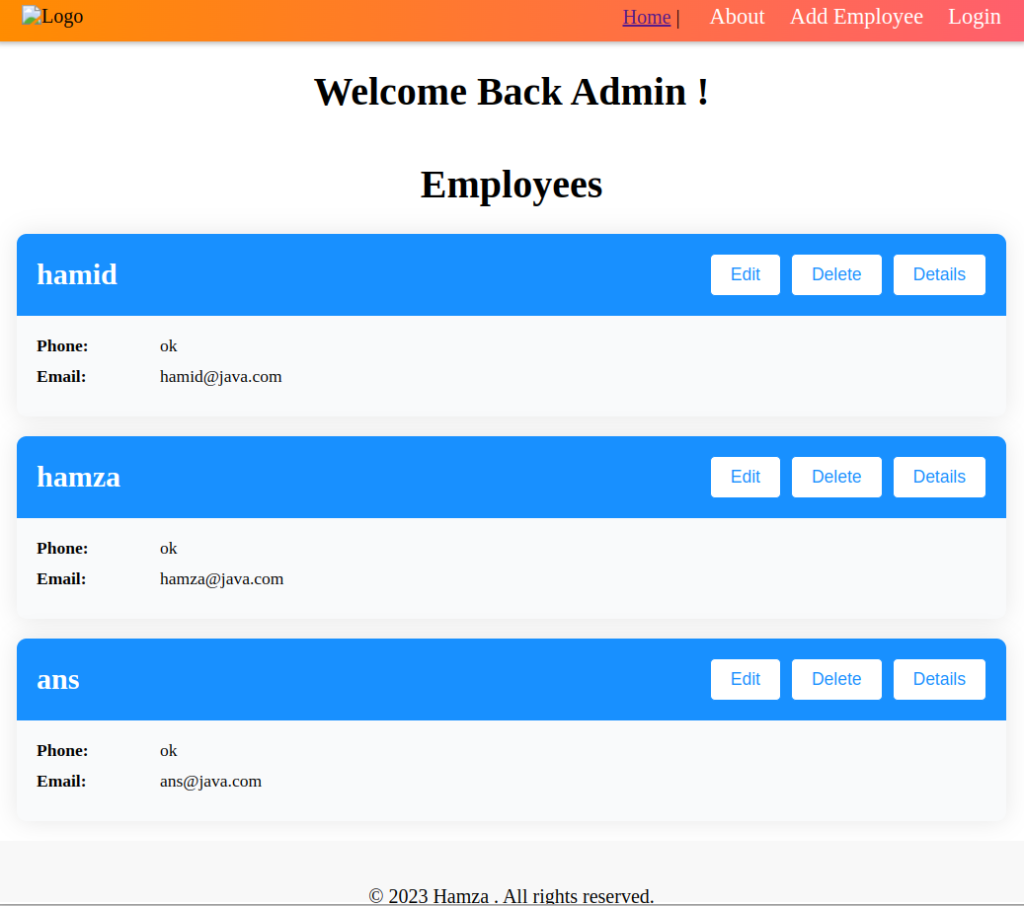
In the application, the home screen will present a list of all employees, along with options to add a new employee, update or delete an existing employee, and view employee details. The REST APIs will be designed to support these functionalities using Spring Boot.
2. Back-end With Spring Boot
we are reusing the REST APIs created for Spring boot REST API tutorial.
2.1. REST Controller
The following table shows the APIs that our Spring Boot application will export:
| HTTP Method | Endpoint | Action |
|---|---|---|
| POST | /api/employees | Create a new employee |
| GET | /api/employees | Retrieve all employees |
| GET | /api/employees/{id} | Retrieve an employee by ID |
| PUT | /api/employees/{id} | Update an employee by ID |
| DELETE | /api/employees/{id} | Delete an employee by ID |
@RestController
@RequestMapping("/api/employees")
@CrossOrigin
public class EmployeeController {

    @Autowired
    private EmployeeService employeeService;

    @GetMapping
    public List<Employee> getAllEmployees() {
        return employeeService.getAllEmployees();
    }

    @GetMapping("/{id}")
    public ResponseEntity<Employee> getEmployeeById(@PathVariable Long id) {
        Optional<Employee> employee = employeeService.getEmployeeById(id);
        return employee.map(ResponseEntity::ok).orElseGet(() -> ResponseEntity.notFound().build());
    }

    @PostMapping
    public ResponseEntity<Employee> addEmployee( @RequestBody Employee employee) {
        Employee savedEmployee = employeeService.addEmployee(employee);
        return ResponseEntity.created(URI.create("/api/employees/" + savedEmployee.getId())).body(savedEmployee);
    }

    @PutMapping("/{id}")
    public ResponseEntity<Employee> updateEmployee(@PathVariable Long id, @RequestBody Employee employee) {
        Optional<Employee> existingEmployee = employeeService.updateEmployee(id, employee);
        return existingEmployee.map(ResponseEntity::ok).orElseGet(() -> ResponseEntity.notFound().build());
    }

    @DeleteMapping("/{id}")
    public ResponseEntity<Void> deleteEmployee(@PathVariable Long id) {
        employeeService.deleteEmployee(id);
        return ResponseEntity.noContent().build();
    }
}
2.2. @CrossOrigin
When a client-side JavaScript application makes a request to a different domain, the browser will first check whether the server allows cross-origin requests by sending a preflight request with the OPTIONS HTTP method. The server will respond with headers indicating whether cross-origin requests are allowed, and if so, what methods and headers are allowed.
If the server responds with the appropriate headers, the browser will then send the actual request to the server. If the server does not respond with the appropriate headers, the browser will block the request and the controller will not be executed.
By using the @CrossOrigin annotation, we can configure the server to respond with the appropriate headers and allow cross-origin requests from specific domains, before the request is blocked by the browser.
Note that if we just put @CrossOrigin without specifying any origins, then all origins will be allowed to access the annotated endpoint.
@CrossOrigin
@RestController
public class EmployeeController { ... }
2.3. Model
For reference, the Employee class is as follows:
@Entity
@Getter
@Setter
@AllArgsConstructor
@NoArgsConstructor
public class Employee {

    @Id
    @GeneratedValue(strategy = GenerationType.IDENTITY)
    private Long id;
    private String name;
    private String phone;
    private String email;
    private String position;
    private String bio;
}
3. Front-end With Vue.js
3.1. Create Project Skeleton
To begin, make sure we have Node.js installed (version 10 or higher) and run the command “npm install -g @vue/cli” to install Vue CLI. we will use Vue CLI to create a Vue.js project.
To create a new vuejs project, open a terminal window and run the following command:
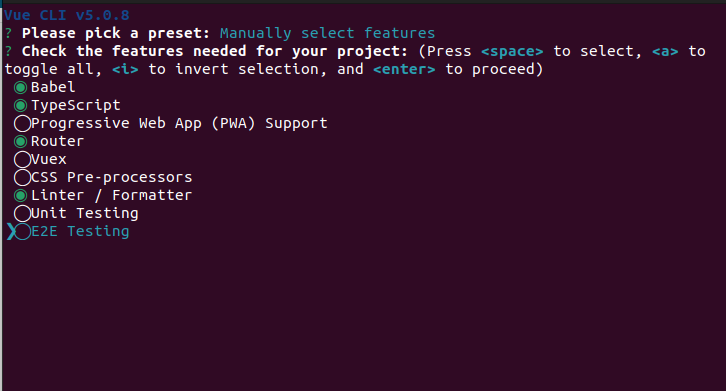
vue create my-app // Replace my-app with the name of your application.When you see the first prompt, select the option ” Manually select features“, and follow the prompts to configure the project. When prompted to select features, choose the following: Babel, TypeScript, Router, Linter / Formatter.
For the rest of the configuration, choose following options:
? Choose a version of Vue.js that you want to start the project with ? : 3.x
? Use class-style component syntax? (y/N) ?  : N
? Use Babel alongside TypeScript ? : Y
? Use history mode for router? : Y
? Pick a linter / formatter config ? : ESLint + Prettier
? Where do you prefer placing config for Babel, ESLint, etc. ? : In dedicated config files
3.2. Install & Initialize Axios
In Vue.js applications, we often need to retrieve data from an API or send data to an API. Axios can be used to make HTTP requests to an API and retrieve data. Unlike Angular (which has an HTTP module), Vue.js does not have an integrated library for making HTTP calls, which allows developers to choose their own preferred HTTP library or tool.
To install Axios navigate to the project directory and run the following command to install Axios :
npm install axiosTo set up Axios with the required parameters like the base URL and headers, we will create a TypeScript file called “apiClient.ts” inside a “utils” folder under the “src” directory. Here we define the API base URL and default headers.
import axios, { AxiosInstance } from "axios";

const API_URL = "http://localhost:9090/api";

const axiosInstance: AxiosInstance = axios.create({
  baseURL: API_URL,
  headers: {
    "Content-Type": "application/json",
  },
});

export default axiosInstance;
3.3. Model
In Vue.js with TypeScript, we can create a model using an interface.
interface Employee {

  id: number;
  name: string;
  phone: string;
  email: string;
  position: string;
  bio: string;
}
export default Employee;
3.4. Service
We are using Axios library to make HTTP requests to our Spring Boot application backend. Axios is imported into our service file and initialized with the necessary parameters such as the base URL and headers from the file apiClient.ts. Our service file defines methods to consume the RESTful API endpoints provided by Spring Boot controller.
import apiClient from "@/utils/apiClient";
import Employee from "@/types/Employee";

class EmployeeService {
  // get All Employees
  getAllEmployees = (): Promise<Employee[]> => {
    return apiClient.get("/employees").then((response) => response.data);
  };
  getEmployeeById = (id: any): Promise<Employee> => {
    return apiClient.get(`/employees/${id}`).then((response) => response.data);
  };

  edit = (id: any, emp: any): Promise<Employee> => {
    return apiClient
      .put(`/employees/${id}`, emp)
      .then((response) => response.data);
  };
  delete = async (id: any): Promise<Employee> => {
    return await apiClient
      .delete(`/employees/${id}`)
      .then((response) => response.data);
  };
  save = (emp: any): Promise<Employee> => {
    return apiClient.post("/employees", emp).then((response) => response.data);
  };
}

export default new EmployeeService();
The service class defines the following methods:
getAllEmployees()– makes an HTTP GET request to retrieve all employees from the API endpoint “/employees“.getEmployeeById(id)– makes an HTTP GET request to retrieve an employee with a specific id from the API endpoint “/employees/{id}“.edit(id, emp)– makes an HTTP PUT request to update an employee with a specific id by sending the updated employee object in the request body to the API endpoint “/employees/{id}“.delete(id)– makes an HTTP DELETE request to delete an employee with a specific id from the API endpoint “/employees/{id}“.save(emp)– makes an HTTP POST request to create a new employee by sending the employee object in the request body to the API endpoint “/employees“.
3.5. Routing
Routing in SPA applications is an approach to manage the navigation within the application without requiring a page refresh or a full request to the server. In traditional web applications, each page is loaded separately from the server in response to a request made by the user. However, in a SPA application, all necessary resources (HTML, CSS, and JavaScript) are loaded initially, and then the routing is handled on the client-side using JavaScript.
Using vue-router, we can define the routes for our application and associate them with specific components. When a user navigates to a certain URL, vue-router will load the associated component and render it on the page.
Edit the src/router/index.ts file to map the views or components to specific URLs.
const routes: Array<RouteRecordRaw> = [
  {
    path: "/",
    name: "home",
    component: HomeView,
  },
  {
    path: "/about",
    name: "about",
    component: AboutView,
  },
  {
    path: "/edit/employee/:id",
    name: "edit",
    component: EditEmployeeView,
    props: true,
  },
  {
    path: "/add/employee",
    name: "add",
    component: AddEmployeeView,
    props: true,
  },
  {
    path: "/details/employee/:id",
    name: "details",
    component: ShowDetails,
  },
];

const router = createRouter({
  routes,
  history: createWebHistory(process.env.BASE_URL),
});

export default router;
3.6. Components and Views
A view in Vue.js typically refers to a component that represents a page. A view can contain other components, which can be nested or composed together to create complex UIs.
Note that we are not providing the CSS for the components to keep the demo concise. However, you will find all the sourcecode attached to this article.
3.6.1. EmployeeCard Component
This Component Card shows the employee information with 3 buttons to delete, edit, and show details of an employee.
- Edit button will use the
push()method of the router object to direct the user to the Edit Employee view, passing the employee ID as a parameter through the router. - Details button will use the
push()method of the router object to direct the user to the Show Details view, passing the employee ID as a parameter through the router. - Delete button calls the
employeeService.delete()method to delete the employee from the database.
<template>
  <div class="card">
    <div class="card-header">
      <div class="card-header-left">
        <h2 class="card-title">{{ employee.name }}</h2>
      </div>
      <div class="card-header-right">
        <button class="btn" @click="editEmployee">Edit</button>
        <button class="btn" @click="deleteEmployee">Delete</button>
        <button class="btn" @click="showDetails">Details</button>
      </div>
    </div>
    <div class="card-body">
      <div class="card-row">
        <div class="card-label">Phone:</div>
        <div class="card-value">{{ employee.phone }}</div>
      </div>
      <div class="card-row">
        <div class="card-label">Email:</div>
        <div class="card-value">{{ employee.email }}</div>
      </div>
    </div>
  </div>
</template>
<script lang="ts">
import employeeService from "@/services/employeeService";
import Employee from "@/types/Employee";
import { defineComponent, PropType } from "vue";
import { useRouter } from "vue-router";

export default defineComponent({
  name: "EmployeeCard",
  props: {
    employee: {
      type: Object as PropType<Employee>,
      required: true,
    },
  },
  setup(props) {
    const router = useRouter();
    const showDetails = () => {
      router.push({ name: "details", params: { id: props.employee.id } });
    };

    const editEmployee = () => {
      router.push({
        name: "edit",
        params: { id: props.employee.id },
      });
    };
    const deleteEmployee = () => {
      employeeService.delete(props.employee.id).then(() => {
        window.location.reload;
      });
    };

    return {
      showDetails,
      editEmployee,
      deleteEmployee,
    };
  },
});
</script>
3.6.2. HomeView View
The component will use the getAllEmployees() method from employeeServiceEmployeeCard component for each employee. The employee object will be passed to the EmployeeCard component as a prop.
<template>
  <div class="home">
    <h1>
      Welcome Back Admin ! <br />
      <br />
      Employees
    </h1>
    <div v-for="(employee, index) in employees" :key="index">
      <employee-card :employee="employee" />
    </div>
    <Footer></Footer>
  </div>
</template>

<script lang="ts">
import { defineComponent, ref } from "vue";
import EmployeeCard from "@/components/EmployeeCard.vue";
import Footer from "@/components/FooterPage.vue";
import Employee from "@/types/Employee";
import employeeService from "@/services/employeeService";

export default defineComponent({
  name: "HomeView",
  components: { EmployeeCard, Footer },

  setup() {
    let employees = ref<Employee[]>([]);

    employeeService.getAllEmployees().then((response) => {
      employees.value = response;
    });

    return {
      employees,
    };
  },
});
</script>
3.6.3. ShowDetails View
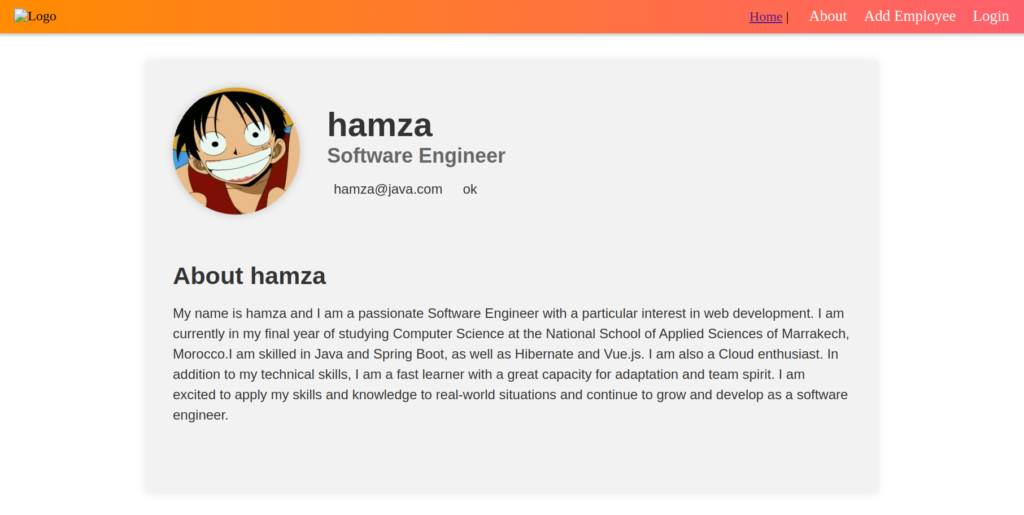
This component will utilize the id parameter in the router object, which is passed from the HomeView using the push() method, to retrieve the corresponding employee data from the back-end via the getEmployeeById() method provided by the employeeService. Once the employee object is obtained, the component will map its properties to the template to display the relevant information.
<template>
  <div class="employee-details">
    <div class="employee-header">
      <div class="employee-avatar">
        <img src="../assets/lofi2.jpeg" alt="Employee Avatar" />
      </div>
      <div class="employee-info">
        <h1>{{ employee?.name }}</h1>
        <h2>{{ employee?.position }}</h2>
        <div class="employee-contact">
          <div class="employee-contact-item">
            <i class="fas fa-envelope"></i>
            <p>{{ employee?.email }}</p>
          </div>
          <div class="employee-contact-item">
            <i class="fas fa-phone"></i>
            <p>{{ employee?.phone }}</p>
          </div>
        </div>
      </div>
    </div>
    <div class="employee-details-body">
      <div class="employee-details-section">
        <h2>About {{ employee?.name }}</h2>
        <p>{{ employee?.bio }}</p>
      </div>
    </div>
  </div>
</template>

<script lang="ts">
import employeeService from "@/services/employeeService";
import Employee from "@/types/Employee";
import { defineComponent, ref } from "vue";
import { useRoute } from "vue-router";

export default defineComponent({
  setup() {
    const route = useRoute();
    const id: string | string[] = route.params.id;
    let employee = ref<Employee>();

    employeeService
      .getEmployeeById(id)
      .then((Response) => (employee.value = Response));

    return {
      employee,
    };
  },
});
</script>
3.6.4. AddEmployeeView View
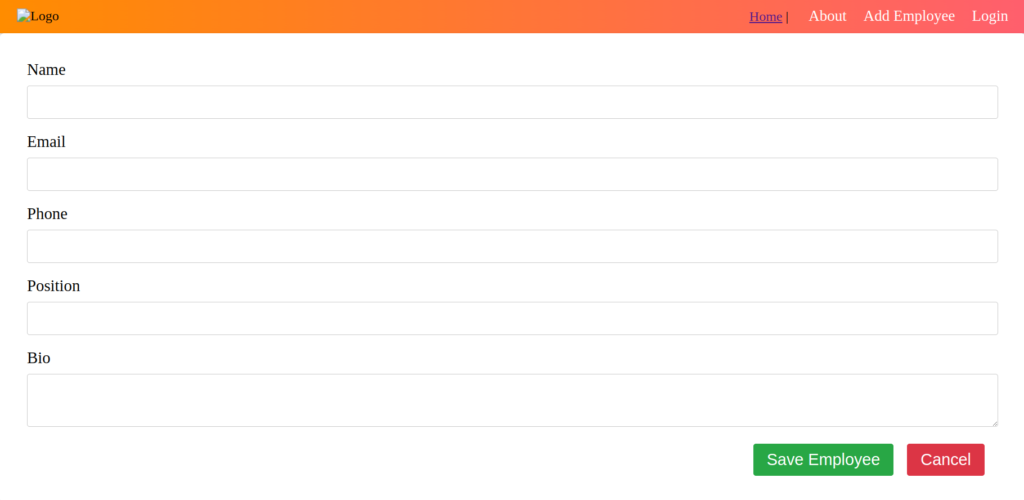
This component has a form To add a new Employee with the necessary fields, it calls the employeeService.save() method to save the employee (this method gets called when we hit the submit button ).
<template>
  <div class="employee-edit-form">
    <form @submit.prevent="submitForm">
      <div class="form-group">
        <label for="name">Name</label>
        <input
          type="text"
          id="name"
          v-model="employeeToBeSaved.name"
          required
        />
      </div>
      <div class="form-group">
        <label for="email">Email</label>
        <input
          type="email"
          id="email"
          v-model="employeeToBeSaved.email"
          required
        />
      </div>
      <div class="form-group">
        <label for="phone">Phone</label>
        <input
          type="tel"
          id="phone"
          v-model="employeeToBeSaved.phone"
          required
        />
      </div>
      <div class="form-group">
        <label for="position">Position</label>
        <input
          type="text"
          id="position"
          v-model="employeeToBeSaved.position"
          required
        />
      </div>
      <div class="form-group">
        <label for="bio">Bio</label>
        <textarea id="bio" v-model="employeeToBeSaved.bio" required></textarea>
      </div>
      <div class="form-actions">
        <button type="submit">Save Employee</button>
        <button type="button" @click="cancelEdit">Cancel</button>
      </div>
    </form>
  </div>
</template>

<script lang="ts">
import { defineComponent, ref } from "vue";
import Employee from "@/types/Employee";
import employeeService from "@/services/employeeService";
import { useRouter } from "vue-router";

export default defineComponent({
  name: "AddEmployeeView",
  setup() {
    const employeeToBeSaved = ref<Employee>({
      id: 0,
      name: "",
      phone: "",
      email: "",
      bio: "",
      position: "",
    });
    const router = useRouter();

    const submitForm = () => {
      employeeService.save(employeeToBeSaved.value).then(() => {
        router.push({ name: "home" });
      });
      window.location.reload;
    };
    const cancelEdit = () => {
      router.push({ name: "home" });
    };

    return {
      employeeToBeSaved,
      cancelEdit,
      submitForm,
    };
  },
});
</script>
3.6.5. EditEmployeeView View
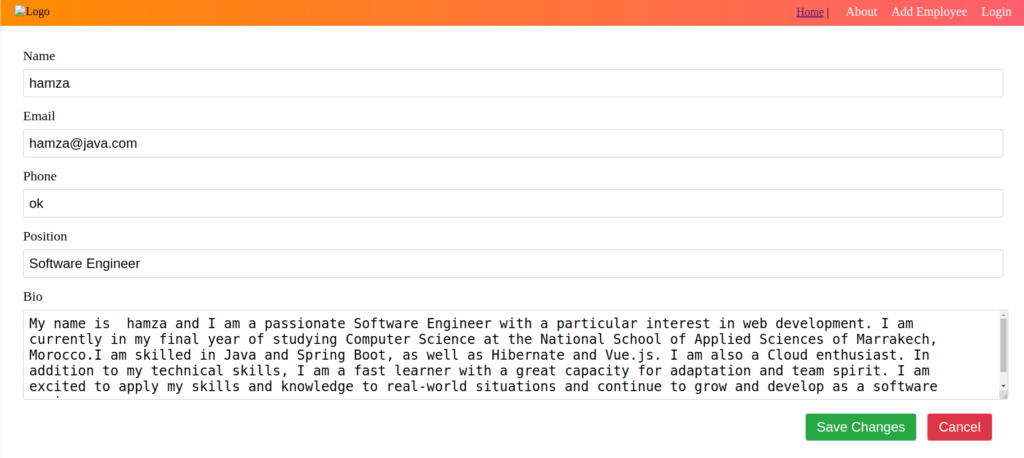
This component has a form to edit an existing employee’s information, with the necessary fields. Similar to the ShowDetails view, this component fetches the required employee information, pre-fills the form, and renders the component. The user can then make changes to the employee information and upon submission, it calls the employeeService.edit() method to update the employee’s data on the back-end.
<template>
  <div class="employee-edit-form">
    <form @submit.prevent="submitForm">
      <div class="form-group">
        <label for="name">Name</label>
        <input type="text" id="name" v-model="editedEmploye.name" required />
      </div>
      <div class="form-group">
        <label for="email">Email</label>
        <input type="email" id="email" v-model="editedEmploye.email" required />
      </div>
      <div class="form-group">
        <label for="phone">Phone</label>
        <input type="tel" id="phone" v-model="editedEmploye.phone" required />
      </div>
      <div class="form-group">
        <label for="position">Position</label>
        <input
          type="text"
          id="position"
          v-model="editedEmploye.position"
          required
        />
      </div>
      <div class="form-group">
        <label for="bio">Bio</label>
        <textarea id="bio" v-model="editedEmploye.bio" required></textarea>
      </div>
      <div class="form-actions">
        <button type="submit">Save Changes</button>
        <button type="button" @click="cancelEdit">Cancel</button>
      </div>
    </form>
  </div>
</template>

<script lang="ts">
import { defineComponent, ref } from "vue";
import Employee from "@/types/Employee";
import employeeService from "@/services/employeeService";
import { useRoute, useRouter } from "vue-router";

export default defineComponent({
  name: "EmployeeEditForm",
  setup() {
    const editedEmploye = ref<Employee>();
    console.log(editedEmploye);
    const route = useRoute();
    const router = useRouter();
    let id = route.params.id;
    employeeService.getEmployeeById(id).then((response) => {
      editedEmploye.value = response;
    });

    const submitForm = () => {
      employeeService.edit(id, editedEmploye.value).then(() => {
        router.push({ name: "home" });
      });
      window.location.reload;
    };
    const cancelEdit = () => {
      router.push({ name: "home" });
    };

    return {
      editedEmploye,
      cancelEdit,
      submitForm,
    };
  },
});
</script>
4. Demo
Navigate to the root directory of the Vue.js app in a terminal or command prompt. Run the following command to start the development server.
$ npm run serveThe command prompt should display a local development server URL where we can view the app. It is typically http://localhost:8080.
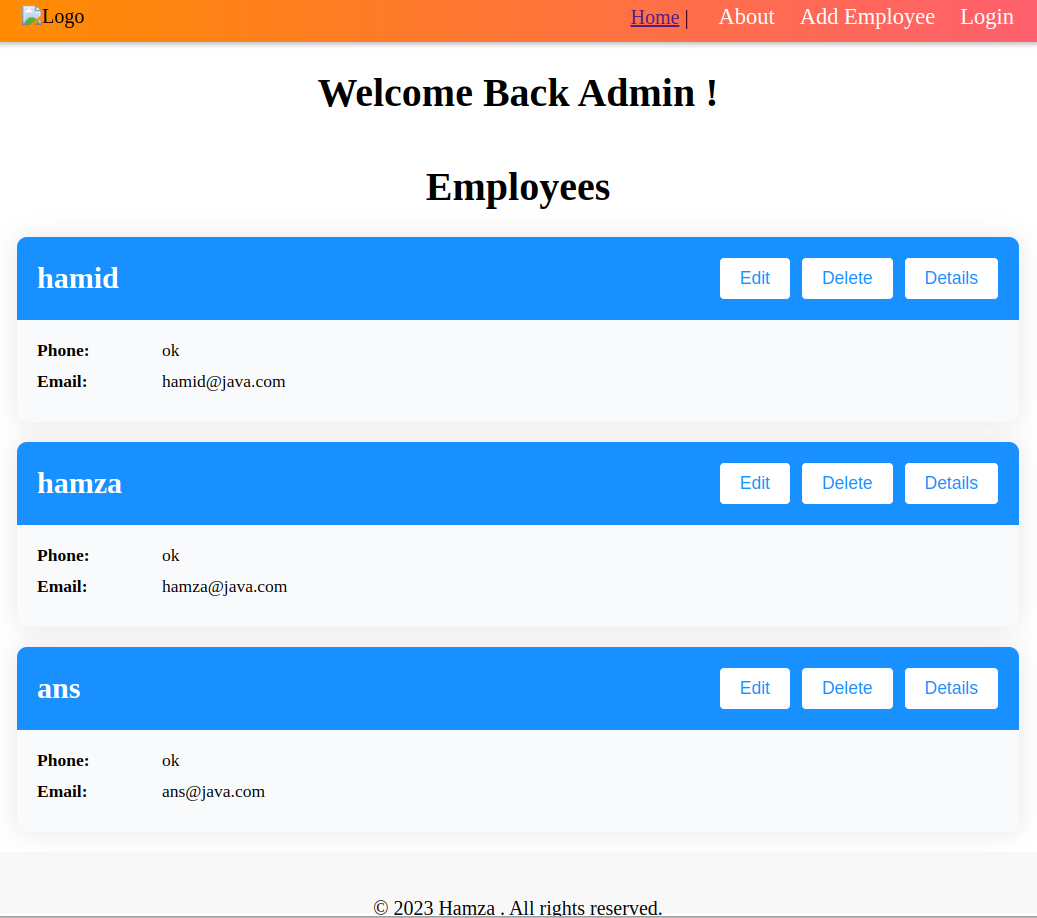
Open a web browser and navigate to the URL displayed in the command prompt to view our Vue.js app Home Page.
5. Conclusion
Vue.js and Spring Boot are two powerful technologies that can be used together to build robust and scalable web applications. In this article, we explored how to integrate Vue.js with Spring Boot, and saw how they can work together to provide a seamless user experience and efficient backend functionality.
I have add that specific address to the annotation @CrossOrigin(origins = “http://192.168.178.222:8080”), but still the same problem. The error what earlier mentiond is from the browser console.
Here I have the error on screen, and it seems to me that it is a Vue\Axios error, so at the front-end:
There is also nothing happening in the console from the backend (IntelliJ).
But if you download the sourcecode from Github and you compile it, install Axios, npm install, is it running than ‘out of the box’?
At this moment I’m using Node v22.2.0 with NPM 10.7.0. I have tried lower versions, but it is above 10. Do I need to use a lower Node\NPM version?
(I like to know why this is happening, to learn from it, because I know this are though issue’s if running into this!)
I get this error:
Access to XMLHttpRequest at ‘http://localhost:9090/api/employees’ from origin ‘http://192.168.178.222:8080’ has been blocked by CORS policy: No ‘Access-Control-Allow-Origin’ header is present on the requested resource.
employeeService.ts:7
GET http://localhost:9090/api/employees net::ERR_FAILED 404 (Not Found)
I don’t know how to solve it. Must this be done at server side or at the client side?
I have added at the server side @CrossOrigin and client side devServer proxy.
I hope that you can help me further.
Try adding this: @CrossOrigin(origins = “http://192.168.178.222:8080”)
Hello,
Thanks for this tutorial. I have downloaded the code from GitHub. I can compile and run it.
But I get een CORS error although I have added ‘@CrossOrigin’ at the backend controller. I try to add at the frontend:
const { defineConfig } = require("@vue/cli-service");
module.exports = defineConfig({
 transpileDependencies: true,
  devServer: {
    proxy: {
      http://localhost:9090
      },
    },
  },
});
But still I have the CORS error. I try to find out how to solve it, so that I know how it works….