By combining the portability and flexibility of Docker containers with AWS’s reliable and scalable infrastructure, we can take our Spring Boot applications to new heights. In this comprehensive guide, we’ll show exactly how to deploy a Dockerized Spring Boot app to AWS ECS from start to finish.
1. Introduction to Amazon ECS
Amazon Elastic Container Service (Amazon ECS) is a fully managed container orchestration service that simplifies the deployment, management, and scaling of “containerized” applications.
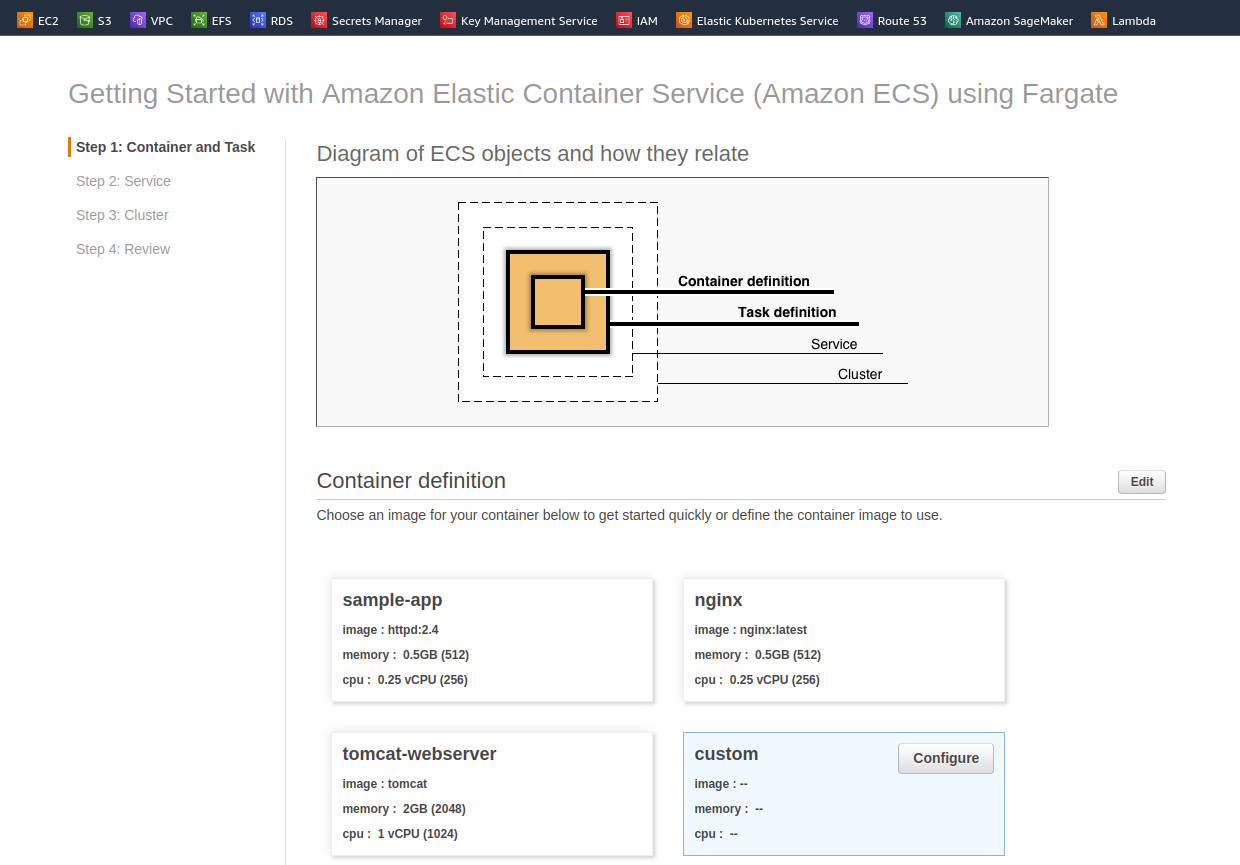
ECS consists of the following important components:
- Elastic Container Repository (ECR): A Docker repository to store Docker images (similar to DockerHub but provisioned by AWS).
- Task Definition: A versioned template of a task that we would like to run. It specifies the Docker image to be used, memory, CPU, etc. for the container.
- ECS Cluster: The cluster definition contains how many instances we would like to have and how it should scale.
- Service: Using the task definition, the service deploys a container into the cluster.
2. Deployment Plan

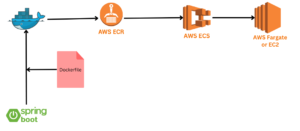
Here’s a high-level workflow for deploying a Spring Boot application to AWS using Docker, ECR, and ECS:
- Create a Dockerfile for the Spring Boot application, specifying the base image and dependencies etc.
- Using Docker CLI, build a Docker image, tag it with the name of ECR repository, and push the image to ECR repository.
- Create an ECS task definition including docker image name and the required CPU and memory resources.
- Create an ECS service that executes ECS task definition, specifying the desired number of tasks and the load balancer configuration for distributing the traffic to the tasks.
- Finally, test the Spring Boot application by accessing the application deployed on the ECS cluster.
3. Prerequisites
Before beginning this tutorial, these are the prerequisites that must be met:
- An AWS account is required in order to utilize AWS services. If you do not have an AWS account, you can sign up at aws.amazon.com/console. We will be using Amazon ECR as a container registry and Amazon ECS as a container service for this tutorial.
- AWS CLI is installed on your machine.
- Docker must be installed on your computer in order to create, manage, and push Docker images to the Amazon ECR registry. We can download and install Docker from the official Docker website.
- A functional spring boot application.
4. Dockerizing the Spring Boot Application
The first step in deploying a dockerized Spring Boot application to AWS is to create a Docker image. This image will contain all the dependencies and configurations necessary for the application to run.
4.1. Spring Boot App
To keep things simple, we will use a simple Spring Boot application with a single endpoint “/home“.
@RestController
public class HomeController {

    @GetMapping("/home")
    public String hello(){

        return  "Project running successfully " ;
    }
}
4.2. Creating the Docker Image
Create a file named Dockerfile in project root and add the following code:
FROM openjdk:8-jdk-alpine
MAINTAINER howtodoinjava.com
ADD target/AWSDockerDeploy-0.0.1-SNAPSHOT.jar  AWSDockerDeploy-0.0.1-SNAPSHOT.jar
ENTRYPOINT ["java","-jar","AWSDockerDeploy-0.0.1-SNAPSHOT.jar"]
The Dockerfile uses the OpenJDK 8 image as its base image, adds the AWSDockerDeploy-0.0.1-SNAPSHOT.jar file to the container, and sets it as the entry point. Make sure to replace AWSDockerDeploy-0.0.1-SNAPSHOT.jar with the name of your application’s JAR file.
4.3. Building the Docker Image
Build the docker image using the following command:
docker build -t my-application .This command builds the image with the tag 'my-application'.
4.4. Testing Locally
Before publishing the Docker image to ECR, it’s a good idea to test it locally to ensure that it works as expected. Run the following command to start a container using the Docker image:
docker run -p 8080:8080 my-applicationThis command starts a container using the my-application image and maps port 8080 in the container to port 8080 on the local machine. We can now access the application by navigating to http://localhost:8080.
5. Creating an AWS Elastic Container Registry (ECR)
The Elastic Container Registry (ECR) is a fully-managed container registry service provided that makes it easy to store, manage, and deploy docker images. Also, ECR enables easy integration with other AWS services such as Amazon Elastic Container Service (ECS). We can think of it as our Docker Hub.
5.1. Create an Elastic Container Registry
To create an ECR repository, follow these steps:
- Log in to the AWS Console and navigate to the Amazon ECR dashboard.
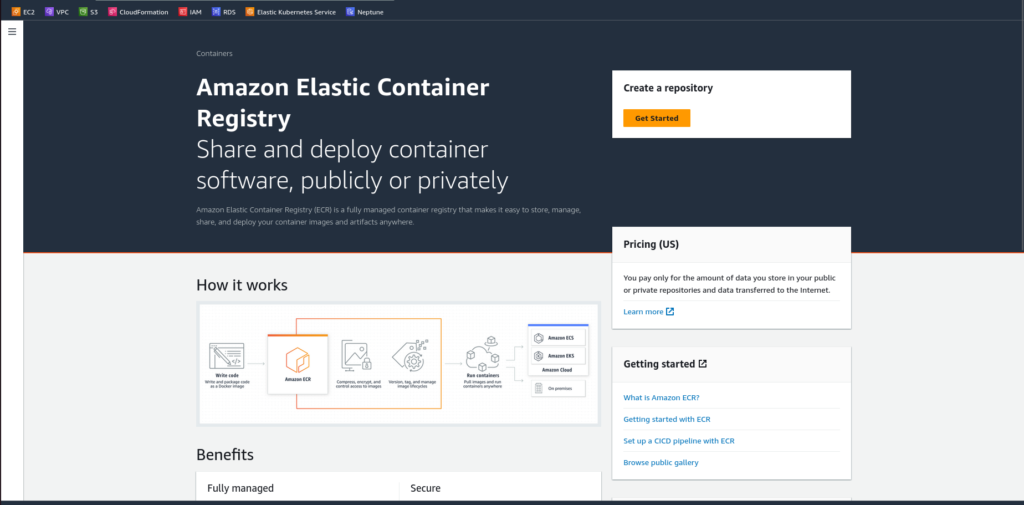
- Click on the “Get Started” button.
- In the “Create repository” page, enter a name for the repository. We have specified “howtodoinjava“.
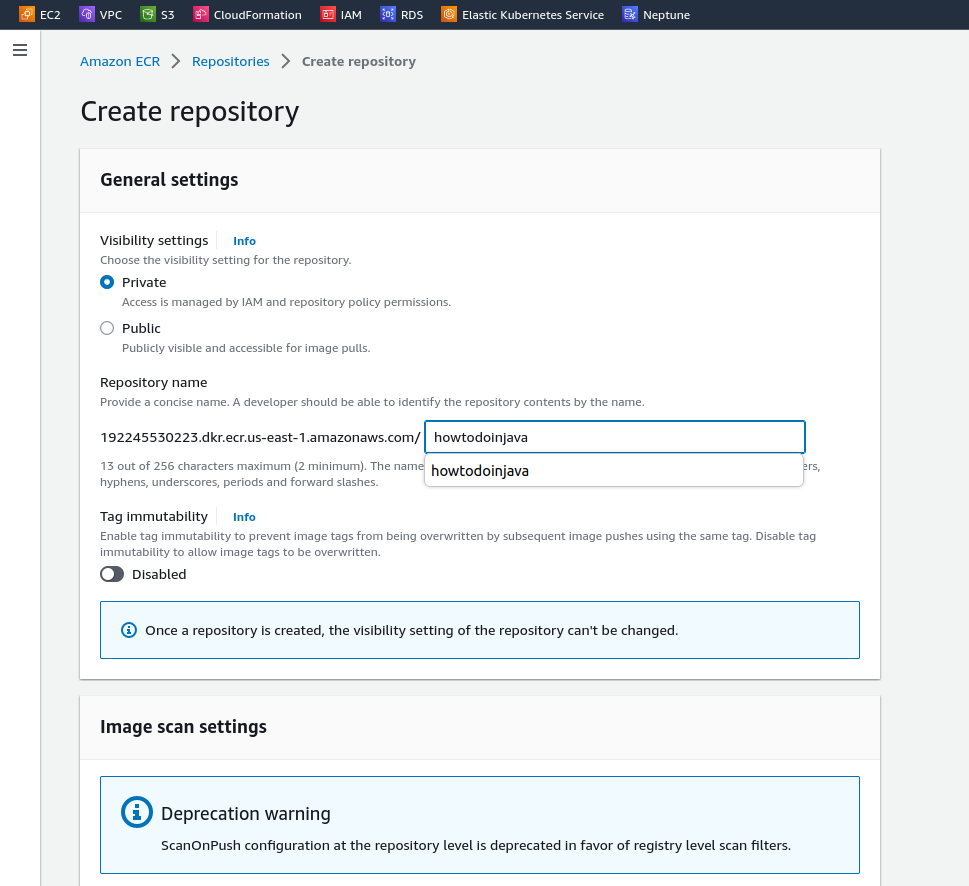
- Click on the “Create repository” button to create the repository.
5.2. Publishing the Docker Image on ECR
The next step is to publish the Docker image to the Elastic Container Registry (ECR) that we just created.
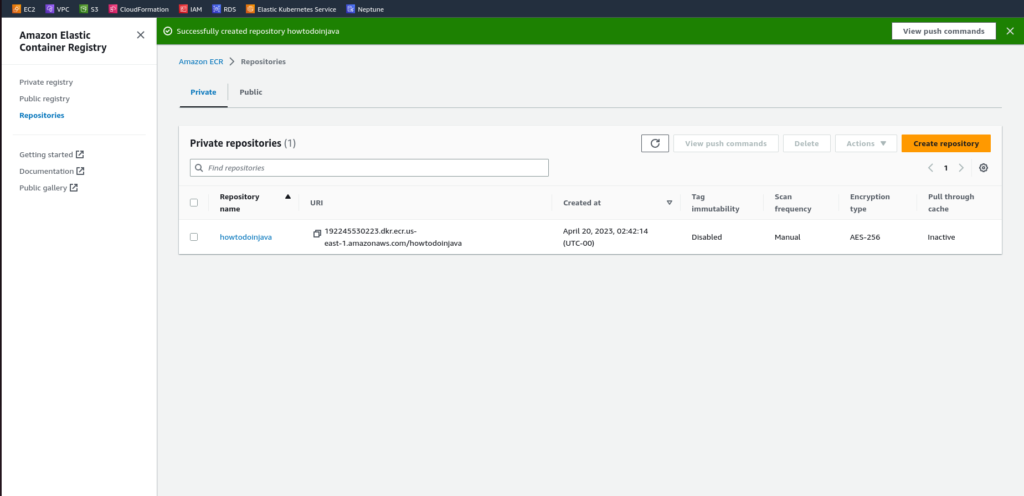
Once your repository is created, click on the “View push commands” button to get the commands needed to push your Docker image to the repository.
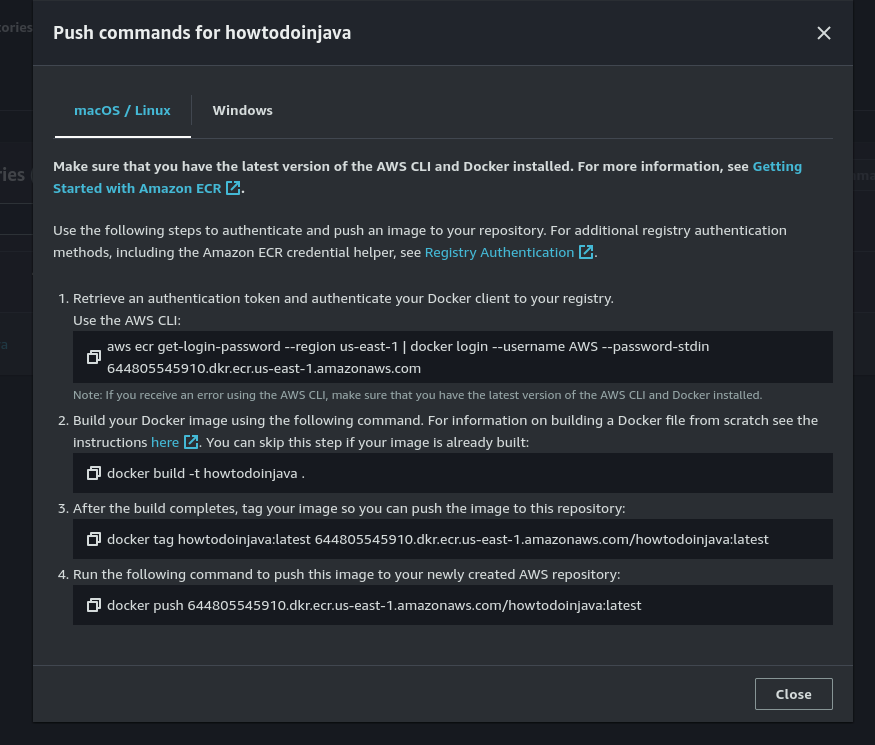
Follow the instructions provided by AWS to tag, login, and push the Docker image to ECR.
- Login to the ECR repository:
aws ecr get-login-password --region us-east-1 | docker login --username AWS --password-stdin 644805545910.dkr.ecr.us-east-1.amazonaws.comIf we encounter the error “Cannot perform an interactive login from a non-TTY device” while trying to log in to ECR repository, it may be due to an outdated AWS CLI version. To resolve this, try upgrading your AWS CLI version from version 1 to version 2.
- Tag the Docker image with the ECR repository URI:
docker tag my-application:latest 644805545910.dkr.ecr.us-east-1.amazonaws.com/howtodoinjava:latest- Push the Docker image to ECR:
docker push 644805545910.dkr.ecr.us-east-1.amazonaws.com/howtodoinjava:latest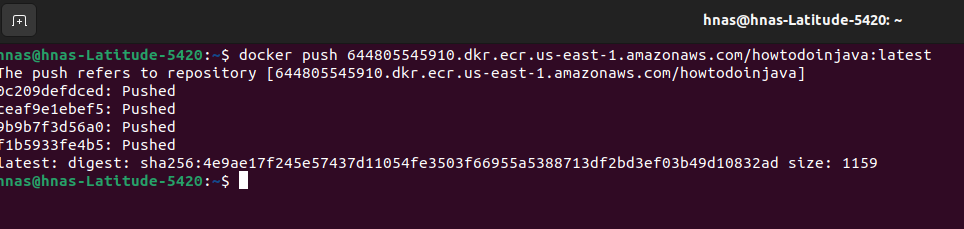
We can now check the ECR Registry to confirm that the Docker image has been successfully pushed and is available for use.

6. Configuring Elastic Container Service (ECS)
Amazon Elastic Container Service (ECS) is a fully-managed container orchestration service that allows us to easily run, manage, and scale Docker containers on a cluster of EC2 instances or Fargate, a serverless compute engine for containers.
An ECS service is a logical group of tasks, which are essentially Docker containers, that are deployed and run together. ECS services allow defining how many containers to run, what resources they need, and how they should be deployed and scaled.
6.1. Creating ECS Cluster
To create an ECS cluster, simply search for the ECS service in the AWS console and click on the “Get Started” button. This will launch a wizard that will guide us through the process of creating our ECS cluster in a straightforward manner.
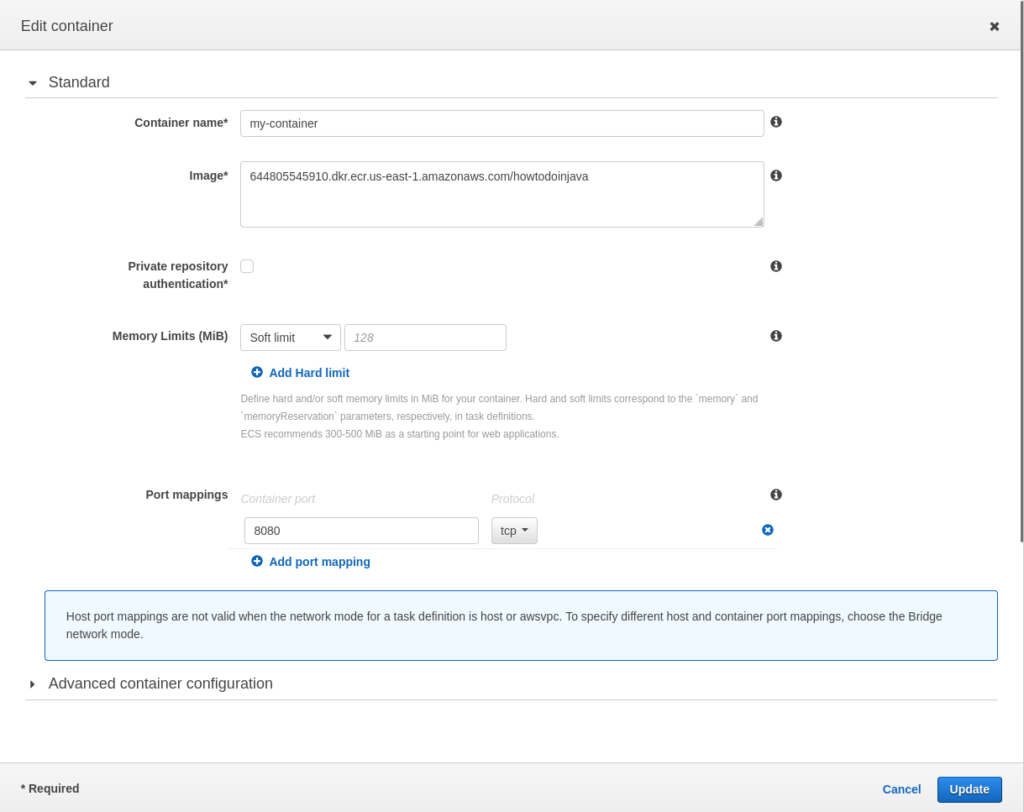
6.1.1. Container Configuration
When we click on the “Edit” button, a modal window will appear where we can provide various details about the container. In this modal, we can specify the Docker image, the CPU and memory limits, the networking mode, and the port mappings. We can also configure environment variables, commands, and arguments for the container.
6.1.2. Task Creation
To create a task definition, simply provide the task definition name and leave all other settings at their default values.
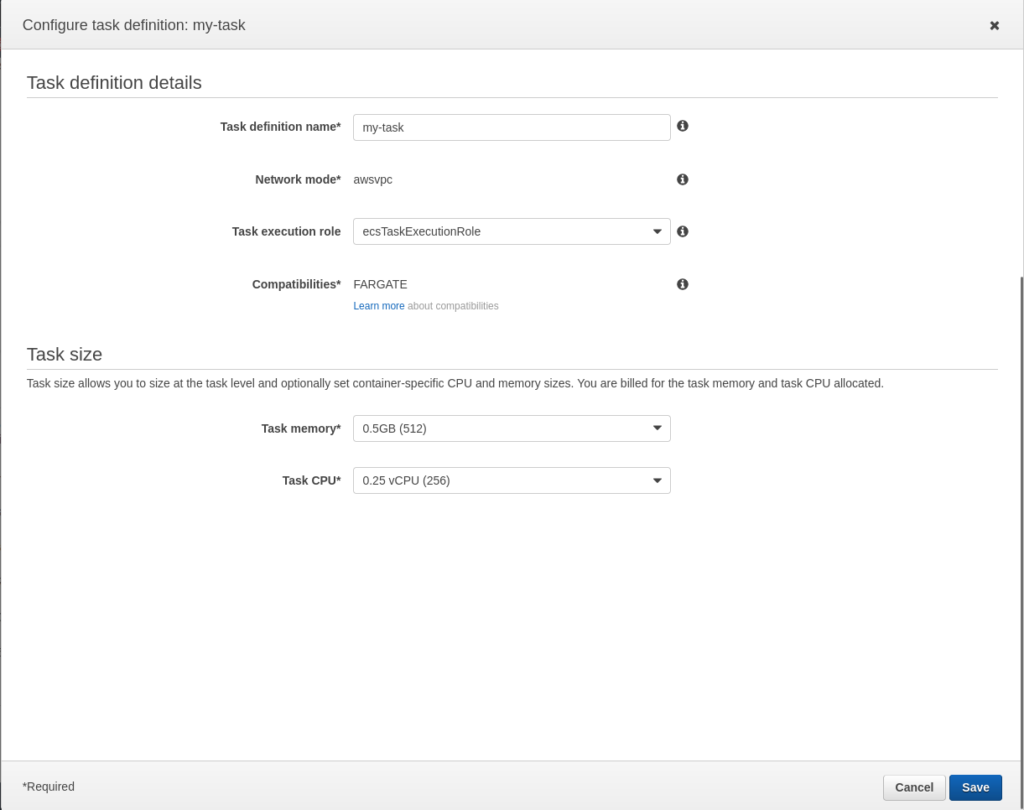
Once we have configured the container and task, click “Next” to proceed to the next step, where we can configure the ECS service.
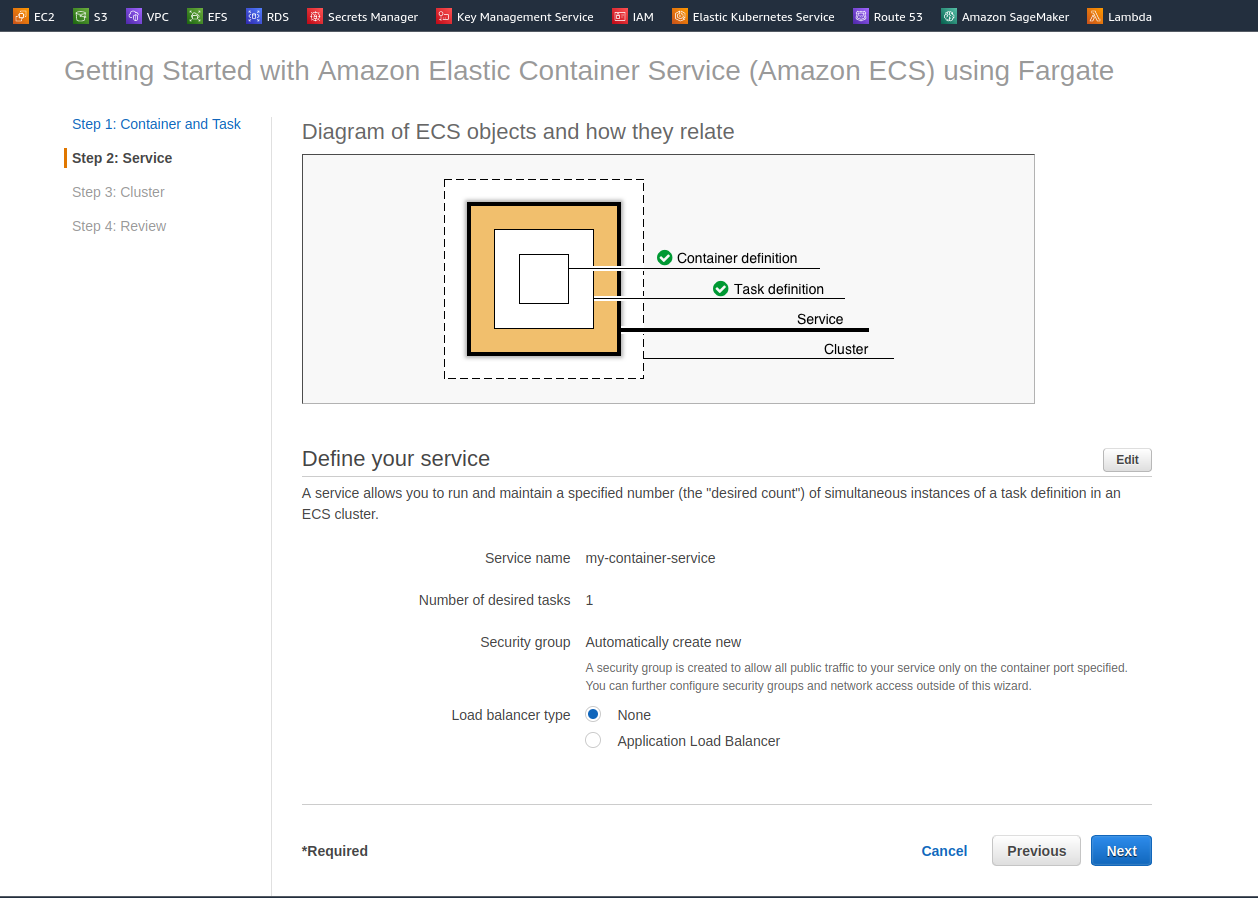
6.2. Create a Service
For the service configuration, choose the application load balancer if required.
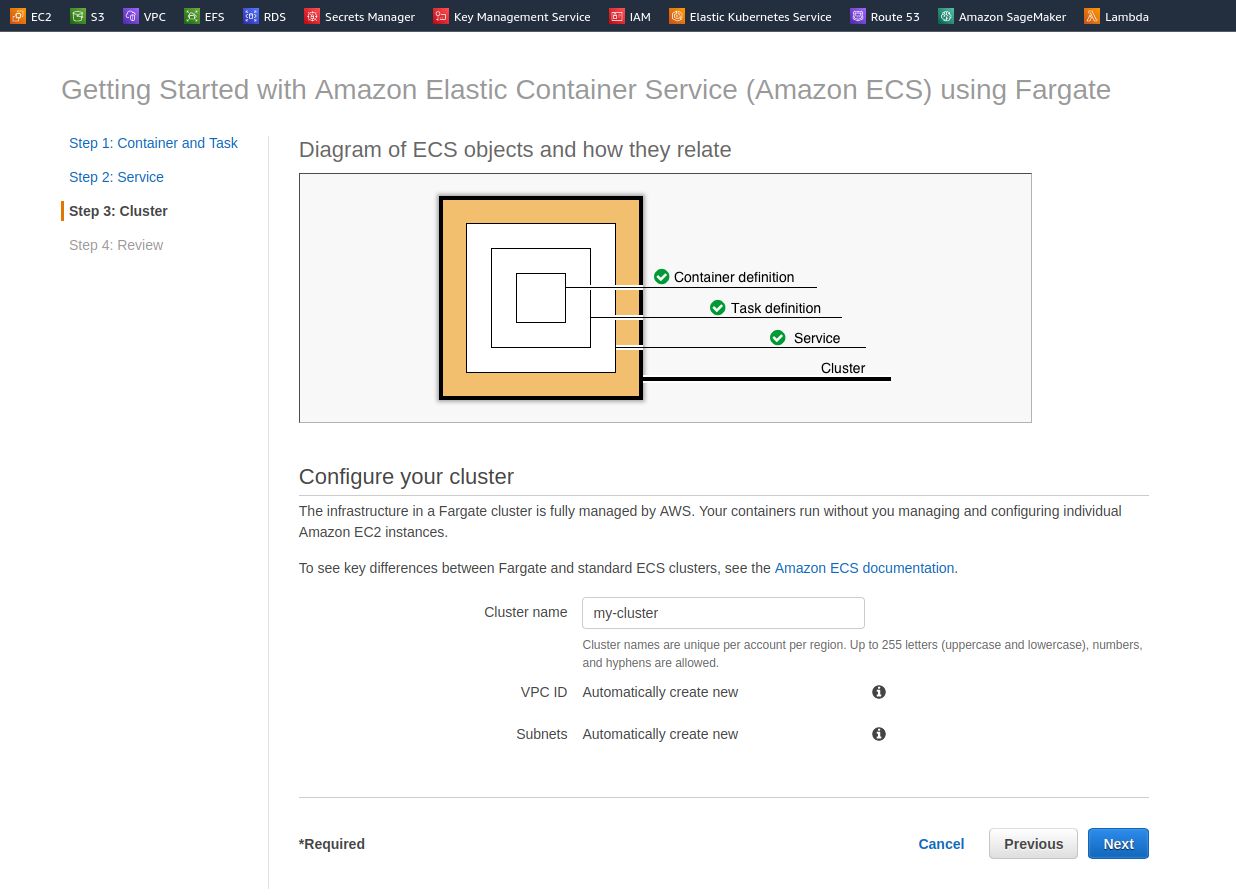
6.3. Cluster Creation
Finally, we need to create the ECS cluster, just provide a name for the cluster, and then click “Next” to proceed to the Review page .
Once we have reviewed and confirmed all the parameters for ECS Container, task definition, service, and cluster; then click the “Create Cluster” button to create our ECS cluster.
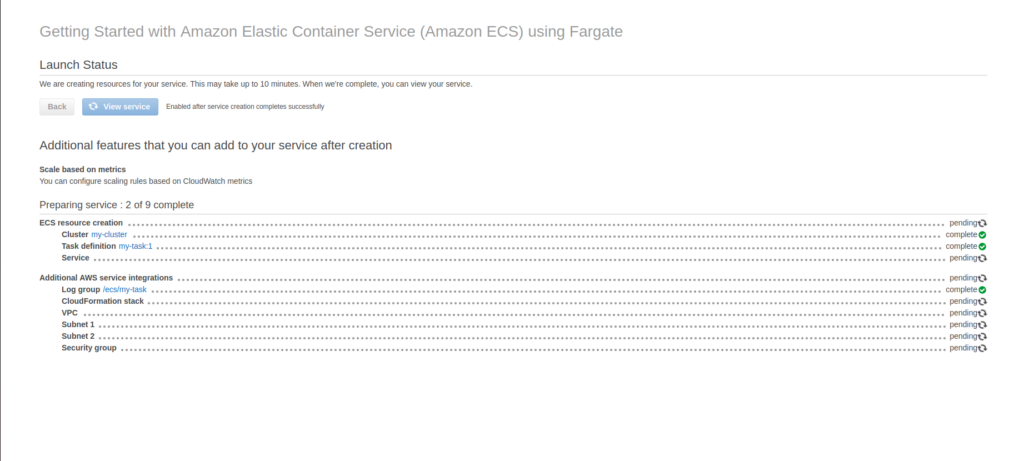
Congratulations! We have successfully deployed the Spring Boot Docker image to the ECS cluster.
7. Demo
Once the cluster creation process is complete, click on “View service” to check the status of the ECS service.
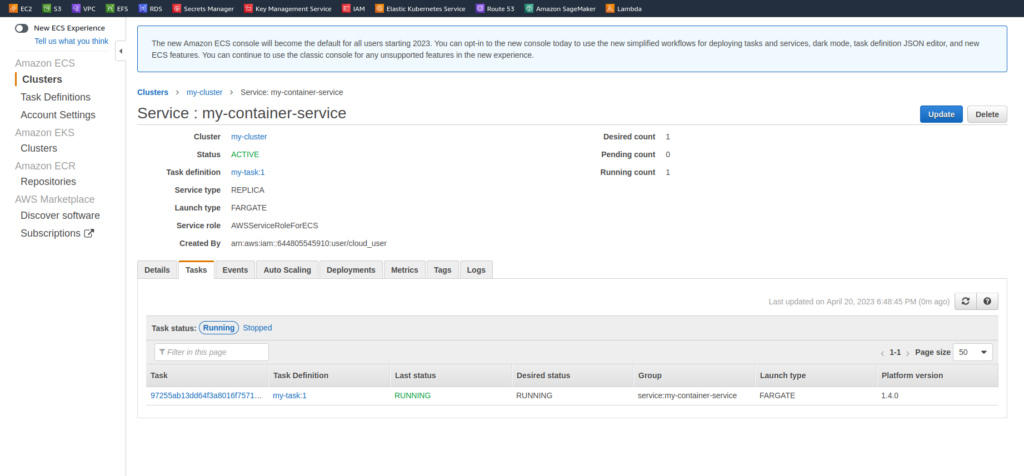
Navigate to the “Tasks” tab and click on the task we want to view. Then, click on the “Details” tab to view the task parameters. We can find the public IP address of the task under the “Network” section, which we can use to access the application.
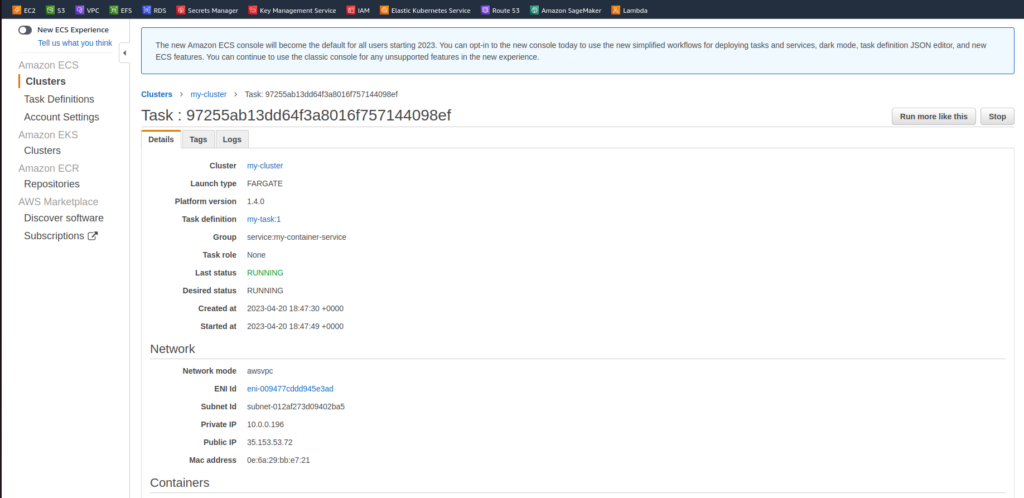
Copy the public IP address, and use the port number “8080” (assuming we used port number 8080 in the port mapping section). This will allow us to access the application.

8. Conclusion
By following the steps outlined in this tutorial, we can quickly and easily deploy a Spring Boot application to AWS, taking advantage of the scalability and flexibility of the AWS infrastructure. Whether we are deploying a new application or migrating an existing one, using ECR and ECS can simplify the process and provide a reliable and efficient platform.
Happy Reading !!
Good Article to read in simple steps.