

In today’s world of containerization and microservices, running applications in lightweight, isolated environments has become the norm. When it comes to containerizing Spring Boot applications, Podman, a powerful container management tool, offers a versatile and user-friendly platform for deployment.
This guide explores the step-by-step process of running a Spring Boot application with a PostgreSQL database using Podman.
1. Introduction to Podman
Before we dive into Podman, let’s first define what a Pod is. Pods are a fundamental concept in container orchestration systems like Kubernetes.
Container orchestration automatically provisions, deploys, scales, and manages containerized applications without worrying about the underlying infrastructure.
Pods represent the smallest deployable units in Kubernetes and provide a way to encapsulate one or more tightly coupled containers and shared resources. Any given pod can be composed of multiple, tightly coupled containers or just a single container. Containers within a pod share the same network namespace, storage volumes, and can communicate with each other via localhost.
In the context of Podman, a pod is a group of one or more containers that share the same network namespace, storage volumes, and IPC namespace. This allows containers within a pod to communicate with each other via localhost and share data more easily.
Podman = Pod + Manager
Podman consists of two words (Pod + Manager) so basically Podman is a container management tool designed to easily find, run, build, share and deploy applications using OCI (Open Containers Initiative) Containers and Container Images. Podman is a daemonless and open-source tool which makes it a great fit to choose over Docker.
2. Difference between Podman and Docker
In general, Podman is a secure and user-friendly alternative to Docker that maintains compatibility with Docker commands and container images. Podman is particularly useful for managing containers in environments where Docker might not be available or suitable.
Let’s compare Docker and Podman head to head.
| Parameter | Docker | Podman |
|---|---|---|
| Architecture | Docker uses a daemon-based architecture that requires a central daemon (dockerd). | Podman’s daemon-less architecture can run containers under the user who starts the container. |
| Pod Concept | No native pod concept. | Supports pods for group containers. |
| Container Orchestration | Swarm mode for orchestration | No built-in orchestration (use Kubernetes) |
| Security | Docker daemons have root privileges, attackers often use them to access your system. | Podman supports containers that don’t have root privileges. It is considered that containers that do not have root privileges are safer than containers that do. |
| Platform Support | Linux, Windows, macOS (Docker Desktop) | Linux, Windows (with limitations) |
It is important to note that both Podman and Docker are capable containerization tools. Podman’s daemonless architecture, emphasis on security, and support for rootless containers make it particularly appealing for users seeking these features. Docker, on the other hand, has a larger user base and ecosystem; and has its own usecases.
3. Installing Podman on Windows/Linux/macOS
Podman comes with a complete solution for installing it on all major OS (macOS, Windows or Linux Distributions). However, it is not possible to show all installation processes. So we are restricted to Centos 7 OS of Linux distro. You can read the https://podman.io/docs/installation guide for complete installation instructions.
Podman is available in the package repositories for CentOS 7 and CentOS 8 (including CentOS Stream).
sudo yum -y install podmanOnce installation is complete, you can run the below command to verify Podman installation.
sudo podman version

#output
Version:            1.6.4
RemoteAPI Version:  1
Go Version:         go1.12.12
OS/Arch:            linux/amd64
There are many useful commands for Podman that we can find in the official documentation.
4. Creating a Spring Boot Application
For demo purposes, we are reusing the Spring Boot application created as part of Spring Boot CRUD App with Thymeleaf. However, we need to make the following changes to make it work with our PostgreSQL DB.
Include the latest version of PostgreSQL in the project.
<dependency>
  <groupId>org.postgresql</groupId>
  <artifactId>postgresql</artifactId>
  <scope>runtime</scope>
</dependency>
Configure the datasource to connect to the Postgres database.
spring.datasource.url=jdbc:postgresql://localhost:5432/employee
spring.datasource.username=postgres
spring.datasource.password=**********
spring.jpa.show-sql=true
spring.jpa.properties.hibernate.dialect = org.hibernate.dialect.PostgreSQLDialect
5. Containerizing and Deploying the Application in Podman
Now, let us deploy the Spring Boot application in containers using Podman. To make the process easier and more understandable, we are breaking it down into steps.
Step 1: Package the Spring Boot Application
Run the ‘mvn package‘ command to package the application as a Jar file.
mvn packageStep 2: Create the Docker File
You all are wondering why we need a Docker file. We need the Docker file to gather the basic resource requirements to run this app in containers. Podman will pull all the required resources for us from docker.io/library/ and help us create the final image.
The docker file differs from project to project. For this project, we can create the following docker file.
#pulling jre image
FROM docker.io/library/openjdk:17-oracle
#set working dir
WORKDIR /app
COPY demo-0.0.1-SNAPSHOT.jar app.jar
# Expose the port that your Spring Boot application listens on (default is 8080)
EXPOSE 8080
# Define the command to run your application
CMD ["java","-Dserver.port=8080","-jar","app.jar"]
Step 3: Create the Image using Podman
Once our docker file is completed, we can move for our image build. To create the image we can follow below code snippet below. Just replace the image tag with your desired tag.
sudo podman build -t <your image tag> .Here let’s understand the above command and its parameters
- build: this will build our image
- -t: for tagging purposes.
- dot(.): The dot at the end represents the current directory. You can provide a path of the directory where your package is created or stored.
Once our image is built, you can check and verify images by running the below command.
sudo podman images

#output

[vagrant@ac01 spring-postgres-demo]$ sudo podman images
REPOSITORY                       TAG              IMAGE ID       CREATED         SIZE
localhost/spring-postgres-demo   latest           f4863133bb41   4 hours ago     521 MB
localhost/spring-demo            latest           3673272b32a8   2 days ago      318 MB
docker.io/library/postgres       14-bullseye      b6293bd893e6   6 days ago      385 MB
docker.io/dpage/pgadmin4         latest           ce8ae42da4a0   6 days ago      561 MB
docker.io/library/openjdk        8-jre            0c14a0e20aa3   14 months ago   280 MB
docker.io/library/openjdk        17-oracle        5e28ba2b4cdb   17 months ago   475 MB
docker.io/library/adoptopenjdk   11-jre-hotspot   2c57fb3bc67b   24 months ago   249 MB
k8s.gcr.io/pause                 3.1              da86e6ba6ca1   5 years ago     749 kB
Step 4: Run the Container using the Image
Now we have our image ready, so we will deploy it to our containers using the snippet below.
sudo podman run -d --name spring-postgres-demo -p 80:8080 localhost/spring-postgres-demoNow let’s decode the above command and its parameters
- run: it will run our container
- -d: This is a detach flag and is mainly used for running the process in the background.
- –name: this flag is used to make the name of the containers. Names are handy when we have multiple containers.
- -p: this flag is used to specify ports
Lastly, our image tag needs to be run in a container. In our case, it is localhost/spring-postgres-demo
Once containers are created, you can see them using the command below.
sudo podman ps -a

#output

CONTAINER ID  IMAGE                                   COMMAND               CREATED         STATUS                    PORTS                 NAMES
dfb47100d1fe  docker.io/library/postgres:14-bullseye  postgres              5 seconds ago   Up 4 seconds ago          0.0.0.0:9876->80/tcp  postgresDB
b673cc6b5d10  docker.io/dpage/pgadmin4:latest                               22 minutes ago  Up 22 minutes ago         0.0.0.0:9876->80/tcp  pgadmin14
77c72267734f  k8s.gcr.io/pause:3.1                                          25 minutes ago  Up 22 minutes ago         0.0.0.0:9876->80/tcp  c840e0b5bcba-infra
So cheers to yourself. We just deployed our spring app to the Podman container. However, if you try to access our application, you get a blank page.
Why a Blank page? Our application still needs one last step: configuring our Postgres DB with our Spring Boot application. So, let’s dive deep into this.
6. Start the Postgres Container in Podman
Before connecting to the database, we need a running container for Postgres DB. We can simply create a container by running the Podman ‘run‘ command, however, we have learned that we can create multiple containers inside one pod.
To run any container inside the pod, we must follow the below steps.
- Create a pod
- Pull and deploy the image in that pod.
So to create a pod you can use below code snippet:
sudo podman pod create --name postgres-sql -p 9876:80Let’s understand this command.
- pod: this justifies that we need to work with the pod.
- create: this justifies that we need to create something in this case pod
- –name: this flag tells the name of our pod.
- -p: this flag tells ports mapping Now our pod is ready let’s deploy our Postgres DB and run our pod in a single command as shown in the code snippet
Now our pod is ready so let’s deploy our Postgres DB and run our pod in a single command as shown in the code snippet.
#pulling and running pgadmin image inside our postgres-sql pod

sudo podman run --pod=postgres-sql -e 'PGADMIN_DEFAULT_EMAIL=pgadmin@postgres.com' -e 'PGADMIN_DEFAULT_PASSWORD=postgres@dm1n' --name pgadmin14 -d dpage/pgadmin4

# pulling and running postgres14 db image inside our postgres-sql pod

sudo podman run --pod=postgres-sql -v ~/database:/var/lib/postgressql/data:Z -e 'POSTGRES_USER=pgadmin' -e 'POSTGRES_PASSWORD=postgres@dm1n' --name postgresDB -d postgres:14-bullseye
In brief above commands run two containers named pgadmin14 and postgresDB respectively inside a pod named postgres-sql (–pod=postgres-sql)
Once your pod is running, you can check all containers using Podman ‘ps -a‘ command. However, this time you notice along with your containers, you have one extra container having an ‘infra‘ name at the end.
sudo podman ps -a

# Output

CONTAINER ID  IMAGE                                   COMMAND               CREATED         STATUS                    PORTS                 NAMES
dfb47100d1fe  docker.io/library/postgres:14-bullseye  postgres              5 seconds ago   Up 4 seconds ago          0.0.0.0:9876->80/tcp  postgresDB
b673cc6b5d10  docker.io/dpage/pgadmin4:latest                               22 minutes ago  Up 22 minutes ago         0.0.0.0:9876->80/tcp  pgadmin14
77c72267734f  k8s.gcr.io/pause:3.1                                          25 minutes ago  Up 22 minutes ago         0.0.0.0:9876->80/tcp  c840e0b5bcba-infra
Now our pod is ready, and our postgres DB is running fine so let’s connect it with our Spring Boot application.
7. Connecting Spring Boot Application to Containerized Postgres
To connect our DB with our app, we need the IP address of our database so we can configure it with our Spring Boot application. To get the IP address for our DB, we need to get the IP address of our infra container.
You can use below code snippet below to get IP address of any container by its id.
sudo podman container inspect -f "{{.NetworkSettings.IPAddress}}" 77c72267734fThe command Output:
10.88.0.20Before running this command make sure our containers are running , if not then you will get no result of this command.
Now that we have our database’s IP address, let’s modify our docker file to configure it so our new image will pick it up and connect to our database. You can follow the docker file snippet below to follow our application.
#pulling jre image
FROM docker.io/library/openjdk:17-oracle
#setting db environment variable
ENV SPRING_DATASOURCE_URL jdbc:postgresql://10.88.0.14:5432/pgadmin
ENV SPRING_DATASOURCE_USERNAME pgadmin
ENV SPRING_DATASOURCE_PASSWORD postgres@dm1n
#set working dir
WORKDIR /app
COPY demo-0.0.1-SNAPSHOT.jar app.jar
# Expose the port that your Spring Boot application listens on (default is 8080)
EXPOSE 8080
# Define the command to run your application
CMD ["java","-Dserver.port=8080","-jar","app.jar","spring.datasource.url=${SPRING_DATASOURCE_URL}", "spring.datasource.username=${SPRING_DATASOURCE_USERNAME}","spring.datasource.password=${SPRING_DATASOURCE_PASSWORD}"]
8. Demo
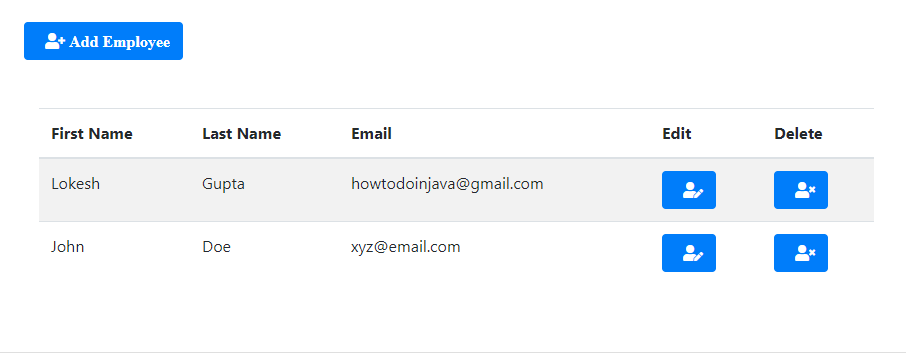
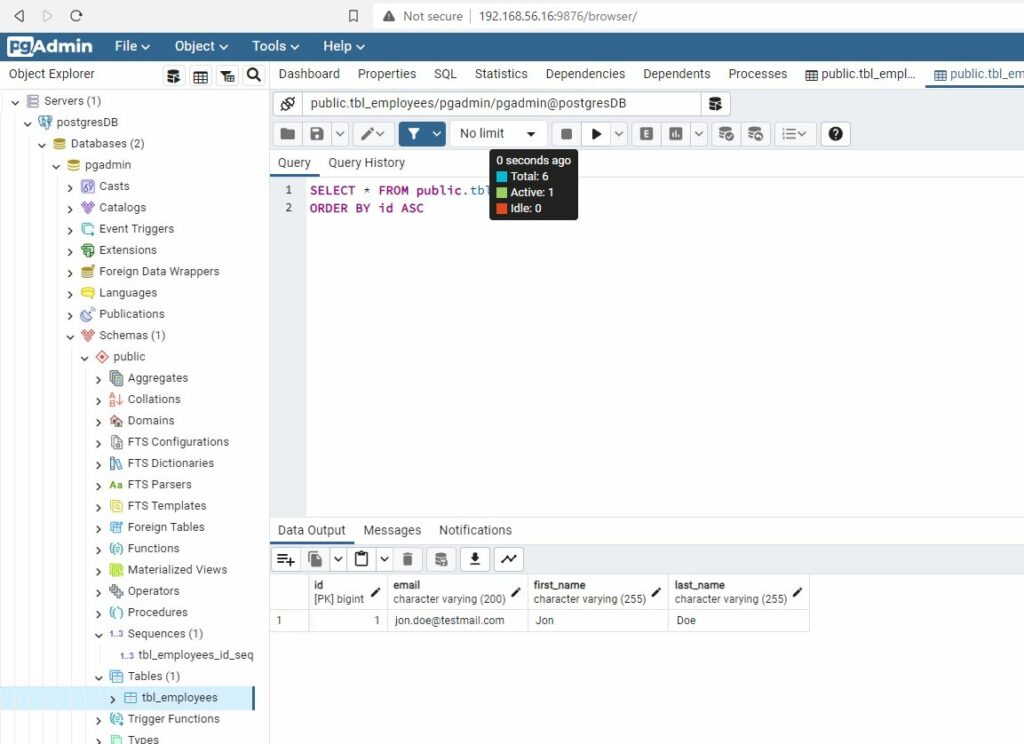
Once you rebuild our spring application with this docker file and deploy it in the container, you will see our application is working fine in our browser.
Some snaps from our deployed app.
- Spring app running at browser.
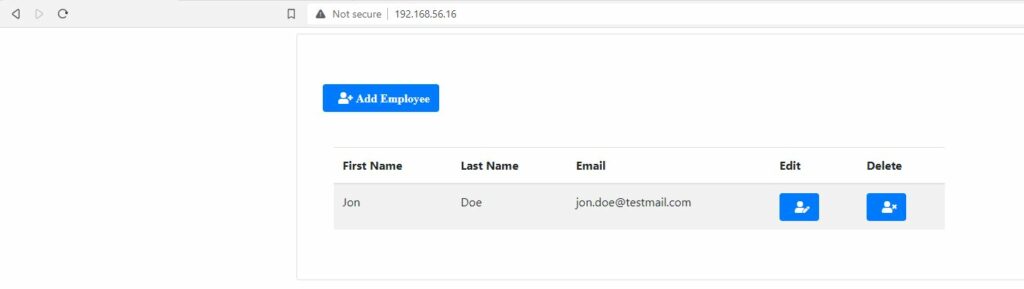
- The database is updated after our entry in the app.
9. Conclusion
In this tutorial, we successfully ran a Spring Boot application alongside a PostgreSQL database, showcasing how Podman simplifies the containerization and orchestration process.
By encapsulating our application and database within containers, we gained several advantages, such as isolation, portability, and scalability. Also, Podman’s compatibility with Docker and user-friendly commands made it easy to work with containers.
Happy Learning !!