
Spring Boot Gradle plugin provides support for Spring Boot applications using Gradle as the build automation tool. The plugin helps us manage dependencies, package the application as an executable jar or war and run the applications from the console.
1. Plugin Setup
To get started with the plugin, include the latest version of the plugin in the project build.gradle file into the plugins block.
plugins {
	id 'org.springframework.boot' version '2.7.5'
}
Note that the version applied is the target Spring Boot version for our application. Spring Boots Gradle plugin requires Gradle 6.8, 6.9, or 7.x.
2. Managing Dependencies
As the application grows in size over time, we need to make sure the dependencies used in the project are in sync and compatible. Spring Boot Gradle plugin can help us easily manage the project’s dependencies.
2.1. Managing Versions with BOM Support
BOM stands for Bill of Materials. Since Gradle 5, we can use BOM in our build.gradle file to get the compatible dependency versions.
Gradle BOM helps us in managing direct as well as transitive dependencies. This means we can skip the version number of the dependencies managed by the BOM. Gradle BOM internally works in a similar manner as using the import scope when depending on a BOM in Maven.
Project dependencies can be managed via Gradle’s BOM support by declaring it as a platform or enforcedPlatform dependency.
- If we declare a
platformdependency, it is a suggestion and the actual version used may be different. - if we use
enforcedPlatformdependency, it is treated as a requirement and will override any other version found in the dependency graph.
dependencies {
    implementation platform("org.springframework.boot:spring-boot-dependencies:2.7.4")

    // here we define dependencies without any explicit version
    implementation 'com.google.code.gson:gson'
}
2.2. Spring Dependency Management Plugin
We can add the io.spring.dependency-management plugin as below in build.gradle file. Spring dependency plugin will automatically import the Spring Boot Dependencies BOM from the Spring Boot version we are using. This means we can omit the version numbers of the dependencies managed by the BOM.
plugins {
	id 'org.springframework.boot' version '2.7.5'
	id 'io.spring.dependency-management' version '1.0.14.RELEASE'
}
This is very useful since we need not worry about various dependencies being compatible with each other as they are automatically managed. It is also beneficial if we need to upgrade the libraries used in our project in future.
For example, if we need to add spring-boot-starter-web in our project, we can do it as follows without including the version number.
dependencies {
    implementation 'org.springframework.boot:spring-boot-starter-web'
}
2.3. Excluding Dependencies
We can also exclude transitive dependencies from the project when needed. Let’s take the example of logging. By default, Spring Boot configures Logback for logging. We can configure our application to exclude Logback and use log4j2.
dependencies {
	implementation 'org.springframework.boot:spring-boot-starter-log4j2'
}
configurations {
    all {
          exclude group: 'org.springframework.boot', module: 'spring-boot-starter-logging'
      }
}
3. Packaging the Application as .jar and .war Files
Spring Boot Gradle plugin can create executable archives (jar files and war files) that contain all of an application’s dependencies.
3.1. Packaging as Jar File
Spring Boot Gradle plugin can create executable jars using the java plugin which can be applied using the plugins block.
plugins {
	id 'org.springframework.boot' version '2.7.5'
	id 'io.spring.dependency-management' version '1.0.14.RELEASE'
	id 'java'
}
When we add the java plugin the following are applied to the project:
bootJartask is added which will create an executable jar at the location <PROJECT_ROOT>\build\libsassembletask is configured to depend on thebootJartask. It assembles the output of the projectbootRuntask is added which runs the applicationjartask is configured to use the plain convention for the archive classifier
Gradle task dependencies can be viewed as a dependency tree using the gradle-task-tree plugin.
Let’s take a look at the gradle task graph for the assemble task. We can see that the assemble task depends on the bootJar task.
:assemble
+--- :bootJar
|    +--- :bootJarMainClassName
|    |    \--- :classes
|    |         +--- :bootBuildInfo
|    |         +--- :compileJava
|    |         \--- :processResources
|    \--- :classes *
\--- :jar
     \--- :classes *
Running the assemble task gives us the following.
Gradle Tasks: assemble

> Task :compileJava
> Task :processResources
> Task :classes
> Task :bootJarMainClassName
> Task :bootJar
> Task :jar
> Task :assemble

BUILD SUCCESSFUL in 3s
5 actionable tasks: 4 executed, 1 up-to-date
Note that the bootJar task was also executed. This means the executable jar is created at the location <PROJECT_ROOT>\build\libs.
3.2. Packaging as War File
Executable war files can be created using the war plugin. The war plugin extends the Java plugin to add support for assembling web application WAR files.
plugins {
	id 'org.springframework.boot' version '2.7.4'
	id 'io.spring.dependency-management' version '1.0.14.RELEASE'
	id 'war'
}
Adding the war plugin configures the following in the project:
bootWartask is added which will create an executable war at the location <PROJECT_ROOT>\build\libsassembletask is configured to depend on thebootWartask. It assembles the output of the projectbootRuntask is added which runs the applicationwartask is configured to use the plain convention for the archive classifier
Let’s look at the dependency tree for the bootWar task.
:bootWar
+--- :bootWarMainClassName
|    \--- :classes
|         +--- :bootBuildInfo
|         +--- :compileJava
|         \--- :processResources
\--- :classes *
Running the bootWar gives us the following
Gradle Tasks: bootWar

> Task :compileJava
> Task :processResources
> Task :classes
> Task :bootWarMainClassName
> Task :bootWar

BUILD SUCCESSFUL in 1s
4 actionable tasks: 3 executed, 1 up-to-date
3.3. Specifying Main class or Manifest file
By default, the jar or war executables’ main class would be configured by looking for a class with public static void main(String[]) method in directories on the task’s classpath.
We can configure this using the task’s mainClass property as follows in build.gradle.
tasks.named("bootJar") {
	mainClass = 'com.howtodoinjava.GradlePluginApplication'
}
Alternatively, we can specify the Start-Class attribute on the task’s manifest
tasks.named("bootJar") {
	manifest {
		attributes 'Start-Class': 'com.howtodoinjava.GradlePluginApplication'
	}
}
4. Running the Application with Gradle
4.1. Run the Application
Adding the jar or war plugins will add the bootRun task to the application. This can be used to run the project.
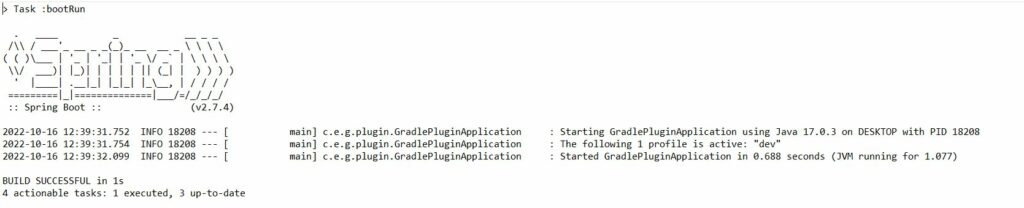
Alternatively, we can use the gradle wrapper in our project to execute the bootRun task
> gradlew bootRun4.2. Run the Unit Tests
We can run the tests using the test task which will run all the tests.
Gradle Tasks: test

> Task :compileJava
> Task :processResources
> Task :classes
> Task :compileTestJava
> Task :processTestResources
> Task :testClasses
> Task :test

BUILD SUCCESSFUL in 4s
4 actionable tasks: 2 executed, 2 up-to-date
Alternatively, we can use the gradle wrapper and run the tests from command line.
>gradlew test5. Adding Build Info
Spring Boot Actuator endpoints provide a way to monitor your application. The /info endpoint automatically publishes information about the build if a META-INF/build-info.properties is present. To generate this file, we can run the bootBuildInfo task which gets generated on adding the following to build.gradle.
springBoot {
	buildInfo()
}
Running the bootBuildInfo generates the META-INF/build-info.properties at the location <PROJECT_ROOT>\build\resources\main\.
Note that running the bootRun task will generate this file. By default, the build-info file will contain the following information:

Run the application, hit the actuator endpoint on localhost /actuator/info and verify the details returned.
{
  "build": {
    "artifact": "gradlePluginApp",
    "name": "gradlePluginApp",
    "time": "2022-10-16T13:35:23.688Z",
    "version": "0.0.1-SNAPSHOT",
    "group": "com.howtododinjava"
  }
}
We can customize the properties as needed and to omit default properties we can set them to null.
springBoot {
	buildInfo {
		properties {
			version = '2022.1.1'
			name = 'Gradle Plugin application'
		}
	}
}
We can add additional properties to the build information.
springBoot {
	buildInfo {
		properties {
			version = '2022.1.1'
			name = 'Gradle Plugin application'
			additional = [
				'blog': 'howtodoinjava',
				'language': 'java'
			]
		}
	}
}
Note that as of Spring Boot v2.5.0 and above the /info endpoint in actuator is disabled by default. We can enable it by adding the following in application.properties
management.endpoints.web.exposure.include=info6. Conclusion
In this article, we learned the Spring Boot Gradle Plugin and manage dependencies using the plugin. We also learned to package the project as executable and run it. We also learned how to add Build info to the project.
Happy Learning!!!
Comments