Apache Cassandra is a distributed database management system that is built to handle large amounts of data across multiple data centers and the cloud. This guide walks you through the process of using modules Spring Data Cassandra and Spring Boot to work with the Cassandra database (such as Astra DB).
1. Prerequisites
Before starting, make sure we have the following installed in the system.
- Our favorite IDE
- Maven 3.2+
- JDK 11 or later
2. Creating a Spring Boot Application
- Go to https://start.spring.io.
- Choose Maven Project and Java.
- Choose the name of your project.
- Click on Dependencies and select Spring Data for Apache Cassandra.
After that the configuration should look like the following:
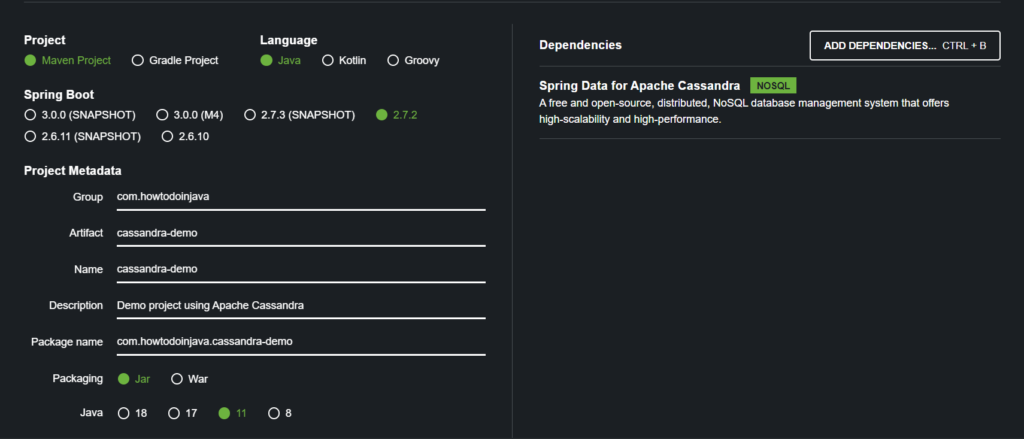
Now, generate the project and download it to our computer. Further, we need to unzip the archive and open it with our favorite IDE. For example, we will use IntelliJ IDEA.
If we check the pom.xml file we will see the following dependency for Cassandra:
		<dependency>
			<groupId>org.springframework.boot</groupId>
			<artifactId>spring-boot-starter-data-cassandra</artifactId>
		</dependency>
3. Setting Up Cassandra Database
Before starting coding, we will need a Cassandra database to connect with. In this example, we will use the free tier of DataStax Astra Cassandra-as-a-Service. Follow the instructions in the following link to create the database and keyspace named spring_cassandra.
After that, we will need to add the astra-spring-boot-starter dependency to our pom.xml file. It helps in connecting the application with ASTRA DB.
<dependency>
    <groupId>com.datastax.astra</groupId>
    <artifactId>astra-spring-boot-starter</artifactId>
    <version>0.3.1</version>
</dependency>
4. Cassandra Configuration
Next, we should configure the database connection properties in our application.properties file. Each provider provides its specific properties so these may vary depending on the Cassandra service provider.
# Credentials to Astra DB
astra.client-id= <client-id>
astra.client-secret= <client-secret>
astra.application-token= <application-token>

# Select an Astra instance
astra.cloud-region= <region>
astra.database-id= <database-id>
astra.keyspace= spring_cassandra

#timeout configs
spring.data.cassandra.request.timeout=60s
spring.data.cassandra.connection.connect-timeout=60s
spring.data.cassandra.connection.init-query-timeout=60s
An equivalent Java configuration is given below. We can extend with AbstractCassandraConfiguration and override specific beans for setup-specific configurations.
import com.datastax.astra.boot.autoconfigure.AstraClientProperties;
import org.springframework.context.annotation.Configuration;
import org.springframework.data.cassandra.repository.config.EnableCassandraRepositories;

@Configuration
@EnableCassandraRepositories(basePackages = {"com.howtodoinjava.cassandrademo"})
public class CassandraConfig extends AstraClientProperties {

    @Override
    public String getClientId() {
        return "<Your_Client_Id>";
    }

    @Override
    public String getApplicationToken() {
        return "<Your_Application_Token>";
    }

    @Override
    public String getClientSecret() {
        return "<Your_Client_Secret>";
    }

    @Override
    public String getCloudRegion() {
        return "<Your_cloudRegion>;
    }

    @Override
    public String getDatabaseId() {
        return "<Your_database_id>";
    }

    @Override
    public String getKeyspace() {
        return "spring_cassandra";
    }
}
The spring.data.cassandra.schema-action property defines the schema action to take at startup. It can have the following values:
none(recommended for production) – Take no schema actions.create– Create each table as necessary.create-if-not-exists– Create each table as necessary.recreate– Create each table as necessary, dropping the table first if it exists.recreate-drop-unused– Drop all tables in the keyspace, then create each table as necessary.
We are using create-if-not-exists to create the required schema for this demo.
The @EnableCassandraRepositories is a special Cassandra annotation that will scan the package (in our case the package that we specify in “basePackages“) for Cassandra repositories such as specified in the next section.
Additionally, we can specify the timeout settings for connections to the Cassandra database.
5. Connecting to Cassandra
5.1. Entity
We have created the Book class that works as an entity for persistence. The annotation @Table maps this entity to a Cassandra table. We are using UUID for the primary key.
@Table
public class Book {

    @PrimaryKey
    private UUID id;

    private String title;
    private String author;

// getters, setters, constructor, toString method
}
5.2. CassandraRepository Configuration
Next, we are creating a @Repository that provides the most common methods for performing basic CRUD operations in the database. Note that Spring Data Cassandra internally uses the CassandraTemplate to execute the SELECT queries. I added the addition query findBookByTitle with the annotation @AllowFiltering.
import org.springframework.data.cassandra.repository.AllowFiltering;
import org.springframework.data.cassandra.repository.CassandraRepository;
import org.springframework.data.cassandra.repository.config.EnableCassandraRepositories;

public interface BookRepository extends CassandraRepository<Book, Long> {

    @AllowFiltering
    Book findBookByTitle(String title);
}
6. Accessing Data with CassandraRepository
It’s time to test the connection. We are using CommandLineRunner which executes the given code after the application is started. We will insert some books into the database. Then we will select one book and update it. After that, we will delete one, and we will select all the books from the database.
import org.springframework.boot.CommandLineRunner;
import org.springframework.boot.SpringApplication;
import org.springframework.boot.autoconfigure.SpringBootApplication;
import org.springframework.context.annotation.Bean;

import java.util.Arrays;

@SpringBootApplication
public class AccessingDataCassandraApplication {

	public static void main(String[] args) {
		SpringApplication.run(AccessingDataCassandraApplication.class, args);
	}

	@Bean
	public CommandLineRunner clr(BookRepository bookRepository) {
		return args -> {

			// save books in the database
			bookRepository.saveAll(Arrays.asList(
					new Book(1L,"War and Peace", "Tolstoy"),
					new Book(2L,"Harry Potter", "Rowling, J.K."),
					new Book(3L,"Anna Karenina", "Tolstoy")
			));

			// select only on book
			Book harryPotter = bookRepository.findBookByTitle("Harry Potter");

			// modify the selected book
			harryPotter.setTitle("Harry Potter and the Philosopher's Stone");
			bookRepository.save(harryPotter);

			//delete the book with id 1
			bookRepository.deleteById(1L);

			//get all the books
			bookRepository.findAll().forEach(System.out::println);
		};
	}
}
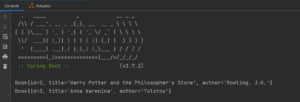
The output in the console is:

7. Enable Filtering
If you are searching for non-equivalence, Cassandra has to do a full table scan. So instead of performing the above action, Cassandra fails the request with a warning. Here, we need to annotate and mark the interface method with @AllowFiltering to ping Spring Data Cassandra to send it with the filter query and allow the database to perform it.
To understand better the role of the @AllowFiltering annotation let’s try to run the code without it. If you do so you will get the following error:
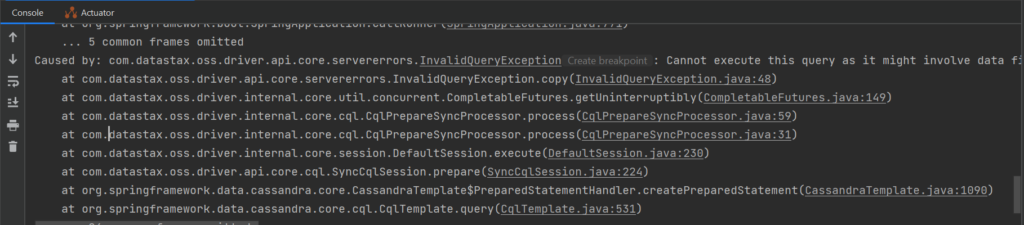
With this message, Cassandra tells us that we want to execute a query with an unpredictable result that may have performance issues.
Use of ALLOW FILTERING is not recommended unless you are confident the table contains a very small set of data in it. Using it on large data can have performance issues.
8. Conclusion
It’s not hard at all to start playing with Cassandra in your personal projects right now. Cassandra is very useful and a very good skill to learn and perfect for your career as a developer.
Happy Learning !!